A stack of mini PCs on a shelf works fine right up until the day you knock a power brick loose reaching for the one cable you actually need. That is usually the moment people go looking for a rack, discover a full 19-inch cabinet is the size of a dishwasher, and quietly give up.
A 10-inch mini rack is the fix. It holds the same mini PCs, a managed switch, a patch panel and a small PDU in a footprint about the size of a toaster. This guide is the parts list and the layout: which rack to buy, its real dimensions, what goes in it (including a NAS), how to power it, and the order to stack things so the little cabinet does not tip over or cook itself. We re-checked every price and stock state in November 2026, and the big change is the switch, which is back to the TP-Link Omada after the XikeStor that replaced it in October went out of stock.
The parts, at a glance
Six parts turn a pile of gear into a rack. This table is the whole shopping list before we go through each one. A sensible starter build lands around $230 without a managed switch and about $330 with one, plus roughly $28 for each extra pair of shelves, so the switch is the single biggest variable and the part worth thinking hardest about.
| Part | Pick | Price band | Why it is here |
|---|---|---|---|
| The rack | DeskPi RackMate T1 (8U) | ~$110 to $130 | Die-cast aluminium 10-inch cabinet, the standard mini-rack body |
| Network core | TP-Link Omada ES210X-M2 | ~$95 to $105 | 8x 2.5GbE + 2x 10G SFP+, fanless metal case, 209 mm wide so it fits a shelf, runs on 12V DC |
| Compute shelf | GeeekPi vented shelf (0.5U, 2-pack) | ~$26 to $30 | Two vented trays; mini PCs have no rack ears, so each rides its own tray |
| Power | GeeekPi DC PDU Lite 7-CH | ~$50 (DeskPi store) | One wall brick becomes seven fused DC feeds |
| Cabling | GeeekPi 10-inch 12-port patch panel | ~$18 to $22 | Terminates your runs so the front stays tidy |
| Cable entry | GeeekPi 1U brush strip | ~$12 to $15 | Passes cables through cleanly and keeps dust out |
The compute itself is not on that list on purpose. Whatever mini PCs, Pis or a firewall you already run go on the shelf, and picking those is a whole topic of its own. If you are still choosing, our guide to a mini PC sized for Home Assistant and the one on a mini PC for local AI both cover boxes that slot straight onto a 0.5U tray.
10-inch rack dimensions: width, rail spacing, depth and U height
A 10-inch rack, also called a half rack or mini rack, keeps the same 1U height as a big rack (44.45 mm, or 1.75 inches) and the same vertical hole pattern, but the mounting holes sit only 236.525 mm apart. That spacing is the number the whole ecosystem is built around, so any part sold as “10-inch” or “for DeskPi RackMate” lines up. The “10 inches” is the width of a front panel including its ears, not the space for your gear. Jeff Geerling’s Project Mini Rack, the community reference for what fits, puts the absolute maximum clearance between the rails at around 220 mm and recommends planning on 210 mm.
| Measurement | 10-inch rack | 19-inch rack |
|---|---|---|
| Front panel width (with ears) | 254 mm (10 in) | 482.6 mm (19 in) |
| Hole spacing, centre to centre | 236.525 mm (9.312 in) | 465.1 mm (18.312 in) |
| Usable width for gear | about 220 mm max, plan on 210 mm | 450 mm |
| 1U height | 44.45 mm (1.75 in) | 44.45 mm (1.75 in) |
| Depth | no standard, 200 to 300 mm on most racks | no standard, 600 mm and up, 1000 to 1200 mm on full server racks |
| Screws | cage nuts, or threaded 10/32 or 12/24 | cage nuts, or threaded 10/32 or 12/24 |
Height is simple arithmetic once you know 1U. A 4U rack gives you 177.8 mm of mounting height, 8U gives 355.6 mm, 10U gives 444.5 mm and 12U gives 533.4 mm, and half-U parts like the patch panel and PDU below take 22.2 mm each. Depth is the measurement with no standard at all, and it is the one that decides whether a NAS fits. Most 10-inch racks are 200 to 300 mm deep, and only a few go past 30 cm, such as Triton’s RKA 10/19. Measure your deepest box, add room for the cables out the back, and buy the rack around that number.
1. Start with the right 10-inch rack
The DeskPi RackMate T1 is the one most builds start with. It is 8U of die-cast aluminium with translucent acrylic sides, per DeskPi’s specs. Pick the size by how much you actually own, and by how deep your deepest box is.
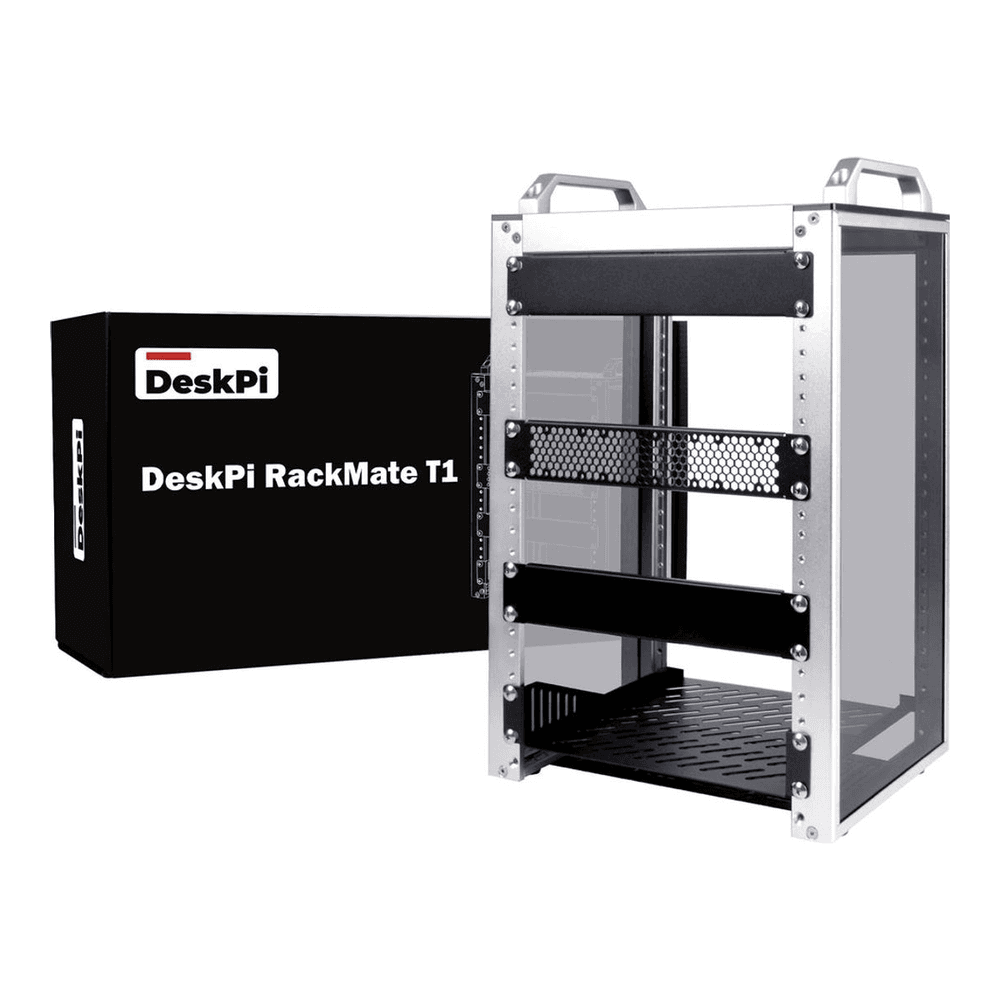
The T1 sells for about $120 on Amazon. Check price on Amazon. Here is how the five sizes compare.
Five RackMate models, from 4U to 12U
The T-series RackMates are about 280 mm wide on the outside and the TL1 is 272 mm. What changes is height and, more importantly, depth. These are DeskPi’s published external dimensions, with the November 2026 Amazon price band:
| Rack | Height | External W x D x H | Price band | Best for |
|---|---|---|---|---|
| RackMate T0 | 4U | 281 x 200 x 274 mm | ~$70 to $80 | A switch, a patch panel and one or two small nodes |
| RackMate T1 | 8U | 281 x 200 x 451 mm (with handles) | ~$110 to $130 | The default first build in this guide |
| RackMate T1 Plus | 8U | 281 x 260 x 418 mm (451 with handles) | ~$135 to $150 | Same height as the T1, deep enough for a small NAS |
| RackMate TL1 | 10U | 272 x 272 x 465 mm (498 with handles) | ~$75 to $85 | The deepest RackMate, an open frame that takes T2 trays |
| RackMate T2 | 12U | 281 x 260 x 596 mm (629 with handle) | ~$145 to $160 | More nodes, a NAS, and room to grow |
The gotcha here is depth, and it is the mistake that bites first. The plain T1 is only 200 mm deep overall, which is fine for single-board computers, most mini PCs on a tray, and a compact switch. A 2-bay NAS, a mini-ITX board or anything built for a 19-inch rack will hang out the back. If your gear is deeper than about 200 mm, buy the T1 Plus or the T2 (both 260 mm) or the 10U TL1 (272 mm) and save yourself a return. T1 Plus stock has come and gone on Amazon, so the T2 is the backup deep pick if it runs out.
The TL1 is the odd one out, and worth a look if you want a 10U mini rack. It is an open aluminium frame rather than a cabinet with acrylic sides, DeskPi quotes 222 mm of internal width, and it uses the same 10.23-inch trays as the T2. At around $80 on Amazon it costs less than the 8U T1 while giving you two more units of height and 72 mm more depth, which makes it the cheapest RackMate that will take a small NAS. What you give up is the enclosed look and the side panels that keep dust off.
2. Put the network switch up top
The switch is the one part where the market keeps moving under this build. The obvious old pick was a cheap half-width managed switch that bolted straight to the rails, but QNAP has let that price climb: its half-width rackmount models now start around $400, more than the rest of the parts list combined. So for most builds the sensible network core is a compact desktop switch that rides on a vented shelf like everything else.
The one we would put in this rack is TP-Link’s Omada ES210X-M2. It gives you eight 2.5GbE ports and two 10G SFP+ slots. That feeds the mini PCs and still leaves a 10-gig uplink to a NAS or a bigger switch, and Amazon sells it new for around $100. Check price on Amazon. Why not the cheaper XikeStor SKS3200-8E2X that held this slot in October? Its Amazon listing has gone out of stock, so it drops out of the build.

Three numbers from TP-Link’s datasheet make it a mini-rack switch. It is 209 mm wide, just inside the 210 mm Project Mini Rack recommends, and 126 mm deep, which leaves room in even the shallow T1. It is fanless in a metal case and draws 8.38 W at most, so it adds almost no heat to a closed cabinet. And it runs on 12 V DC at 1.5 A, so it can run off the DC PDU below instead of adding another wall brick. TP-Link does not publish the barrel plug size, so check it against the PDU’s cables before you wire it.
Management is a local web UI with 802.1Q VLANs (32 groups), static link aggregation, IGMP snooping, port mirroring, storm control and loop detection. If you already run an Omada controller, local or cloud, it can manage the switch too. There is no LACP and no Layer 3 routing on the switch, which is fine for a homelab that routes on its firewall.
If $100 is more than you want to spend here, the MokerLink 2G08110GSM is the cheaper fallback at around $80. It has the same eight 2.5GbE ports in a fanless metal case, measures 190 x 100 mm per MokerLink, and also runs on 12 V DC (2 A). The catch is a single 10G SFP+ slot instead of two. That is fine for one uplink to a NAS, but it leaves no second 10G port to chain another switch from, which is why the Omada stays the pick.
Width is the trap with desktop switches. Some 8x 2.5GbE boxes are wider than the frame’s opening, QNAP’s own QSW-L2110-10T at 240 mm among them, and those will not go inside a 10-inch rack at all, so check the spec sheet before you buy anything that is not sold as 10-inch. Skip both desktop switches if you want a switch that bolts to the rails. QNAP’s half-width QSW-M2106R-2S2T and its PoE++ sibling QSW-M2106PR-2S2T do that with the SP-EAR-QSWHALFRACK-01 ear kit, but they start around $400. The best-known cheaper rackable choice is MikroTik’s CRS310-8G+2S+IN, with the same eight 2.5GbE plus two 10G SFP+ and RouterOS, at roughly twice the Omada’s price before the separately sold RMK-2/10 10-inch ear kit. Either way, the switch belongs at the top: everything patches up to it, so keeping it above the patch panel gives you the shortest cable runs. For choosing the switch on speed and features, the 2.5GbE and 10GbE switch guide goes deeper.
3. Rack the mini PCs on a vented shelf
Nobody tells you this before the first build: mini PCs, Pis and small firewalls have no rack ears. They cannot bolt to the rails. They ride on a shelf, and the shelf is what actually mounts. So a mini rack needs one tray per node you want to keep serviceable.
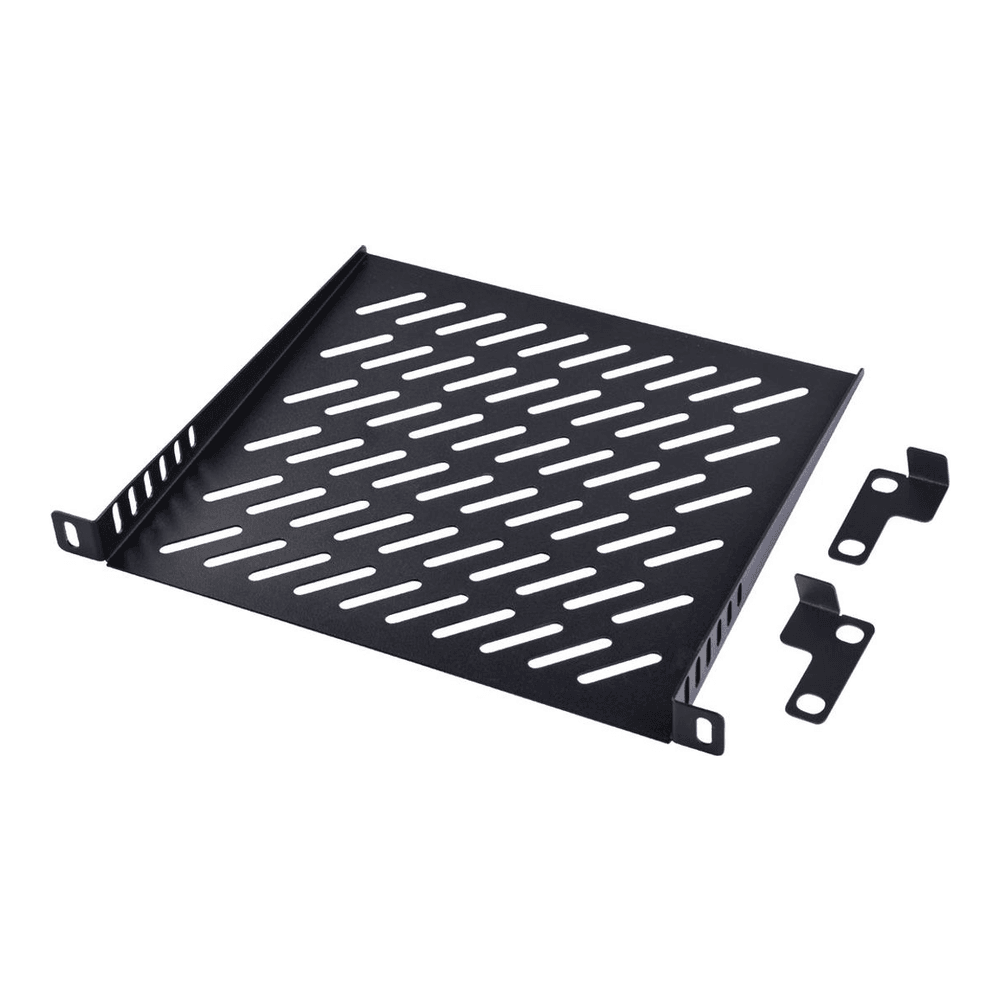
Buy the vented version, not a solid one, because a sealed acrylic box has no fans moving air and the holes let heat rise off the boxes. Match the depth to the rack: a short 7.87-inch shelf for the standard T1, a 10.23-inch one for the T1-Plus or T2. One trap to plan around is quantity. A rack ships with one or two shelves, which covers a third of the space at most; this pick comes as a two-tray pack for about $28, so a single pack covers two nodes and a second pack takes you to four. Check price on Amazon. This is the layer where your actual homelab lives, whether that is a Proxmox host, a NAS, or a firewall.
4. Wire power with a DC PDU
Most mini-rack gear runs on 12V DC barrel jacks, so instead of six wall bricks fighting over a power strip, a DC PDU takes one input and splits it into several clean feeds. The rack PDU guide compares AC versus DC and metered versus switched if you outgrow this shelf. The GeeekPi DC PDU Lite gives you seven channels in half a U, accepts up to 24V at 8A, and fuses each channel so one shorted device trips only its own outlet and recovers after a few seconds.
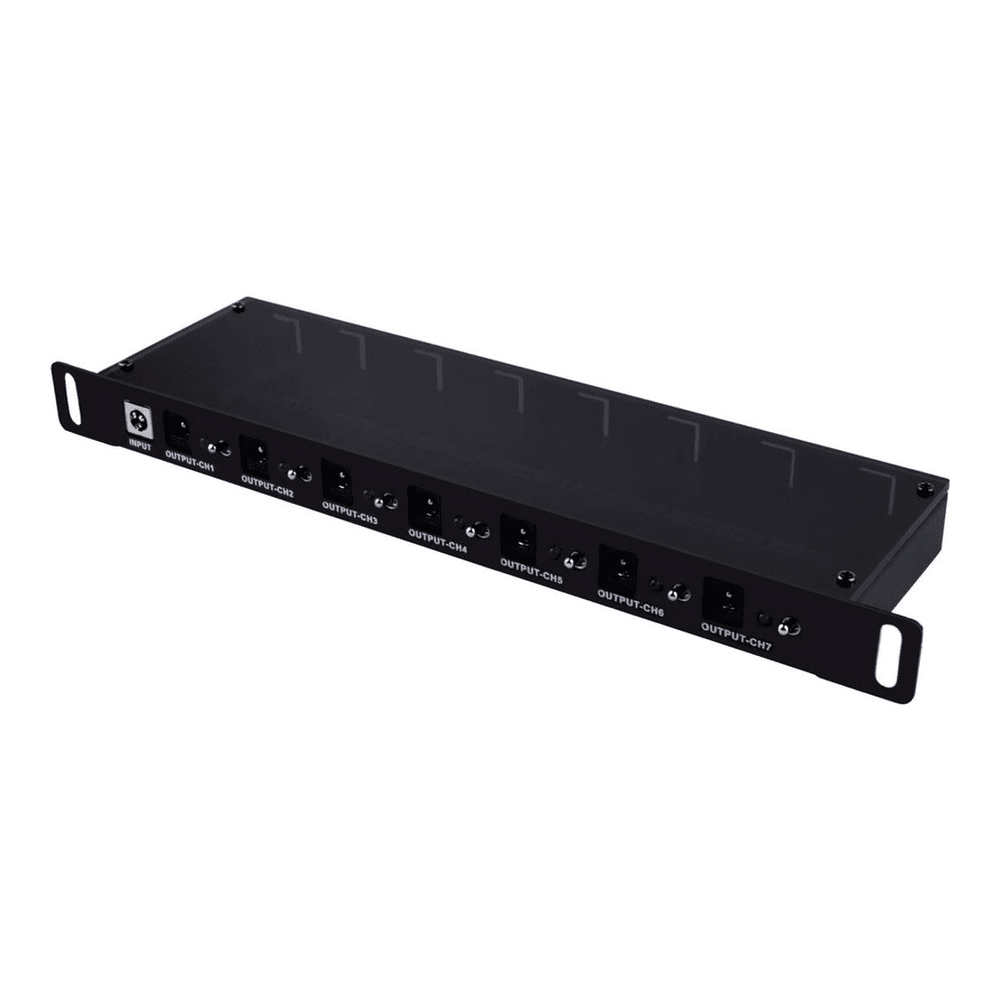
The honest caveat is that this is DC only. It feeds the boxes that take a barrel jack, which is most Pis, mini PCs and small switches. Anything with its own AC brick, and some mini PCs still do, plugs into a normal surge strip you zip-tie to the bottom of the frame. Check the voltage on each device before you wire it, because a 12V PDU will not run a 19V laptop-style brick. A common setup is a DC PDU for the small stuff and one short AC strip for the two odd bricks that refuse to conform. The PDU is also about $50 now against the $25 to $35 it cost when this build was first priced in July, so with only two or three DC devices, one brick and a DC splitter cable can do the job, as long as the brick covers their combined current (you lose the per-channel fuses, though). The guide to powering a mini rack works through the power budget, PoE and UPS choices in more depth.
5. Patch panel and brush strip for the cabling
A patch panel is what separates a rack from a nest of wires. You terminate your permanent runs into the back of a 12-port keystone panel and use short patch cables from the panel to the switch. The GeeekPi 10-inch 0.5U CAT6 panel is the right form factor and numbered 1 to 12 so you can label ports, and it costs about $20. Check price on Amazon.
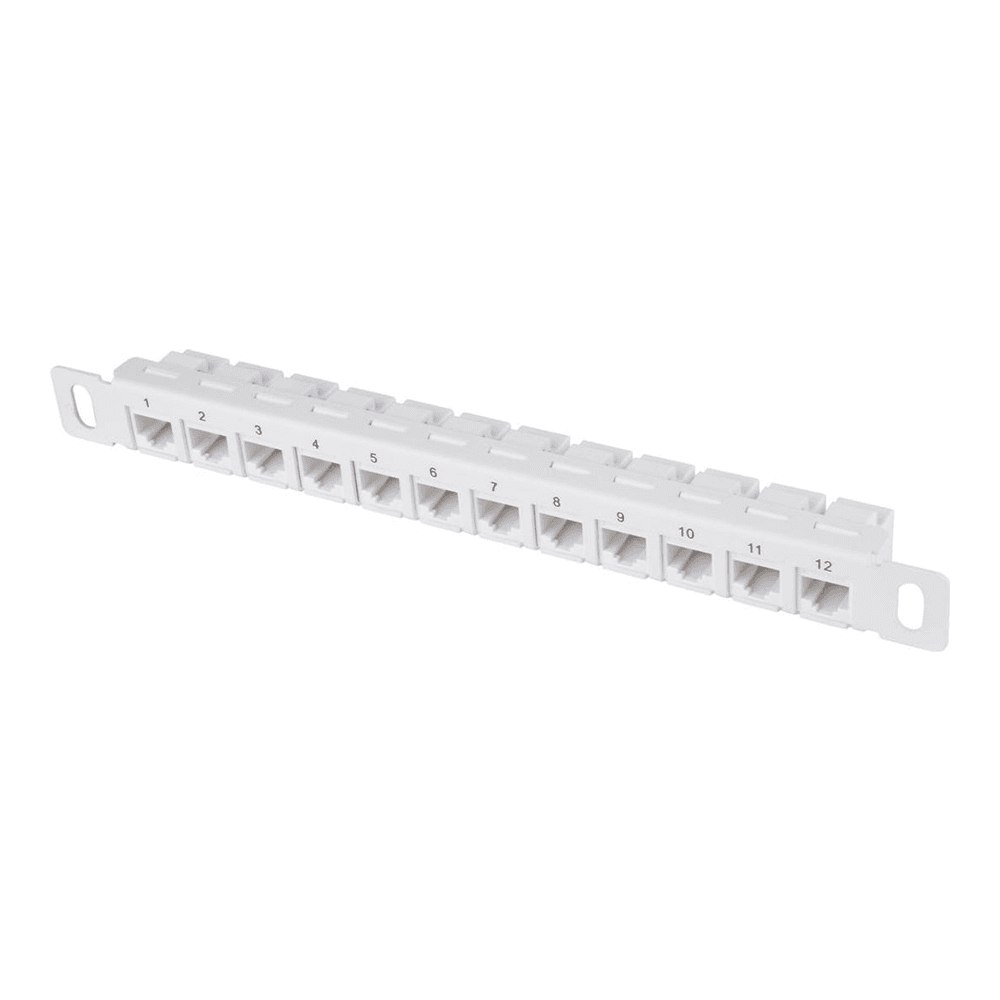
Pair it with a 1U brush strip mounted just below. Cables pass through the bristles into the rack, the brush hides the slack and keeps dust out, and the whole front reads as one tidy path instead of a knot. Buy the patch panel even for a three-node lab. It is cheap, it takes ten minutes, and it is the single change that makes a mini rack look like it was built by someone who knew what they were doing.
6. Plan the layout before you screw anything in
Stacking order matters more in a small rack than a big one, because the thing is light and easy to tip. Here is a layout that works for a first 8U build, and the reasoning behind each choice so you can adapt it to your own gear.
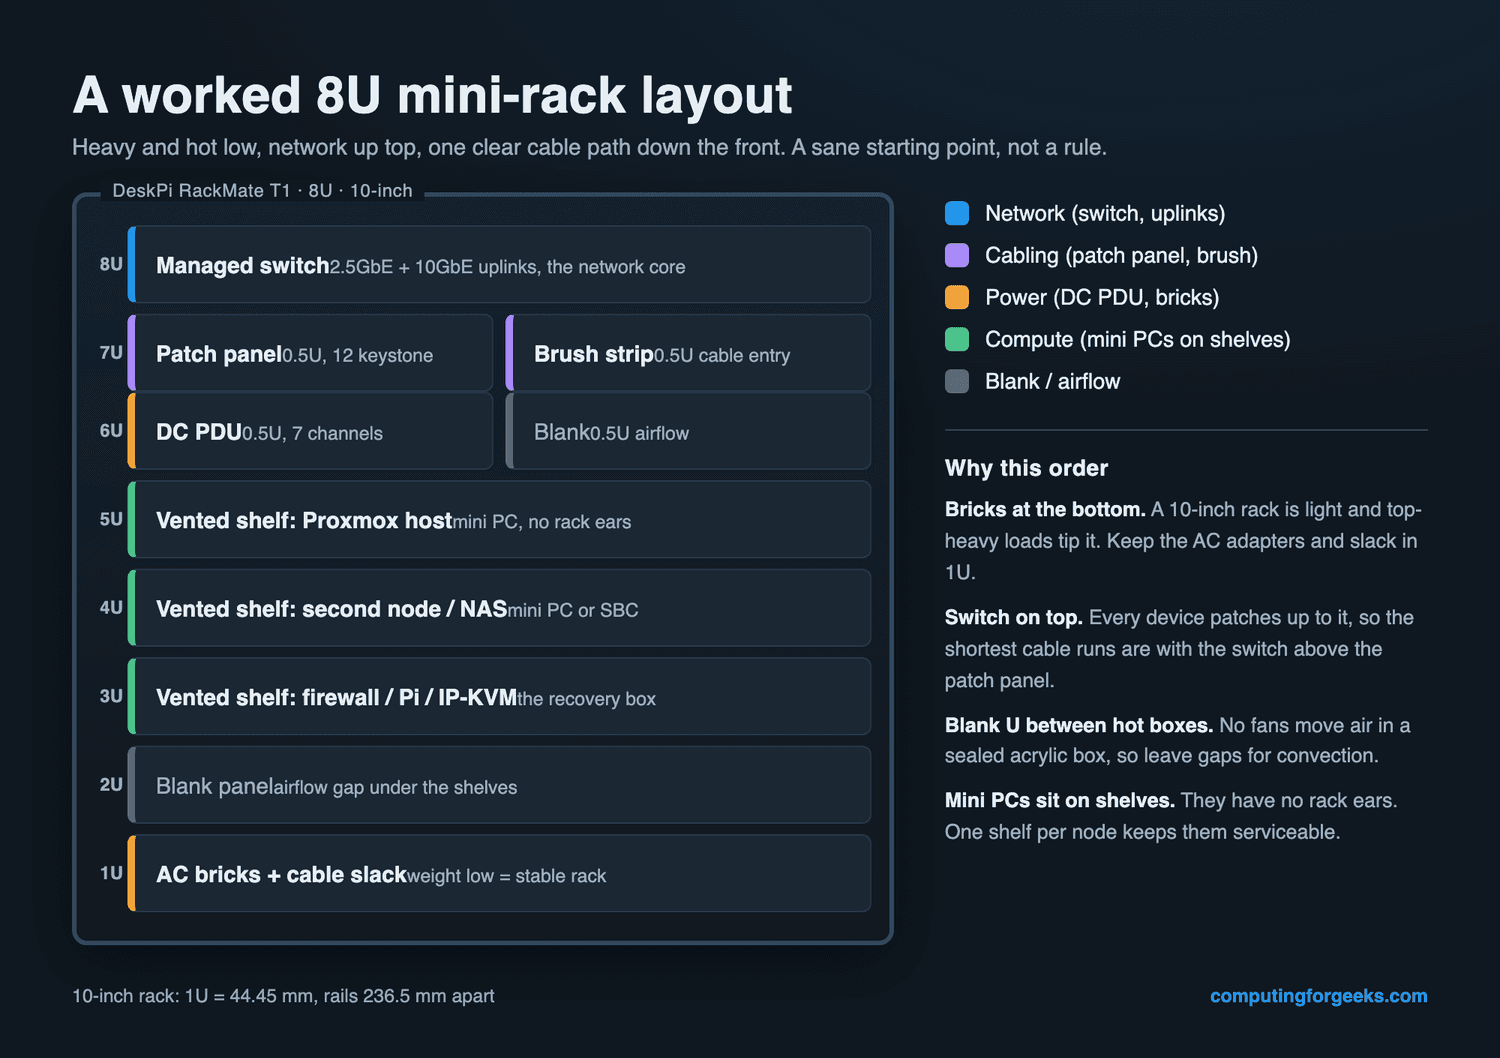
Three rules drive it. Put the switch at the top so every device patches up to it over the shortest run. Keep the compute in the middle, one shelf per node, with a blank U between hot boxes so convection can pull heat up through the vents. And put the weight, the AC bricks and the cable slack, in the bottom U so the rack stays planted. If you slot an IP-KVM onto one of those shelves, you can also recover a headless box in the rack without dragging a monitor over, which pairs well with picking an IP-KVM that fits the space.
10-inch rack NAS build: which NAS fits
Usually yes, a 2-bay or a compact 4-bay NAS goes in, but only in a rack at least 260 mm deep, and it eats more height than people expect. A NAS has no rack ears either, so it rides on a deep shelf like the GeeekPi 1U 10.23-inch vented shelf (around $34 for a two-pack). Here is how the two UGREEN units from our home NAS round-up measure up against the racks, using UGREEN’s published dimensions and DeskPi’s external rack depths:
| NAS | W x D x H | T1 (200 mm deep) | T1 Plus / T2 (260 mm) or TL1 (272 mm) | Rack height used |
|---|---|---|---|---|
| UGREEN DXP2800 (2-bay, ~$360 to $390) | 109 x 231 x 177 mm | No, 31 mm too deep | Yes, about 29 mm spare at 260 mm, 41 mm in the TL1 | About 5U with the shelf |
| UGREEN DXP4800 Plus (4-bay, ~$620) | 178 x 257.5 x 178 mm | No | Borderline at 260 mm; 14.5 mm spare in the TL1 against its 272 mm outside depth | About 5U with the shelf |
The height is the part that trips people up. Four rack units is 177.8 mm, and both of these stand almost exactly that tall, so once you add the shelf underneath you are using five units. In an 8U T1 Plus that leaves three units for the switch, patch panel and PDU, which is a full rack with no compute. That is why a NAS build usually means the 12U T2 or the 10U TL1. Depth is the other squeeze: DeskPi publishes the frame’s outside depth, not the usable depth behind the front rails, so expect the DXP4800 Plus to sit flush with the back or overhang slightly, with its power and network cables poking out the rear. Leave the rear panel off or route them sideways.
Budget the units before you buy. The NAS on its shelf takes about 5U at the bottom, and the network layer (switch on a shelf, patch panel, PDU and brush strip) takes about 3U at the top. In a 12U T2 that leaves 4U in the middle for two or three mini PCs on trays. In a 10U TL1 it leaves 2U, enough for one mini PC or a pair of Pis, which is a tidy NAS plus one node lab. The 8U racks run out of room before the compute goes in.
Put the NAS in the bottom units. A 4-bay loaded with 3.5-inch drives is the heaviest thing in the rack by far, and a light aluminium frame with that much weight up high will tip when you tug a cable. Check the shelf’s load rating against the loaded weight too, because a cantilever tray is only held at the front rails. If a full NAS is more than you need, a mini PC with a couple of SSDs does the same job in a fraction of the height; the mini PC NAS build with TrueNAS or Unraid covers that route, and our NAS hard drive picks cover the disks either way.
What fits and what does not in a 10-inch rack
The 10-inch form factor is young enough that not everything you want exists yet, and knowing the gaps before you shop saves real frustration.
- Compact switches ride a shelf; only pricey half-width units bolt to the rails. QNAP still makes genuine half-width rackmount switches, but they start around $400, so most builds sit a compact desktop switch on a vented shelf instead, as long as it is under about 210 mm wide. Full-depth 19-inch switches do not fit at all.
- There is no purpose-built 10-inch UPS. This is the real gap. A few small desktop units, like the Tripp Lite BC600R, are known to squeeze into the bottom of a RackMate, but most battery backup lives next to the rack, not in it. Plan the space for it, and size it on runtime with the homelab UPS guide.
- Mini PCs and Pis fit, on shelves. No ears, so every one needs a tray. Budget a shelf per node, not per rack.
- Deep gear needs the deep rack. The standard T1 is 200 mm deep. A NAS or an ITX board wants the 260 mm T1 Plus or T2, or the 272 mm TL1, or it will hang out the back.
The difference from a full-size rack is mostly width. A 19-inch rack puts its mounting holes about 465 mm apart, nearly double the 236.525 mm of a 10-inch one, and its gear is often deep enough to need a floor-standing cabinet. If you find yourself wanting rack-ear servers, hot-swap bays and a real UPS, that is the signal you have outgrown 10-inch and should step up to a first 19-inch rackmount server instead. There is no shame in it, but a mini rack is happiest holding mini gear. For the smaller bits that finish a 10-inch build, like blanking panels, cable bars and the right screws, the 10-inch rack accessories guide has the list.
Power and heat in a sealed little box
The acrylic sides that make a mini rack look good also trap heat, and there is no chassis fan doing anything about it. So airflow is a design choice, not an afterthought. Use vented shelves rather than solid ones, leave a blank U between anything that runs warm, and if two mini PCs plus a switch push the inside temperature up, a single quiet 80 mm or 120 mm USB fan clipped to the frame moves enough air to matter.
On the power side, add up the draw of everything you are plugging in before you pick a brick for the DC PDU. Three mini PCs at 15W idle plus a switch is comfortable inside the PDU’s headroom, but a hungry node with a discrete GPU is not a DC-barrel device and belongs on its own AC feed. Measuring real idle and load watts on your own boxes is worth the ten minutes, because it tells you both the brick you need and the heat you have to shed.
Mistakes to avoid on your first mini rack
Almost every first build hits the same handful of snags. None are expensive if you see them coming, all are annoying if you do not.
- Buying a 19-inch panel by accident. Plenty of cheap patch panels and PDUs are 19-inch and will never bolt into a 10-inch rack. Filter for “10-inch” or “for DeskPi RackMate” on every accessory, every time.
- Shelf depth mismatch. A 10.23-inch shelf will not seat in a shallow T1, and a short shelf looks lost in a T2. Buy the shelf that matches the rack you bought.
- Loading it top-heavy. Put the bricks and slack low. A rack this light will tip if the mass is up high and you tug a cable.
- One shelf, three nodes. The included tray is never enough. Order the shelves and the patch panel with the rack so you are not waiting on a second shipment to finish the build.
- Skipping the patch panel. It feels optional on day one and essential the first time you trace a cable. Do it now.
Get those right and a 10-inch rack pays for itself the first time you need to swap a node or chase a bad cable. The gear you already own is the same. It just stops being a pile and starts being infrastructure you can actually reason about.