Can a homelab live in a carry-on case and still be useful when you open it in a hotel room or at a client site? It can, but only if you plan it around the battery and the travel router first and pick the mini PC last. Most builds we see online start with the most powerful box that fits, then find it needs a 240W brick and a wall socket.
You get both halves of the job here. First comes the parts list (mini PC, GL.iNet travel router, USB-C powered 2.5GbE switch, IP-KVM, battery and Pelican case) with the power budget and airline limits that decide what can travel. Then comes the Proxmox setup that keeps the case working as it moves between networks. We have not had this exact case on a bench, so the hardware picks come from maker spec sheets and cited reviews, but I ran the Proxmox side on Proxmox VE 9.2 in October 2026 and it works end to end.
The portable homelab parts list
You can fill the case in one of two ways, and the router, switch, IP-KVM and case stay the same in both:
- Low-power kit: all DC, one battery, most of a working day
- Performance swap: a much faster mini PC that needs AC
Pick the low-power kit unless you know there is a wall socket where the case is going.
| Role | Price band | Part | Kit |
|---|---|---|---|
| Mini PC | about $420 | ZimaBoard 2 1664 | low-power |
| Mini PC | around $1,300 | Minisforum MS-A2 | performance |
| Boot SSD (ZimaBoard) | about $80 | PNY CS900 500GB SATA SSD | low-power |
| KVM video cable (ZimaBoard) | about $10 | Amazon Basics Mini DisplayPort to HDMI cable | low-power |
| Travel router | about $130 | GL.iNet Beryl 7 | low-power |
| Travel router | about $160 | GL.iNet Slate 7 | performance |
| Switch | about $50 | Cudy HS105U | both |
| IP-KVM | about $100 | GL.iNet Comet | both |
| Battery | about $190 | Anker SOLIX C300 DC | low-power |
| Battery | around $300 | EcoFlow River 3 Plus | performance |
| Flight battery | about $200 to $230 | Anker Prime 26K 300W | both |
| Case | around $270 | Pelican 1510 with foam | both |
Without the flight battery, the low-power kit lands around $1,250 with its boot SSD and video cable, and the performance swap around $2,180. Check the live prices before you order, because mini PCs, SSDs and power stations move a lot in the run-up to the holidays. You will also want short Cat6 patch cables and a 12V lead for the ZimaBoard, which we cover in step 5.
How the case is wired
Everything hangs off the travel router. It joins whatever network the venue offers (hotel Wi-Fi, a phone hotspot or a wired port) and hands out the same 192.168.8.0/24 subnet behind it every time. Because the inside of the case never changes, the Proxmox host can keep one static address and every bookmark, SSH config and Tailscale route you set up at home keeps working on the road.

Everything inside the dashed line rides in the case. The laptop joins over the router Wi-Fi when you sit next to the case, or over Tailscale when you are somewhere else. The IP-KVM sits on the same switch so you can reach the BIOS of the mini PC from a browser when the host refuses to boot.
Step 1: Budget the power before you buy anything
Your battery decides how long the lab runs, so add up the worst case draw of every device before you choose any of them. The table uses the maker maximum where one is published and a cited measurement for the mini PCs, which is the honest way to plan when you cannot put the exact kit on a meter first.
| Device | Power input | Draw used for planning | Source |
|---|---|---|---|
| ZimaBoard 2 1664 | 12V DC barrel jack | 12 to 13W CPU package under full load, about 2W at idle | our ZimaBoard 2 review unit, RAPL package power |
| Minisforum MS-A2 | 19V DC, 240W brick | about 25W idle, 135 to 145W under load | ServeTheHome review |
| GL.iNet Beryl 7 | USB-C 5V/3A, 9V/3A or 12V/2.5A | under 12W | GL.iNet spec page |
| GL.iNet Slate 7 | USB-C 5V/3A, 9V/3A or 12V/2.5A | under 18W | GL.iNet spec page |
| Cudy HS105U | USB-C, 4.8 to 18V (12V at 1.2A or more from a power bank) | 6W maximum, 1.6W idle | Cudy spec page |
| GL.iNet Comet | USB-C | not published, plan for 10W | planning allowance |
For the low-power kit, the router, switch and IP-KVM add up to 28W at their limits. The ZimaBoard package figure leaves out the board, memory and SSD, so we round the whole kit up to a 40W planning number. On the 288 Wh Anker SOLIX C300 DC that is about 7 hours of flat-out running before conversion losses, and a lab that mostly idles will run well past that.
With the performance swap, the numbers change completely. The MS-A2 idles at about 25W on its own, so the case sits near 60W doing nothing, which gives the 286 Wh River 3 Plus about 4.8 hours before inverter losses. Put the MS-A2 under sustained load at 145W and the whole case pulls close to 180W, and the same battery is flat in about an hour and a half. If you want the MS-A2, treat the battery as a bridge between wall sockets, not as the power source.
Airline rules are the second half of the budget. The FAA limits spare lithium-ion batteries in carry-on bags to 100 Wh each, and passengers may carry up to two spares rated between 101 and 160 Wh with airline approval, according to its PackSafe lithium battery page. Both power stations in this build are rated above 280 Wh, which is well past the largest tier the FAA lists. So:
- Driving or train: take the power station
- Flying: carry a power bank of 100 Wh or less
- Airline stricter than FAA: their limit wins
Step 2: Pick the mini PC
Choose the mini PC last, because the power budget in step 1 has already done most of the deciding. We picked one box for each kit and the reason for each comes down to the DC input on the back.
Low-power kit: ZimaBoard 2 1664
Best for running the whole case on DC from one battery.

We picked the ZimaBoard 2 for the low-power kit because it runs from a plain 12V DC input and its N150 processor sat at roughly 2W of package power at idle on our ZimaBoard 2 review unit. That 12V input matters more than anything else on the spec sheet. A 12V device can run straight off the car socket of a power station without an inverter, so no energy is wasted turning DC into AC and back again inside a brick.
You get an Intel N150, 16 GB of memory on the 1664 model and two Intel i226-V 2.5GbE ports, which is enough for a handful of LXC containers and a couple of light VMs. Do not install Proxmox on the built-in eMMC: the Proxmox installer does not support eMMC targets, and the root filesystem writes would wear it out anyway. Put a 2.5-inch SATA SSD such as the PNY CS900 500GB on one of the two SATA ports (the board has a SATA power header, and ZimaSpace sells the matching SATA data and power cable if your box lacks one) and install to that. We have only run ZimaOS on our own unit so far (see our ZimaBoard 2 setup guide), so treat Proxmox on this board as the standard x86-64 install rather than something we benchmarked. Look elsewhere when you need more than 16 GB of RAM or plan to run Windows VMs, because the memory is soldered and the four cores run out quickly. Expect to pay around $420. Check the live price.
Performance swap: Minisforum MS-A2
Best when the case will always find a wall socket.
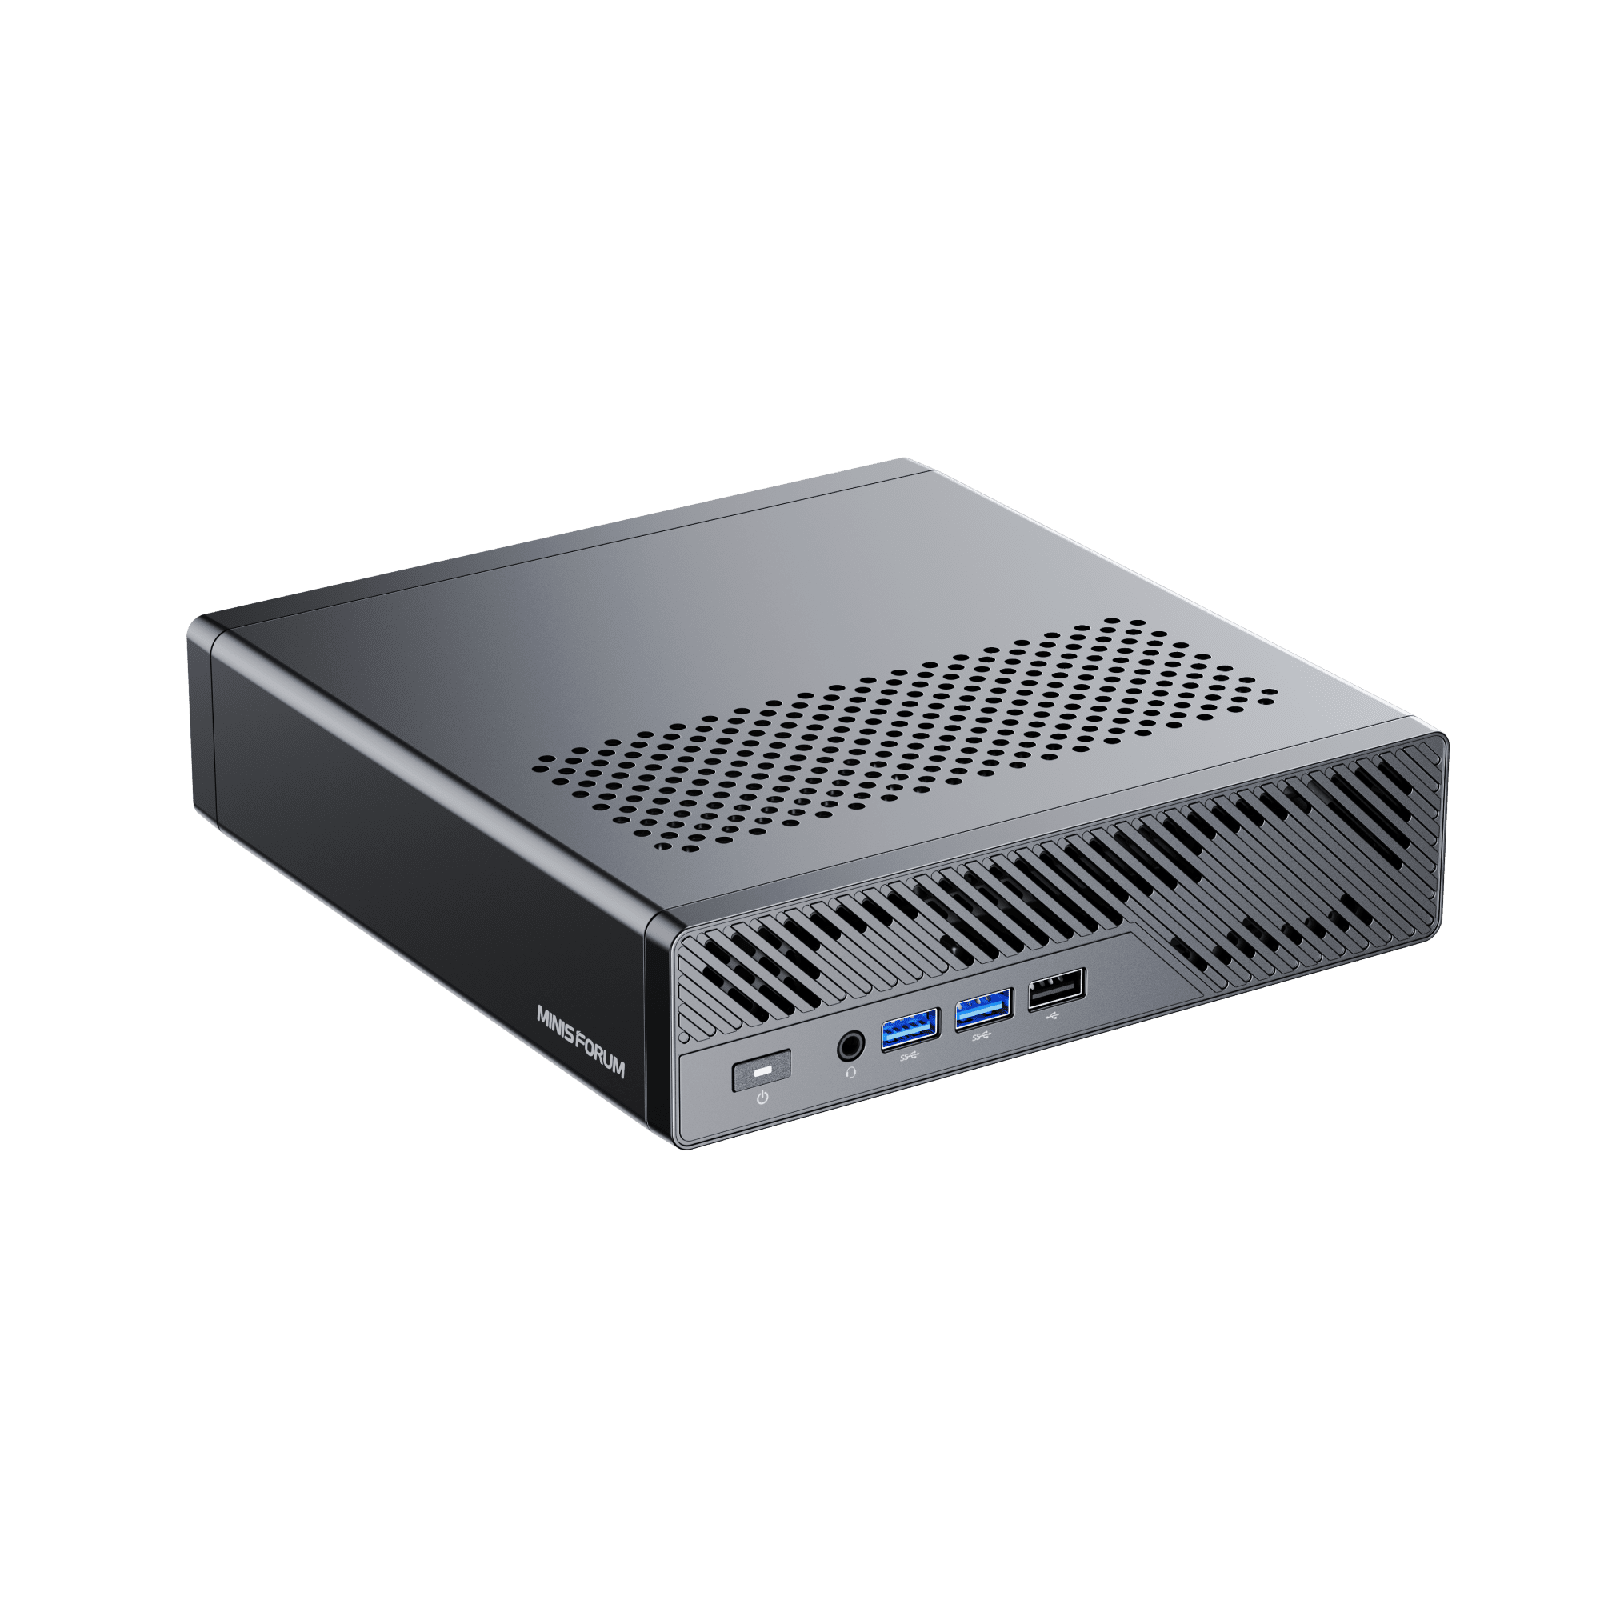
Reach for the MS-A2 when the case is a demo rig or a training lab and you know there will be a wall socket at the other end. It brings two SFP+ ports on an Intel X710, two 2.5GbE ports and a Ryzen 9 9955HX in the configuration we link, all in a box ServeTheHome measured at just over 1.7 liters. Our MS-A2 comparison against the MS-01 and MS-03 goes through its IOMMU groups and NIC layout for Proxmox.
The catch is power. The MS-A2 takes 19V from a 240W brick, so the DC-only Anker C300 cannot run it at all, and a 20V USB-C trigger cable would be over the input voltage it expects. Pair it with an AC power station like the River 3 Plus, and skip it entirely if the case has to run on battery for a full day. It sells for around $1,300 in the 32 GB and 1 TB configuration. Check the live price.
Step 3: Add the travel router
In this build the travel router does three jobs. It joins the venue network in repeater (WISP) mode, it keeps the 192.168.8.0/24 LAN identical everywhere, and it runs Tailscale or WireGuard so you can reach the case from home. Both GL.iNet picks take USB-C power at 5V, 9V or 12V, so any USB-C PD port on the battery will run them.
Low-power kit: GL.iNet Beryl 7
Best default router for the case: low draw, two 2.5GbE ports.

Our default is the Beryl 7 (GL-MT3600BE), because it draws under 12W, weighs 205 g and still has two 2.5GbE ports, one for WAN and one for the switch. GL.iNet rates its WireGuard throughput at up to 1,100 Mbps, which is far more than any hotel uplink will give you. It is also the top pick in our travel router guide, where the Tailscale setup is covered in detail. If you would rather switch uplinks from a screen on the router, the Slate 7 below does that. It is about $130. Check the live price.
Performance swap: GL.iNet Slate 7
Best when you change uplinks often and want a screen on the router.
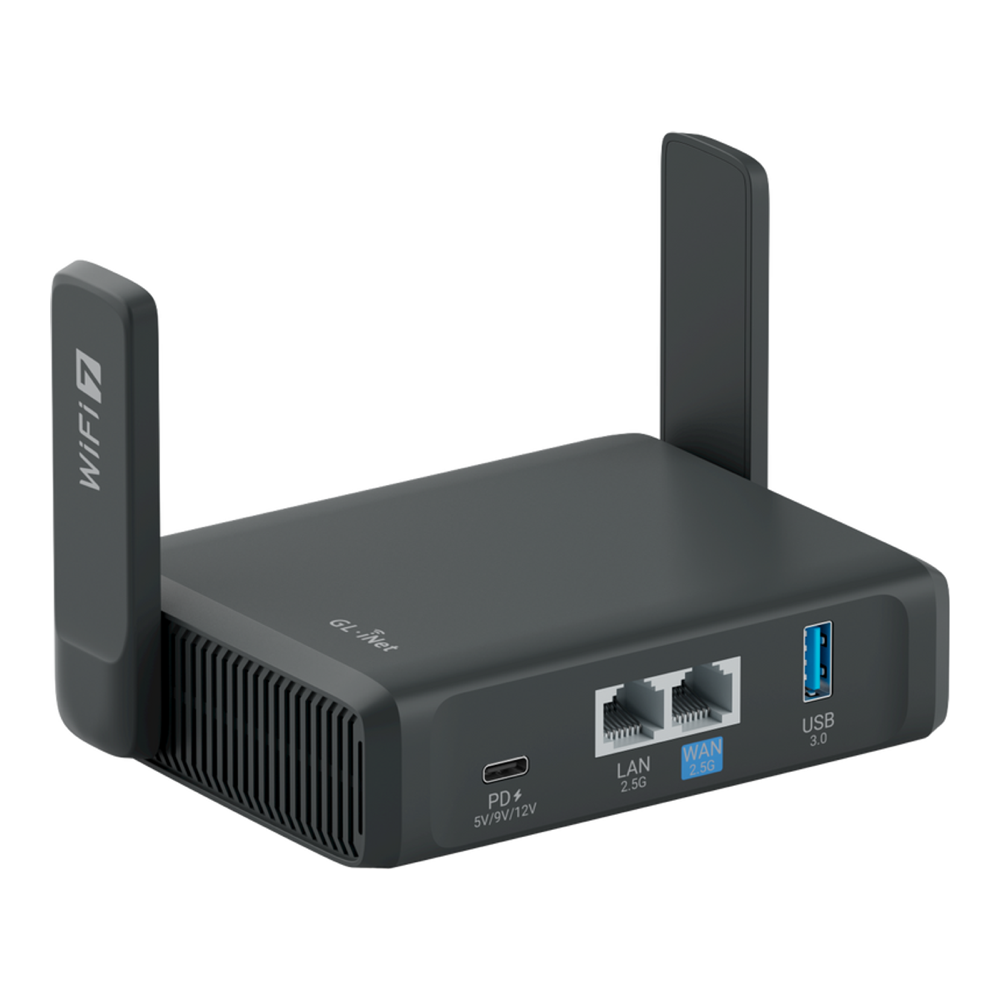
The Slate 7 (GL-BE3600) adds a touchscreen, which is handy for switching between hotel Wi-Fi and a phone hotspot or checking the VPN state without opening a laptop. The cost is power: GL.iNet lists it at under 18W, 6W more than the Beryl 7, and its WireGuard rating is lower at 490 Mbps. That trade is fine in the performance kit, where the MS-A2 already dominates the budget. It is about $160. Check the live price.
Step 4: Add a 2.5GbE switch and an IP-KVM
A travel router has one LAN port, and the case needs at least two more: one for the Proxmox host and one for the IP-KVM. A small switch fixes that, and the IP-KVM is what saves the trip when the host stops booting and you are not sitting next to it.
Cudy HS105U 2.5GbE switch
The one switch here that takes USB-C power instead of a barrel brick.

We would put the Cudy HS105U in the case because it takes power over USB-C instead of a separate barrel adapter. Cudy rates it at 6W maximum and 1.6W at idle, with five 2.5GbE ports in a 100 x 92 mm body, so it matches the 2.5GbE ports on both mini PCs and both routers. Cudy rates the input at 4.8 to 18V and asks for 12V at 1.2A or more when the switch runs from a power bank, so use a USB-C source that offers a 12V profile (the Anker Prime 26K below does) or a USB-C wall adapter at the venue. It is also a web-managed switch, and Cudy lists 802.1Q VLANs, link aggregation and port mirroring, so you can split lab traffic from the KVM later without changing hardware. It is about $50. Check the live price.
GL.iNet Comet IP-KVM
Your keyboard and screen when the host will not boot.
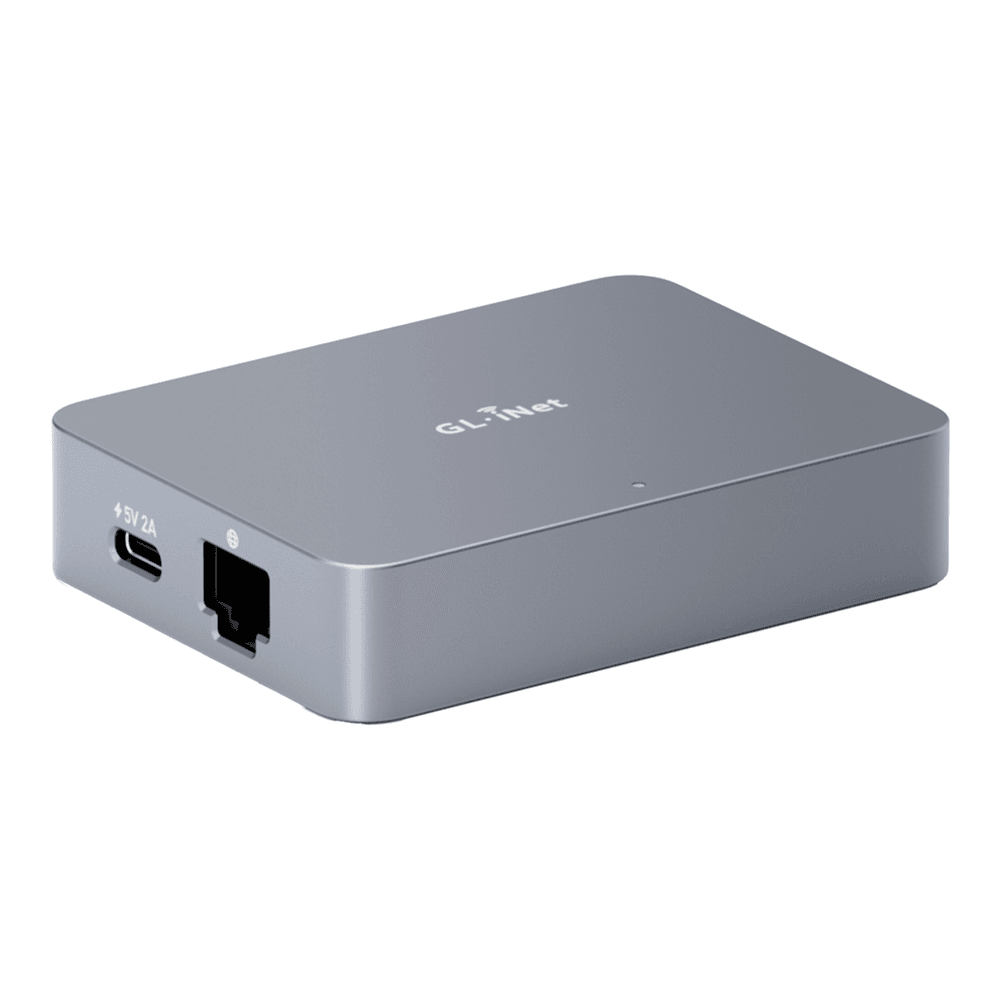
The Comet (GL-RM1) takes HDMI video and a USB connection from the mini PC and gives you its screen and keyboard in a browser, BIOS included. The MS-A2 connects with a plain HDMI cable, but the ZimaBoard 2 only has a Mini DisplayPort output, so the low-power kit needs a Mini DisplayPort to HDMI cable such as the Amazon Basics one if your ZimaBoard box does not already include one. On a portable lab that is the difference between fixing a bad network change from the hotel desk and carrying a monitor around. We compared it with JetKVM, PiKVM and NanoKVM in our IP-KVM roundup, and the headless recovery walkthrough shows the rescue flow. It runs from one USB-C input; GL.iNet does not publish its draw, so we budgeted 10W for it. It is about $100. Check the live price.
Step 5: Choose the battery, and decide if it flies
Here the two kits split for good. A DC-only power station is the efficient choice for the low-power kit, because nothing in that kit needs AC. The MS-A2 needs AC, so it needs a power station with an inverter, and neither power station can go in your carry-on.
Low-power kit: Anker SOLIX C300 DC
Best battery for the low-power kit, because everything in that kit runs on DC.

According to its user manual, the SOLIX C300 DC holds 288 Wh and has no AC outlet at all. Its outputs are what make it fit this kit:
- Two USB-C ports at up to 140W
- One USB-C port at up to 100W
- A 12V/10A car socket (120W)
- A 15W USB-C and a 12W USB-A port
- 300W total output
Run the ZimaBoard from the 12V car socket with a car-plug lead whose barrel matches the DC jack of the board, and feed the router and IP-KVM from the USB-C ports. Check the jack size on your unit before you order the lead, because we have not confirmed it on the 1664, and IceWhale does not publish an input tolerance for the board, so measure the socket with a multimeter once before the first run. Do not plan on 12V from the USB-C ports: the spec sheet The Gadgeteer published for the C300 DC lists 5, 9, 15, 20 and 28V profiles but no 12V, which also means the Cudy switch is better off on its own USB-C wall adapter or on the Prime 26K below. Skip the C300 DC if anything in your case needs AC. It weighs 2.8 kg and costs about $190. Check the live price.
Performance swap: EcoFlow River 3 Plus
Best battery for the MS-A2, because it has real AC outlets.

The River 3 Plus is the power station for the MS-A2 because it has three AC outlets rated at 600W and a UPS mode that EcoFlow rates at under 10 ms switchover. That UPS mode means the case can stay plugged into the wall at the venue and keep running if someone kicks the plug out. Our power station vs UPS comparison explains why switchover time matters for a PC power supply. At 286 Wh it does not give the MS-A2 long runtime, as step 1 showed, and it weighs 10.4 lb. It is around $300. Check the live price.
For flights: Anker Prime 26K 300W
The battery that goes in your carry-on when you fly.

When you fly, the power station stays home and this power bank goes in your carry-on. Amazon lists it at 99.75 Wh (Anker gives 26,250 mAh), which keeps it under the 100 Wh FAA line, and it has two USB-C ports at up to 140W each. That is enough to run the router, switch and IP-KVM between sockets, or to keep the low-power kit alive through a layover, because Anker lists a 12V/3A profile on its USB-C ports, which suits both the Cudy switch and a 12V trigger cable with a matching barrel for the ZimaBoard. It weighs 600 g and sells for about $200 to $230. Check the live price.
Step 6: Pack the Pelican 1510 case
Our pick for the case itself, sized as a carry-on.

We chose the Pelican 1510 because it is sized for airline carry-on rules, it has wheels and a pull handle, and the foam version lets you cut a pocket for each device. The Amazon listing gives the interior as 19.75 x 11.00 x 7.60 inches and the empty case as 13.6 lb, and the power station adds another 6.2 lb (C300 DC) or 10.4 lb (River 3 Plus) on top, so this is a case you wheel, not one you carry. Pack it in this order so nothing has to be moved to plug in:
- Battery in the deepest pocket, at the wheel end
- Mini PC on top of the foam, vents clear
- Router and switch side by side, ports facing up
- IP-KVM taped to the side of the mini PC
- Short Cat6 and USB-C cables in the lid pocket
Because the case seals to keep water out, it also keeps heat in, and a running mini PC warms a closed box quickly. Run the lab with the lid open, and never close it while the mini PC is on. The case costs around $270 with foam. Check the live price.
Step 7: Pin Proxmox to the travel router subnet
Once the hardware is in the case, the host needs an address that never changes. Every command in steps 7 to 9 runs as root in the host shell, which is how a Proxmox ISO install logs you in. Our lab host was a Debian 13 install with a sudo user, which is why the screenshot below shows sudo in front of the commands. Install Proxmox VE as usual (our Proxmox VE 9 install guide covers it), then give the bridge a static address inside the travel router subnet. GL.iNet routers use 192.168.8.1 as the LAN address by default, and we give the host 192.168.8.10. Check the DHCP pool in the router admin page and make sure it does not cover that address, or add a reservation for it.
Open the network configuration on the host:
nano /etc/network/interfacesOnly the bridge section needs to change. Change the address and gateway lines, and keep the bridge-ports line pointing at your real NIC name (ens18 on our lab host, often enp1s0 or similar on a mini PC):
auto lo
iface lo inet loopback

iface ens18 inet manual

auto vmbr0
iface vmbr0 inet static
	address 192.168.8.10/24
	gateway 192.168.8.1
	bridge-ports ens18
	bridge-stp off
	bridge-fd 0

source /etc/network/interfaces.d/*
Proxmox also needs the hostname to resolve to that same address, so update the host line in /etc/hosts. This is the step people forget, and step 10 shows what happens when you do:
nano /etc/hostsReplace the old address on the host line with the new one:
192.168.8.10 pve-mini.lab.home pve-miniApply the network change and restart the cluster filesystem and web proxy so they pick up the new address:
ifreload -a
systemctl restart pve-cluster pveproxy
Check the bridge, the default route and the address Proxmox resolves for itself:
ip -br addr show vmbr0
ip route show default
hostname --ip-address
All three should agree on 192.168.8.10 and the 192.168.8.1 gateway, which is what our lab host returned:
vmbr0            UP             192.168.8.10/24 fe80::be24:11ff:fef1:9025/64
default via 192.168.8.1 dev vmbr0 proto kernel onlink
192.168.8.10
From here the web UI answers on https://192.168.8.10:8006 whenever your laptop is on the router Wi-Fi. To reach it from anywhere else, turn on Tailscale on the router, enable Advertise LAN Subnets (Allow Remote Access LAN on older firmware), then approve the 192.168.8.0/24 route in the Tailscale admin console, because the route stays inactive until you approve it. The full walkthrough is in our GL.iNet Tailscale two-box setup.
Step 8: Start the guests in order when the case powers on
A case that gets unpacked in a new place every week should come up without anyone logging in. Two settings handle that: the BIOS option to power on when AC or DC power returns, which you set once in the firmware of the mini PC, and the Proxmox start order for each guest. Set the order so that the guest other guests depend on (DNS, in our lab) comes first and gets a head start:
pct set 101 --onboot 1 --startup order=1,up=20
pct set 102 --onboot 1 --startup order=2
The up=20 value tells Proxmox to wait 20 seconds after starting container 101 before it moves on to the next guest. Confirm both settings stuck:
pct config 101 | grep -E "onboot|startup"The container reports both values back:
onboot: 1
startup: order=1,up=20
Virtual machines take the same options through qm set instead of pct set. The Proxmox startup and shutdown docs list the full syntax, including the down value for shutdown timeouts. We powered the lab host off and on again, and the boot log shows the order and the delay doing their job:

Container 101 started at 07:18:06, Proxmox waited the 20 seconds, and container 102 followed at 07:18:27. If you need a refresher on building the containers themselves, our guide to running Debian and Ubuntu LXC containers on Proxmox walks through it.
Step 9: Shut down cleanly before you close the lid
Pulling power on a running host is how you lose a container filesystem on the way to the airport. You do not need a special pack-up script for this, because Proxmox stops every guest through the pve-guests service when the host shuts down. Power the host off from the shell or the web UI:
systemctl poweroffOn the next boot, the log of the previous boot shows how the shutdown went:
journalctl -b -1 -u pve-guests --no-pagerProxmox stopped the guests in reverse start order, container 102 first and container 101 last, then let the host power off:
Oct 27 07:17:34 pve-mini pvesh[1951]: Stopping CT 102 (timeout = 180 seconds)
Oct 27 07:17:37 pve-mini pvesh[1951]: Stopping CT 101 (timeout = 180 seconds)
Oct 27 07:17:40 pve-mini pve-guests[1953]: all VMs and CTs stopped
Oct 27 07:17:40 pve-mini systemd[1]: Stopped pve-guests.service - PVE guests.
Two idle containers took six seconds to stop. Note the 180 second default timeout, though: a VM that ignores the shutdown request holds the host up for three minutes. Set a lower down value in the startup option of any guest that is slow to stop, and wait for the power LED of the mini PC to go dark before you unplug anything.
Step 10: The error we hit when the hosts entry went missing
Our first boot after installing Proxmox came up with seven failed units, and the cause sat in the cluster filesystem log. Two things had gone wrong at once: cloud-init on the Debian cloud image we built the lab from rewrote /etc/hosts and dropped the pve-mini line, and the bridge stayed down because the NIC had been renamed. A host installed from the Proxmox ISO has no cloud-init, but any hand edit that loses the hosts line ends the same way. With no hosts entry and no address on any interface, pmxcfs refused to start:
[main] crit: Unable to resolve node name 'pve-mini' to a non-loopback IP address - missing entry in '/etc/hosts' or DNS?Everything that depends on pmxcfs failed after it: pve-firewall, pvestatd, pvescheduler, both HA services and pve-guests, which means none of the onboot guests started either. For a portable homelab that is the worst kind of failure, because the case looks powered up while nothing inside it is running. The fix was to put the host line back in /etc/hosts with the bridge address, bring vmbr0 up with ifreload -a, then restart pve-cluster.
We also tested the quieter version of the same mistake. With the bridge up but the hosts entry removed, pmxcfs starts but resolves the node to its IPv6 link-local address instead:
[main] notice: resolved node name 'pve-mini' to 'fe80::be24:11ff:fef1:9025' for default node IP addressNothing fails, so this one is easy to miss. The node then advertises an address that only works on the local link. That is why step 7 changes /etc/hosts in the same sitting as the bridge address, and why hostname –ip-address is the check worth running every time you touch the network config.
What we would change for a permanent install
Our case is built to move, and a few of its choices are wrong for a lab that stays on one desk. On a fixed shelf we would drop the power station for a real UPS that talks to NUT, because a portable battery does not tell Proxmox when it is about to run out. We would also swap the travel router for a full-size router with more LAN ports, and move the mini PC to a box with more memory slots once the guest list outgrows 16 GB. For everything else, from the static 192.168.8.10 address to the start order and the clean shutdown, the setup above carries straight over, so you can pack the same host into the case again when the next trip comes up.