HV Manager puts a Hyper-V web interface on port 8117, and its current installer still serves it over plain HTTP on every host address. The default login is printed on the sign-in page, so that is the part to fix first. The rest of it works the way you would hope: one browser tab that starts, stops and checkpoints virtual machines, opens a console over RDP, and hands individual VMs to users who should never see Hyper-V Manager itself.
This guide installs HV Manager on a Hyper-V host, adds servers, manages VMs, and delegates them through roles and users, then compares it with the Hyper-V management tools Microsoft ships. The current package, HvManager 3.5.1 (installer built August 2026, inspected October 2026), reserves http://+:8117/ for the Everyone group and accepts Windows 8 / Server 2012 kernels or newer. The walkthrough screenshots come from our earlier install of 3.2.4 on a Windows Server 2022 host, so the version label on them is older than the package you will download.
Hyper-V Manager vs HV Manager vs Windows Admin Center
The names collide, so settle that first. Hyper-V Manager is the Microsoft MMC snap-in (virtmgmt.msc) that ships with the Hyper-V Management Tools. HV Manager is a separate product from Aprel Tech that gives you a Hyper-V web interface. Windows Admin Center is the browser-based console from Microsoft, and its Virtual Machines tool covers most of what Hyper-V Manager does. These are the Hyper-V management tools people actually reach for.
| Tool | Interface | Where it runs | Cost | Delegate single VMs to non-admins |
|---|---|---|---|---|
| Hyper-V Manager | MMC desktop app | Any Windows with Hyper-V Management Tools | Included with Windows Pro, Enterprise, Education and Server | No (Administrators or Hyper-V Administrators) |
| Windows Admin Center | Web (HTTPS gateway) | Windows Server 2016 to 2025 gateway, or Windows 11 local client | Free | No, fixed roles per managed server (Administrators, Hyper-V Administrators, Readers) |
| HV Manager | Web (port 8117) | The Hyper-V host or any Windows box with WMI access to it | Free for 5 VMs, 1 server, 1 user; paid per server | Yes, VMs assigned to roles |
| PowerShell Hyper-V module | CLI | Any Windows with the module | Included | With JEA role capabilities |
Read the last column first, because that is where the choice is made. If only administrators touch the hosts, Windows Admin Center is the better Hyper-V web interface: it is free, supported by Microsoft, served over HTTPS, and covers checkpoints, VM settings and VMConnect. HV Manager earns its place when a developer, a student lab or a customer needs a start button and a console for three specific VMs and nothing else. Its role model hides menu items and VMs per user, while Windows Admin Center only offers three fixed roles per managed server and no custom ones. The free tier is the limit to plan around: five VMs, one server connection and one user once the 30-day evaluation ends, which suits a homelab or a test box and not much more.
Prerequisites
HV Manager is light. The vendor’s guide asks for 1 GB of RAM and 12 MB of disk for the program files, so the host sizing comes from the VMs, not from the web interface. Before you start, have these in place.
- A Hyper-V host: Windows Server 2012 R2 to 2022 and Windows 8.1 or 10 with Hyper-V are on the Aprel Tech support list. The 3.5.1 installer only blocks kernels older than Windows 8 / Server 2012, so it will not refuse Windows 11 or Windows Server 2025, though neither is on the vendor’s list yet.
- The Hyper-V role enabled: follow Hyper-V on Windows Server 2022 or the Windows Server 2019 Hyper-V setup. On a desktop, enable Hyper-V on Windows 11 instead.
- Ports: TCP 8117 for the web interface, WMI from HV Manager to each remote Hyper-V host. That is TCP 135 for the RPC endpoint mapper plus a dynamic port, so enable the built-in Windows Management Instrumentation (WMI) rule group on the remote host. The browser console also needs TCP 2179 (Hyper-V console) and 3389.
- .NET Framework 4.5.1 or newer: the vendor still lists it, and every supported Windows release already has it.
Testing inside another hypervisor is fine as long as the guest sees virtualization extensions. On Proxmox or plain KVM that means cpu: host and nested virtualization enabled on the node, otherwise the Hyper-V role refuses to install. For a dedicated box, a 32 GB mini PC runs a Hyper-V host with a handful of Windows guests comfortably; our homelab mini PC picks list the ones with enough RAM slots.
Step 1: Check what the HV Manager installer changes
The download is a single MSI with no version in its name, so you cannot tell from the file which build you have or what it will open on the host. You can read both from the MSI tables before running it on a server. We did that from a Linux workstation with pymsi run through uv, so the only tool you need installed is uv itself. Fetch the installer first:
curl -LO https://www.hv-manager.org/Download/HvManager.msiThen print the product version, the URL the installer reserves in http.sys, and its launch condition:
uv run --no-project --with python-msi python -c "import pymsi; p=pymsi.Package('HvManager.msi'); [print(r['Property'], r['Value']) for r in p.get('Property').rows if r['Property'] in ('ProductName','ProductVersion','Manufacturer')]; [print('URL', r['Url']) for r in p.get('WixHttpUrlReservation').rows]; [print('LaunchCondition', r['Condition']) for r in p.get('LaunchCondition').rows]"The October 2026 download returned build 3.5.1.0:
Manufacturer Aprel Tech, LLC
ProductName HvManager
ProductVersion 3.5.1.0
URL http://+:8117/
LaunchCondition Installed OR (VersionNT >= 602)
Two lines matter here. http://+:8117/ means the web interface answers on every IP address of the host over unencrypted HTTP, and the matching ACL row grants that reservation to SID S-1-1-0 (Everyone). VersionNT >= 602 is the only OS check, which is why the MSI installs on anything from Windows 8 / Server 2012 upward. The same tables, read together with the getting started guide bundled in the package, show the rest of the footprint.
- Program files:
C:\Program Files\HvManager\, withHvm.exeas both the service binary and the configuration CLI. - Browser console: bundled FreeRDP 3 libraries and OpenSSL 3.2.1, which is how the web page renders a VM console without an RDP client on your laptop.
- Database: one SQLite file per instance at
%LOCALAPPDATA%\HvManager\<instance>\hvm.db, holding users, roles and server connections. - Service account: instances created with
hvm add-instancedefault to a local.\HvmServiceaccount unless you pass-user. The installer-created Hvm service showed a local system account in our 3.2.4 install.
Back up that hvm.db file along with the host if you build roles and users you would hate to recreate, because nothing else stores them.
Step 2: Install HV Manager on the Hyper-V host
Copy HvManager.msi to the Hyper-V host and run it as an administrator. The wizard is a stock Windows Installer sequence (welcome, licence, destination, ready, progress, finish), and the defaults are the right answer for a single host. The welcome page comes first.
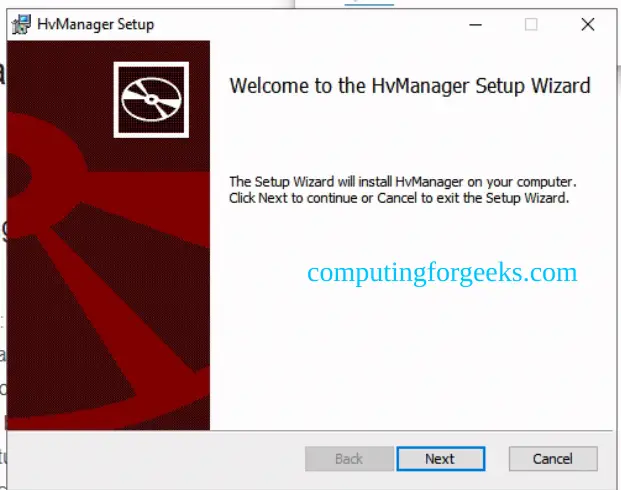
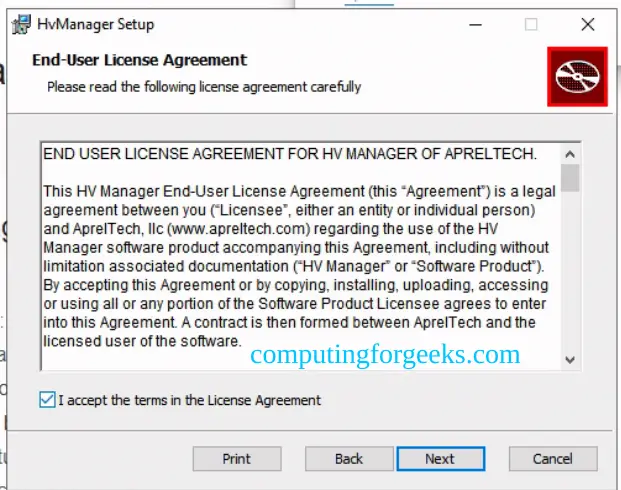
Accept the Aprel Tech licence agreement on the next page. The 30-day evaluation starts automatically on first install, and the free tier applies after it ends.
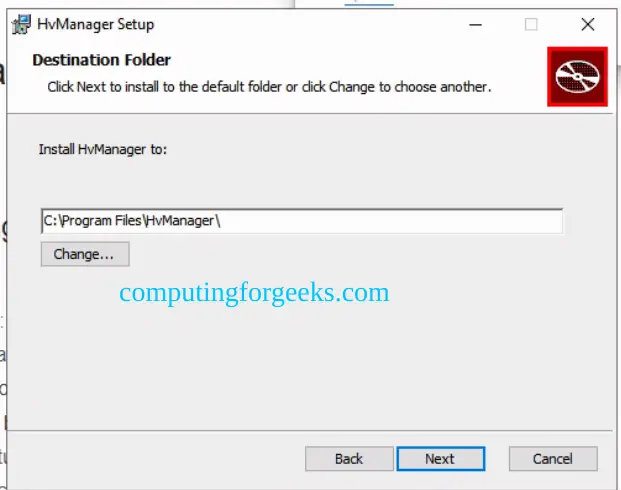
Leave the destination at C:\Program Files\HvManager\ unless your policy puts applications elsewhere. The desktop shortcut and the documentation both assume that path.
Click Install, let it copy the files, and finish the wizard. On completion the installer opens http://localhost:8117/ in the default browser, which is the first sign the service started.

Installation also drops an Hv Manager 3 shortcut on the desktop. It opens a command prompt in the install folder and runs hvm view-instances, which lists the web instance the installer created. Hvm.exe carries a requireAdministrator manifest, so expect a UAC prompt.
Step 3: Confirm the Hvm service and open port 8117
The web interface is a Windows service named Hvm, set to Automatic. Open services.msc and check that it reads Running before you go anywhere near the firewall, because a stopped service and a blocked port look identical from a remote browser.
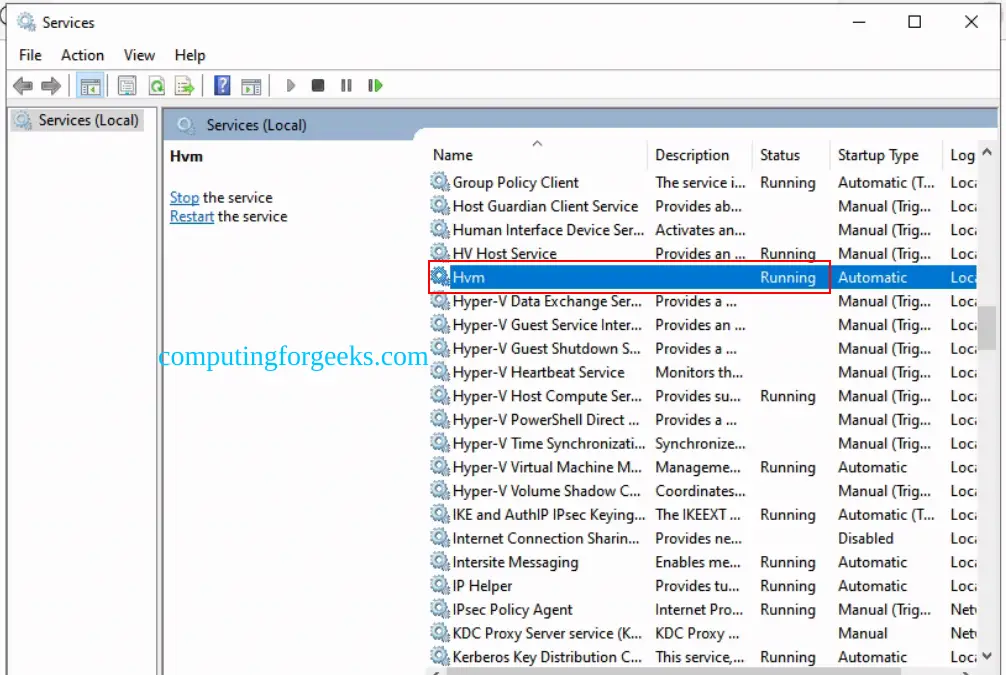
Local access works straight away. For remote access, add an inbound rule in Windows Defender Firewall with Advanced Security (Inbound Rules, New Rule, Port, TCP 8117, Allow). On the Scope tab of the rule, set Remote IP address to your management subnet rather than Any, since the reservation itself listens on every interface. That one setting is the difference between “the admins can reach it” and “everything on the LAN sees a login page with the default password written on it”.
Step 4: Sign in and replace the default login
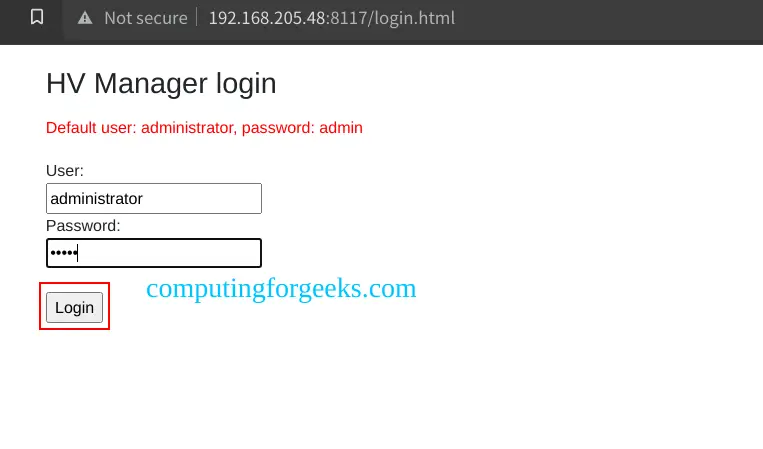
Browse to http://10.0.1.50:8117, using the IP address of your host. The login page tells every visitor the default account is administrator with password admin, and the 3.5.1 binary still carries that same notice, so treat changing it as part of the install rather than a later hardening task.
After login the dashboard shows the build number and links to the documentation. Ours read v3.2.4; a fresh download today reports 3.5.1.
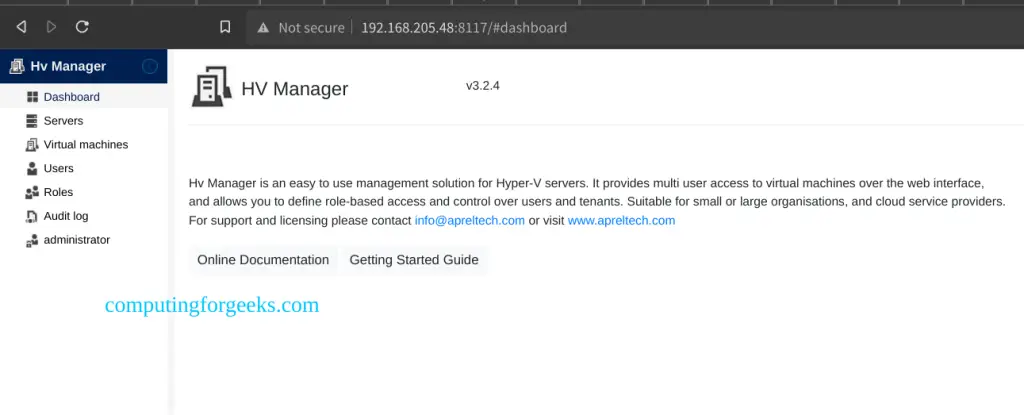
Click administrator at the bottom of the left menu, choose Change password, and set a long one. The navigation also shows the whole product in six entries: Dashboard, Servers, Virtual machines, Users, Roles and Audit log.
Step 5: Add Hyper-V servers
HV Manager talks to Hyper-V over WMI, so the host it runs on is just one possible target. The local host appears as Local Hyper-V server with live CPU, disk, memory, network and uptime columns, and a Status of OK means the WMI query succeeded.
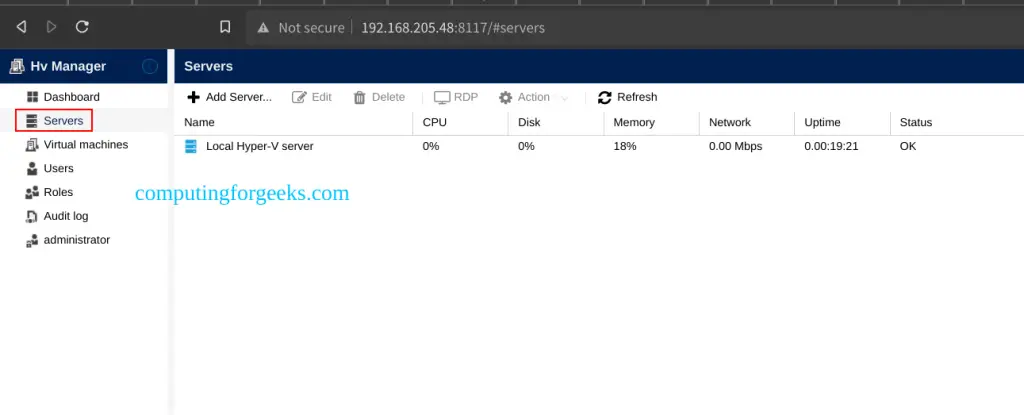
To manage another host, click Add Server, enter its name or IP and an account that is a member of Administrators or Hyper-V Administrators on that host, then Save. A failed connection shows the error in the Status column. It is nearly always WMI blocked by the firewall on the remote host, where the WMI rule group is disabled by default. The other common cause is a local account on a machine outside your domain. UAC remote restrictions strip its admin rights over the network. Keep the free tier in mind as well: after the evaluation, only one server connection stays active.
Step 6: Start, stop and connect to virtual machines
The Virtual machines page is the reason to install HV Manager. It lists every VM across the connected servers with state, CPU usage, assigned memory, memory demand, uptime and host, and the toolbar covers Connect, Checkpoint, Revert and an Actions menu for start, shut down, turn off and the rest:
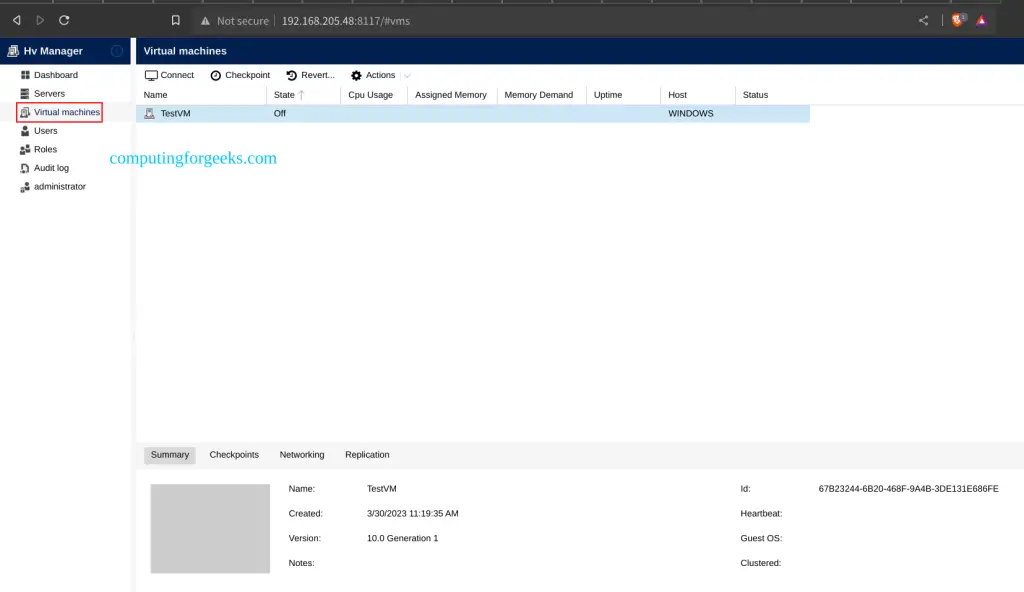
Select a VM and the lower pane fills in its Summary, Checkpoints, Networking and Replication tabs. The test VM in the capture is a Generation 1, configuration version 10.0 machine that is switched off, which is why the CPU and memory columns are empty. In our 3.2.4 install, Connect opened the console inside the browser through the bundled FreeRDP client, and the vendor lists TCP 2179, the Hyper-V console port that VMConnect also uses, among its RDP ports. A host-side console does not depend on guest networking, which is the practical win over plain RDP to the guest when a VM has lost its IP.
Step 7: Delegate VMs with roles and users
Permissions in HV Manager are attached to roles, and users get a role. Each permission maps to a part of the interface, and a cleared box hides that element from the user completely. Open Roles, click Add Role, and name it.
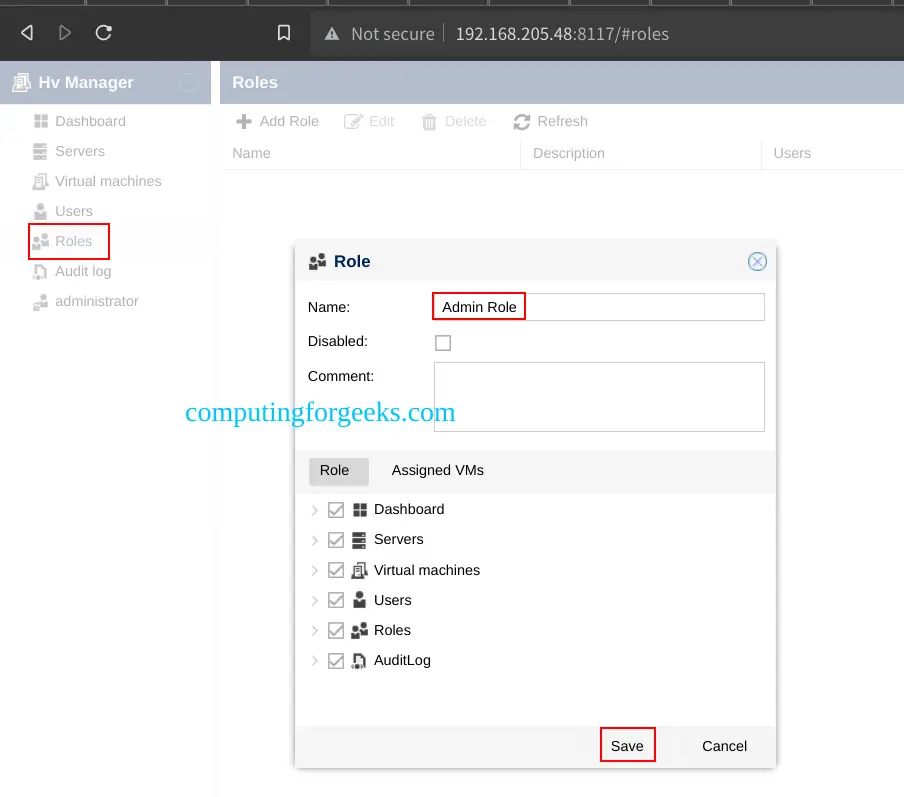
The role in the capture keeps every permission, which makes it a second admin. For real delegation, three settings decide what the user can do:
- Role tab: clear Servers, Users, Roles and AuditLog, and expand Virtual machines to keep only the actions the user needs (start, shut down, connect).
- Assigned VMs tab: click the plus button and pick the VMs this role may see. An empty list means all VMs, so leave it empty only for admin roles.
- Disabled: tick it to suspend everyone in the role at once without deleting users.
Next, open Users, click Add User, and give the account a name, the role and a password.
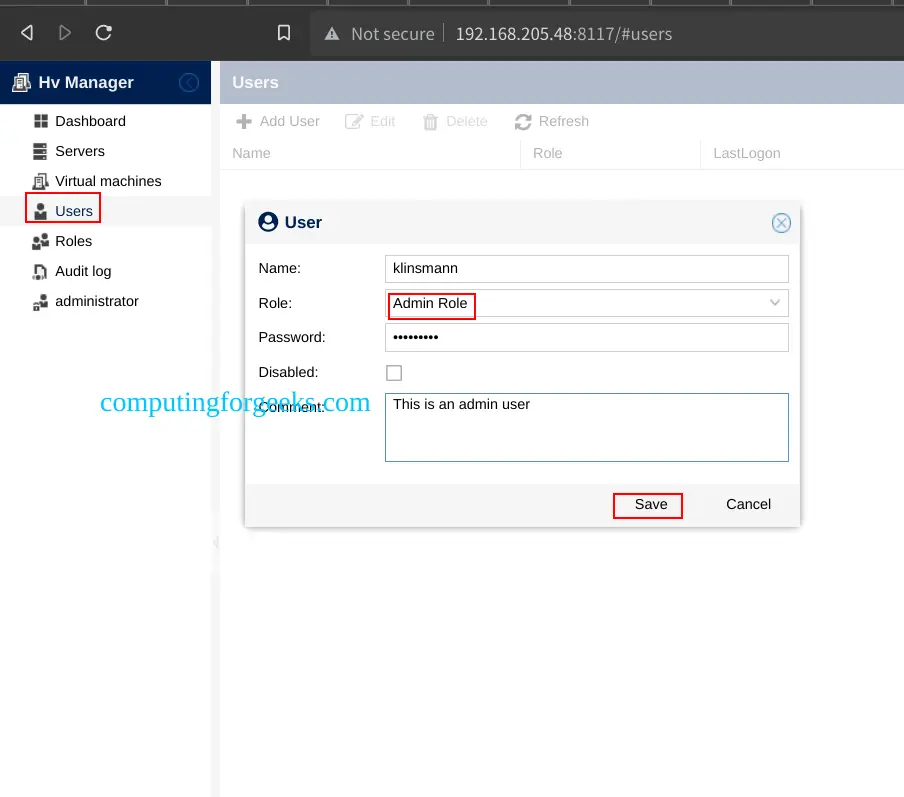
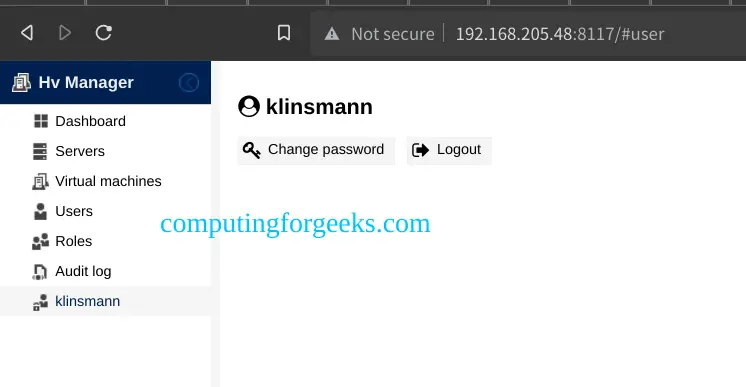
Log out and sign in as the new user to confirm what they see. The account name replaces administrator at the bottom of the menu, and that page is where users change their own password.
User activity is recorded in the Audit log, which is the record you will want when a shared VM gets reverted to a checkpoint from last week. On the free tier you only get the one user, so the delegation model above needs a paid per-server licence once the evaluation runs out.
Step 8: Configure instances with the hvm command-line tool
Anything the web interface does not expose, such as the listen URL, the authentication scheme or the database path, is set per instance with Hvm.exe. Its built-in help in the 3.5.1 binary lists the same commands as the vendor’s getting started guide:
| Command | Options | Use it to |
|---|---|---|
view-instances | none | List instances, their URL and auth scheme |
add-instance | -name -url [-user] [-password] [-auth] [-admin] [-dbpath] | Create a second web instance, for example per tenant |
update-instance | -name [-url] [-user] [-password] [-auth] [-admin] [-dbpath] | Change the port, switch to NTLM, move the database |
start-instance, stop-instance, restart-instance | -name | Control one instance without touching the others |
delete-instance | -name | Remove an instance |
The option worth knowing is -auth NTLM -admin DOMAIN\User. It replaces the built-in login form with Windows authentication, after which a role named DOMAIN\GroupName grants access to every member of that AD group. That is the cleaner setup in a domain, because disabling the AD account also removes HV Manager access and you stop maintaining a second password list in hvm.db.
Windows Admin Center as the Hyper-V web interface
If you need a browser console for administrators rather than per-VM delegation, the free Windows Admin Center from Microsoft does it with HTTPS by default. Version 2606 is the current generally available release according to the Microsoft release history, and its gateway runs on .NET 8. The Virtual Machines tool appears on any server connection with the Hyper-V role and gives you:
- A Summary tab with VMs by state and host CPU and memory split between host and guests.
- An Inventory tab to create, start, shut down, turn off, save, pause, reset, rename and checkpoint VMs, including bulk actions on several VMs at once.
- VM settings (processors, memory, disks, network adapters, nested virtualization) and console access through VMConnect via the host.
The installer generates a self-signed certificate valid for 60 days if you do not supply one, so plan a real certificate before day 61 or the browser warnings come back. Our Windows Admin Center install guide for Windows Server 2025 walks through the gateway setup, and Microsoft documents the full Virtual Machines tool. For hosts in a cluster it is the stronger choice outright, since it merges Hyper-V Manager and Failover Cluster Manager views in one inventory.
Lock down port 8117 before anyone else uses it
HV Manager’s defaults are tuned for a five-minute demo: plain HTTP, every interface, a published default password. Those defaults are fine on an isolated lab switch and wrong anywhere else, because the same login page controls VM power, checkpoints and consoles. Work through this list before you hand the URL to anyone:
- Default password: changed at first login (Step 4), with the built-in administrator kept for break-glass use only.
- Firewall scope: the 8117 rule limited to the management subnet or a jump host, never Any.
- Transport: an
https://URL on the instance viaupdate-instance -url, which the vendor guide shows as a supported template. Because Hvm.exe serves through http.sys and only creates the URL reservation, you also have to bind a certificate to the new port in http.sys (netsh http add sslcert) and open that port in the firewall. We have not run that path on 3.5.1. Test it on a lab host first. Until it works, reach it over a VPN or SSH tunnel rather than across an untrusted network. - Identity: NTLM authentication in a domain, so AD group membership decides who gets in (Step 8).
- Roles: least privilege with Assigned VMs filled in, and the Audit log checked after the first week of use.
- Backups:
hvm.dbincluded in the host backup so roles and users survive a rebuild.
Never publish port 8117 straight to the internet, even with a strong password, since there is no MFA in front of it. If remote staff need the console, put the host behind the VPN you already run. For the wider Hyper-V administration around this, from storage to failover clustering, we point readers to Mastering Windows Server 2025 (paid link) by Jordan Krause and its hands-on labs. The choice between Hyper-V and other platforms is laid out in our notes on choosing a hypervisor.