

Executing test cases in TestLink is an essential part of managing and validating the quality of software applications. TestLink is a widely used test management tool that allows QA teams to efficiently execute and track test cases. By following the correct steps, you can ensure that your test cases are properly executed, and results are accurately recorded for analysis.
In this guide, we will walk through the complete process of how to execute test cases in TestLink, ensuring smooth testing operations and result tracking
Steps to executing TestCases in TestLink
Following are the steps required for us to execute TestCases in the TestLink software:
Step 1: Select the TestCase
The first step is to select a particular TestCase in TestLink that you want to execute, for go to the testlink homepage, and on the left side you will see the TestCases which are associated with each of the projects, simply select the TestCase that you want to execute.
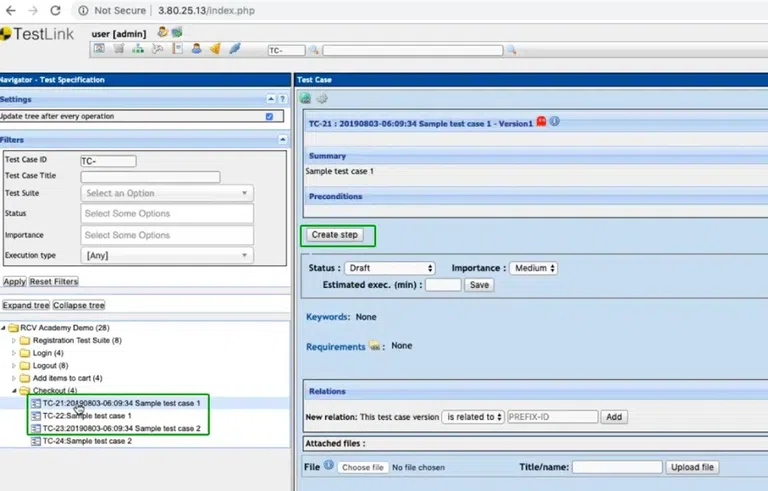
Step 2: Create Step for TestCase
In this step, we will create steps for the TestCase as part of the test case design process. A step is an individual part of the TestCase where specific actions and expected behaviors are defined. This allows for a structured approach when the TestCase is executed later.
Defining clear steps during the design phase makes sure that the TestCase can be executed efficiently and accurately.

Step 3: Open TestLink Homepage
After adding the steps for the particular test case, we will have to go to the TestLink homepage. for going to the homepage we will simply go to the top left corner and click on the "HOME" icon to open the homepage.
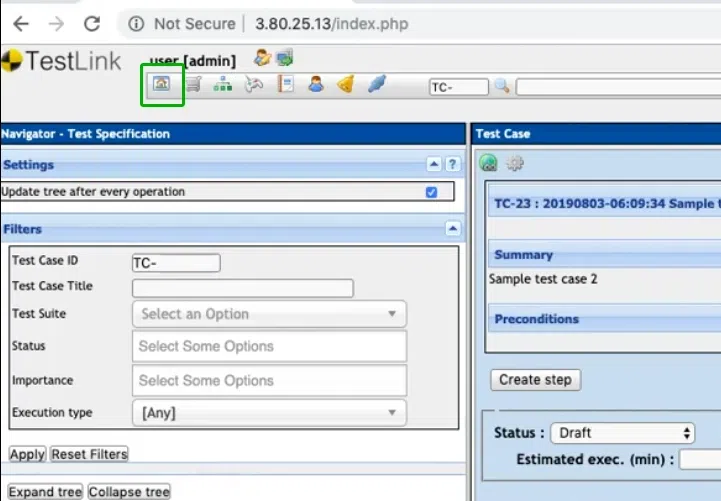
Step 4: Open Test Plan Management
After going to the home menu we will select the test plan management, test plan management allows us to add or remove test cases before executing them and also allows other modifications to the test case.
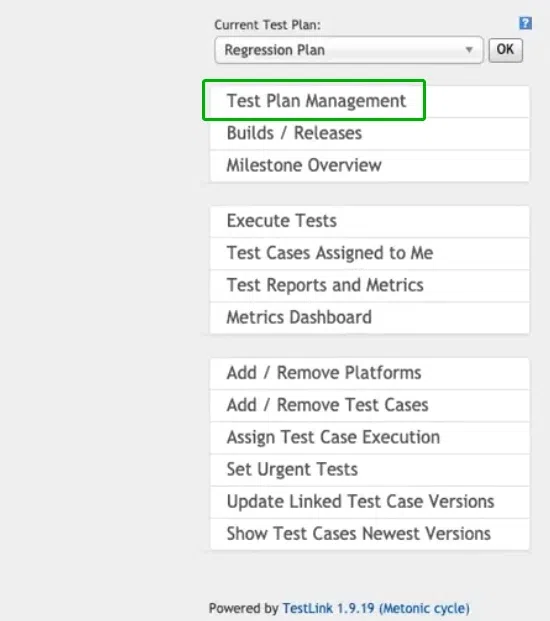
Step 5: Change TestCase Availability
In this step, we focus on managing the TestCase availability within the test plan. instead of simply changing the TestCase status, here we have to make sure that the TestCase is properly assigned to the relevant test plan and project. This helps to make sure that it is ready for execution by the designated team members.
By managing the TestCase through the test plan, we get a better streamlined execution, tracking which also makes it easier for users to access and run the TestCase.
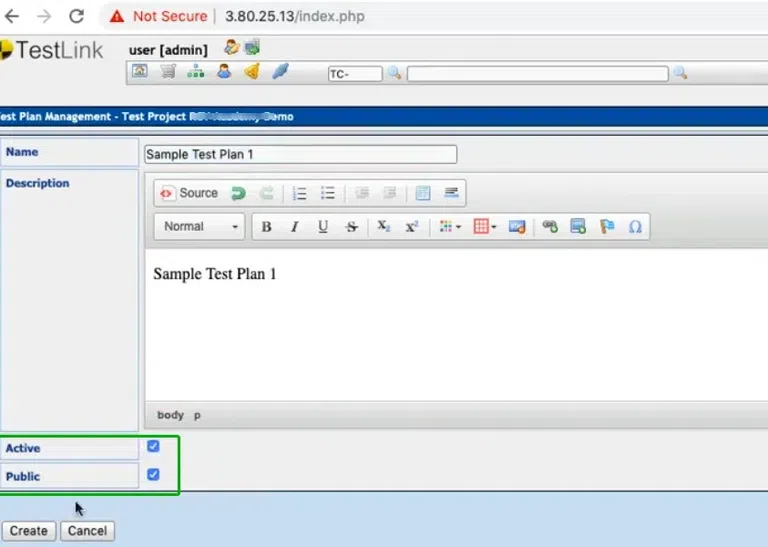
After selected both of these checkboxes simply click on the "Create" button and the TestCase will be created.
Step 6: Add/Remove Test Cases (Optional)
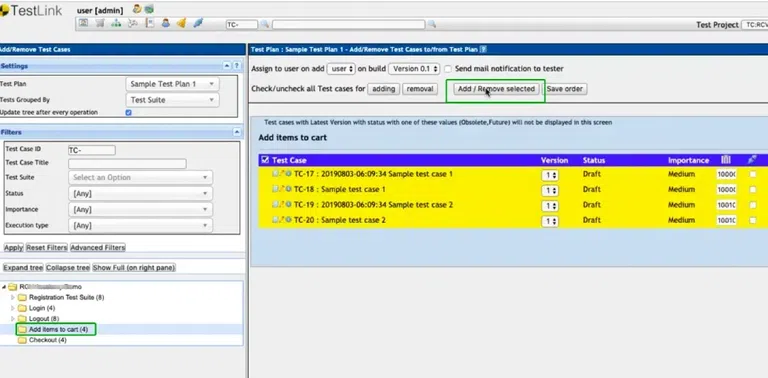
In this step we can add or remove any particular test case that we want, this is an optional step which can be used when we have created more than one similar test case in TestLink, simply go to this option and select the test case that you want to add or remove.

After this, move to the next step for the execution of TestCase.
Step 7: Select the Test Cases & Proceed
After completing the steps mentioned above, we will simply have to select the test cases that we want to be executed, select one or more test cases and click on "Save Order" button to make sure that the order of the test cases and selection is saved.
Step 8: Add Execution of TestCase
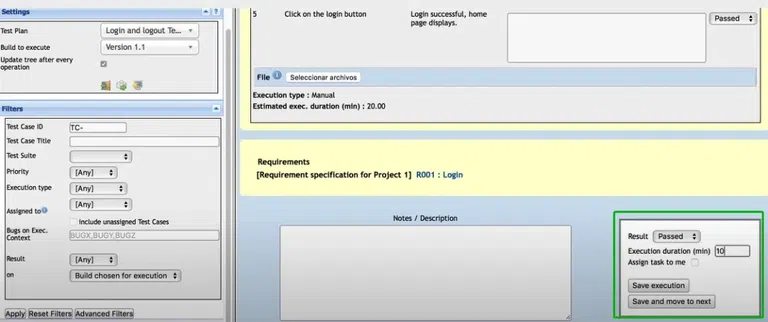
After selecting and proceeding with the particular test cases, we will have to select the execution of the TestCase, for this we will have to set the parameters according to our specific project and then we will click on the "Save and move to next" button.
Step 9: Check Execution Output
After all of the above steps are completed, we will be redirected to the Test Results page automatically and this is where the test results of the executed TestCase is stored which will display the execution history.
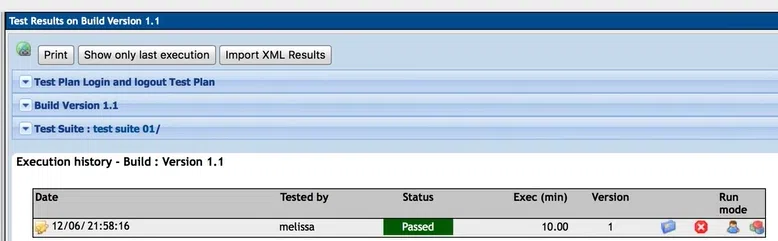
This is how the TestCases can be executed in TestLink by following the steps one by one and making sure there is no error in the TestCases.
Do more with TestLink:
Conclusion
Successfully executing test cases in TestLink ensures that your application meets the necessary quality standards. With its user-friendly interface, TestLink helps QA teams to run tests efficiently, track progress, and capture test results for future reference. By following the outlined steps, you can streamline the testing process and ensure that all test cases are executed effectively, improving the overall software testing workflow
