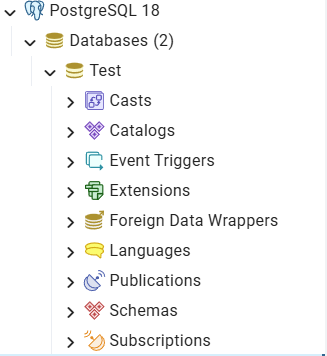
Creating a database in PostgreSQL allows users to store, organize and manage related data in a separate database environment.
- Supports multiple databases on one server.
- Contains tables, views and other database objects.
How to Create a Database
Follow the steps below to create a database in PostgreSQL.
Step 1: Display Available Users
Execute the following meta-command to display all users (roles) available on the PostgreSQL server:
\duThis command lists all PostgreSQL users along with their roles and privileges.
Step 2: Create a Database
After checking the available users, connect using a user that has database creation privileges and execute the following command:
CREATE DATABASE mydatabase;Step 3: Verify the Database
To verify that the database was created successfully, run:
\lThis command displays all databases on the PostgreSQL server, including the newly created one.
Step 4: Connect to the Database
\c mydatabaseThis command connects to the specified database.
Creating a Database Using psql Shell
To create a database using the PostgreSQL psql shell, connect to the PostgreSQL server and execute the CREATE DATABASE command.
CREATE DATABASE mydatabase;Replace mydatabase with the desired database name. After creating the database, use the \l command to verify that it has been created successfully.
Parameters
The following table lists the parameters used by the createdb command.
| Parameter | Description |
|---|---|
| dbname | Name of the database to be created. |
| description | Comment associated with the new database. |
| options | Additional command-line options accepted by createdb. |
Options
The following table lists the options supported by the createdb command.
| Option | Description |
|---|---|
| -D tablespace | Sets the database tablespace. |
| -e | Displays executed commands. |
| -E encoding | Sets the database encoding. |
| -l locale | Sets the database locale. |
| -T template | Uses a template database. |
| --help | Shows help information. |
| -h host | Specifies the server host. |
| -p port | Specifies the server port. |
| -U username | Specifies the user name. |
| -w | Disables password prompts. |
| -W | Forces a password prompt |
Best Practices for PostgreSQL CREATE DATABASE
- Database Naming: Use unique and descriptive database names.
- Owner Configuration: Assign the appropriate database owner role.
- Encoding Configuration: Specify the required encoding and locale settings.
- Connection Management: Configure suitable connection limits.
- Tablespace Selection: Use an appropriate tablespace for database storage.
Creating a Database Using pgAdmin
Creating a database in PostgreSQL using pgAdmin provides a graphical way to create and manage databases without writing SQL commands.
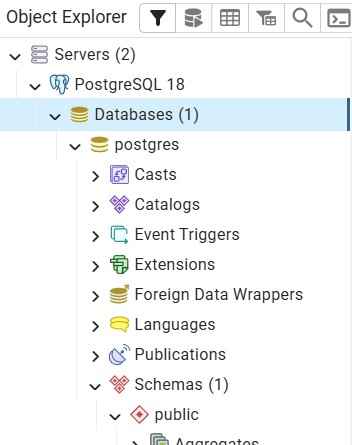
Step 1: Open pgAdmin and Connect to the Server
Open pgAdmin and connect to the PostgreSQL server where you want to create the database. In the left-side Object Explorer, expand the server and log in if required.
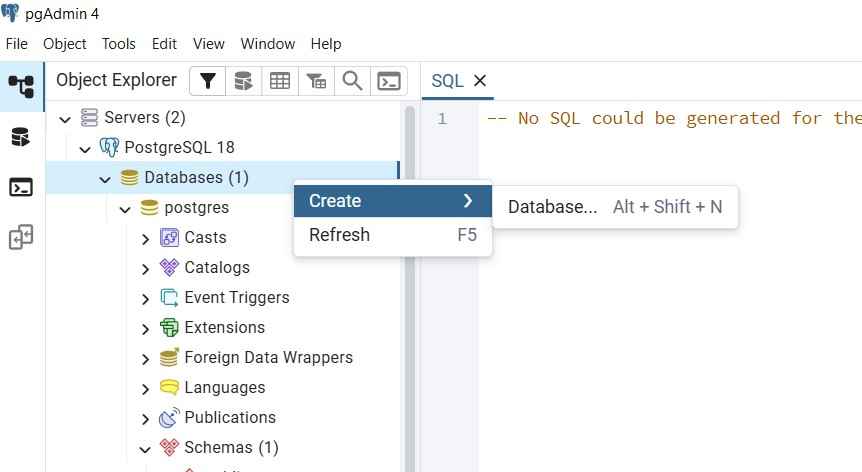
Step 2: Select the Create Database Option
Right-click on the PostgreSQL server where you want to create the database.
From the context menu, select: Create → Database...
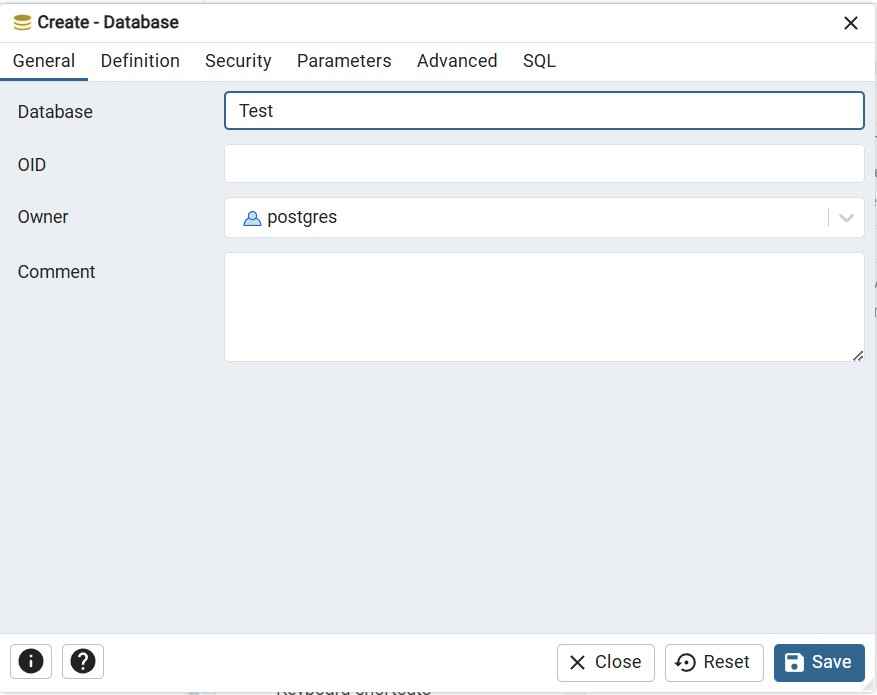
Step 3: Enter Database Details
A Create - Database window will appear. In the General tab, provide the following details:
- Name: Enter the name of the database.
- Owner: Select the user who will own the database.
The database name and owner are the basic details required to create a database.
Step 4: Configure Additional Options
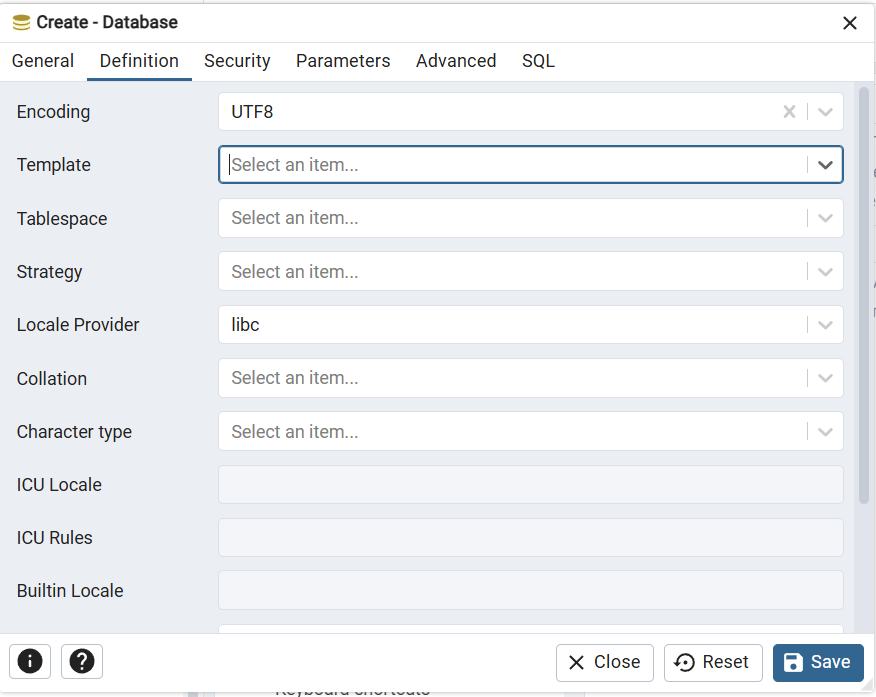
If you want to customize the database, open the Definition tab. Here, we can configure options such as:
- Template: Specifies the template database used to create the new database.
- Encoding: Specifies the character encoding for the database.
- Tablespace: Specifies the tablespace where the database will be stored.
These settings are optional and can generally be left at their default values.
Step 5: Create the Database
After entering the required details, click Save. The new database will be created successfully.
You can find the newly created database under the selected PostgreSQL server in the Object Explorer on the left side of pgAdmin.