

A chatbot is a computer program designed to simulate human conversation, usually through text or voice interactions. They use NLP and machine learning algorithms to understand and respond to user queries, providing a personalized experience. We will build a simple Q&A chatbot using the Gemini API, Flask and Python. The chatbot will send user questions to Gemini through a Flask backend and display the generated responses in a web interface.
The chatbot follows this flow:
User -> Web Browser -> Flask Backend -> Gemini API -> Flask Backend -> Web Browser
The chatbot will also maintain the conversation context so that users can ask follow-up questions.
Prerequisites
Before starting, make sure you have:
- Python installed on your system
- VS Code or another Python-compatible editor
- A Google account
Getting a Gemini API Key
Step 1: Open Google AI Studio and sign in with your google account.
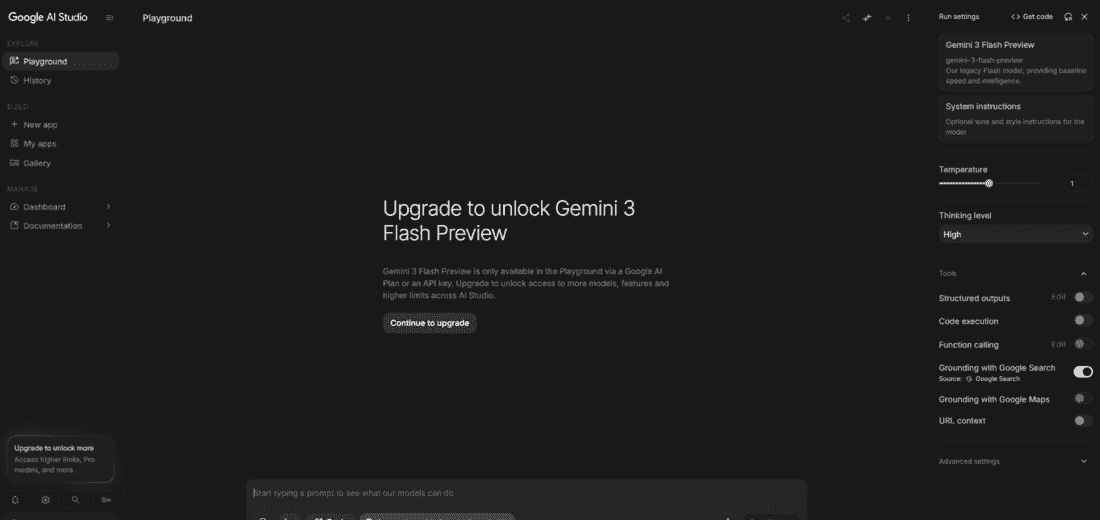
Step 2: Open the API Keys section inside Dashboard.
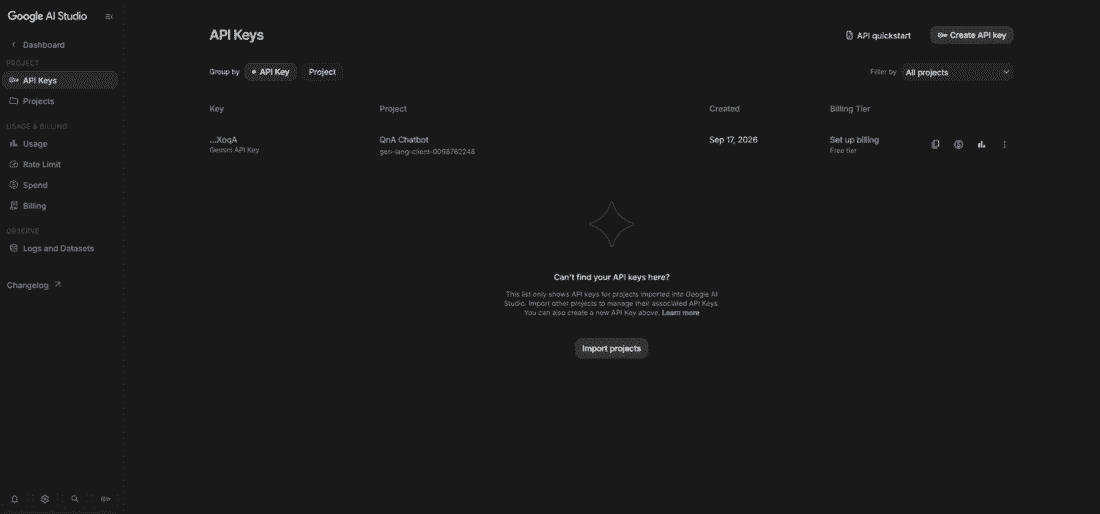
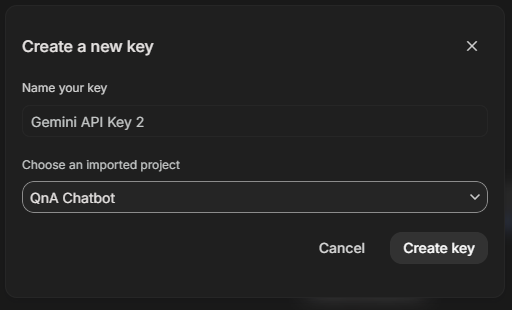
Step 3: Click Create API key and select an existing Google Cloud project or create a new project if required.
Step 4: Copy the generated API key.
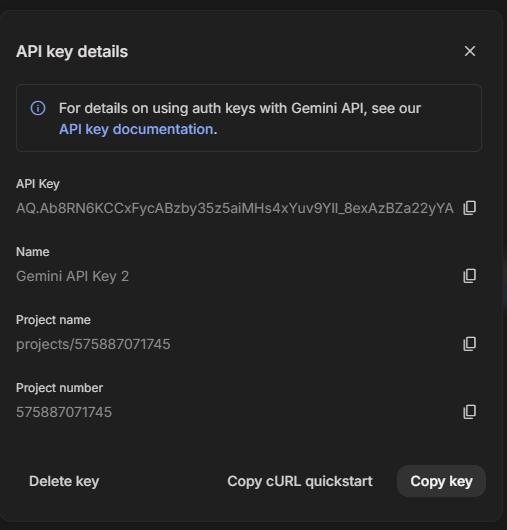
Keep the API key private. Do not add it directly to JavaScript, HTML or publicly shared source code.
Setting Up the Project
Create a folder named: gemini-chatbot. Open this folder in VS Code and project Structure should be as follows:
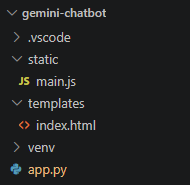
It is recommended to use a virtual environment so that the project's dependencies remain separate from other Python projects.
Install Required Libraries
Install Flask and the Google GenAI Python SDK:
python -m pip install flask google-genai
The google-genai package provides the Python interface for the Gemini API, including the Interactions API. Google's documentation lists google-genai as the current Python SDK for the Interactions API.
Set the Gemini API Key
Instead of writing the API key directly in the Python code, store it in the GEMINI-API-KEY environment variable. In the PowerShell terminal, run:
$env:GEMINI_API_KEY="YOUR_API_KEY_HERE"
Replace YOUR_API_KEY_HERE with your actual Gemini API key. This keeps the API key outside the source code.
Note: The environment variable is available only for the current terminal session. If you open a new terminal, set it again before running the application.
Creating the Flask Backend
Create a file named app.py. The Flask application will:
- Serve the chatbot webpage.
- Receive questions from the browser.
- Send them to Gemini using the Interactions API.
- Maintain the conversation using previous_interaction_id.
- Return the generated response to the browser.
app.py
from flask import Flask, render_template, request, jsonify
from google import genai
import os

app = Flask(__name__)

client = genai.Client(api_key=os.environ["GEMINI_API_KEY"])

previous_interaction_id = None

@app.route("/")
def index():
    return render_template("index.html")

@app.route("/chat", methods=["POST"])
def chatbot():
    global previous_interaction_id

    data = request.get_json()
    message = data.get("message", "").strip()

    if not message:
        return jsonify({"error": "Message cannot be empty"}), 400
    try:
        if previous_interaction_id:
            interaction = client.interactions.create(
                model="gemini-3.6-flash",
                input=message,
                previous_interaction_id=previous_interaction_id
            )
        else:
            interaction = client.interactions.create(
                model="gemini-3.6-flash",
                input=message
            )

        previous_interaction_id = interaction.id

        return jsonify({"response": interaction.output_text})

    except Exception as e:
        return jsonify({"error": str(e)}), 500

if __name__ == "__main__":
    app.run(debug=True)
Google's Interactions API supports stateful conversations by passing the previous interaction's ID to the next request. This allows the server to maintain the conversation history without manually sending all previous messages each time.
Creating the Chatbot Interface
Create a folder named templates inside the project directory and create: index.html. The HTML page provides a simple chat interface where users can enter questions and view responses.
index.html
<!DOCTYPE html>
<html lang="en">

<head>
    <meta charset="UTF-8">
    <meta name="viewport" content="width=device-width, initial-scale=1.0">
    <title>Gemini Q&A Chatbot</title>

    <style>
        body {
            font-family: Arial, sans-serif;
            max-width: 800px;
            margin: auto;
            padding: 20px;
        }

        #messages {
            min-height: 400px;
            border: 1px solid #ddd;
            padding: 15px;
            margin-bottom: 15px;
            overflow-y: auto;
        }

        .message {
            padding: 10px;
            margin: 8px 0;
            border-radius: 8px;
        }

        .user {
            background: #e3f2fd;
            text-align: right;
        }

        .bot {
            background: #e8f5e9;
        }

        .input-area {
            display: flex;
            gap: 10px;
        }

        input {
            flex: 1;
            padding: 10px;
        }

        button {
            padding: 10px 20px;
            cursor: pointer;
        }
    </style>
</head>

<body>

    <h2>Gemini Q&A Chatbot</h2>

    <div id="messages"></div>

    <div class="input-area">
        <input
            type="text"
            id="chat"
            placeholder="Ask a question..."
        >

        <button id="btn">Send</button>
    </div>

    <script src="https://cdn.jsdelivr.net/npm/showdown@2.1.0/dist/showdown.min.js"></script>
    <script src="{{ url_for('static', filename='main.js') }}"></script>

</body>

</html>
Sending Questions to Flask
Create a folder named static and add: main.js. This JavaScript file sends the user's question to the Flask /chat endpoint using a POST request. It also converts Markdown responses from Gemini into HTML so that headings, bold text, lists and other Markdown formatting are displayed properly.
const messageInput = document.getElementById("chat");
const sendBtn = document.getElementById("btn");
const messages = document.getElementById("messages");

const converter = new showdown.Converter();

function addMessage(message, type) {
    const div = document.createElement("div");

    div.className = `message ${type}`;

    if (type === "bot") {
        div.innerHTML = converter.makeHtml(message);
    } else {
        div.textContent = message;
    }

    messages.appendChild(div);
    messages.scrollTop = messages.scrollHeight;
}

async function chatGemini() {
    const message = messageInput.value.trim();

    if (!message) {
        return;
    }

    addMessage(message, "user");
    messageInput.value = "";

    try {
        const response = await fetch("/chat", {
            method: "POST",
            headers: {
                "Content-Type": "application/json"
            },
            body: JSON.stringify({
                message: message
            })
        });

        const data = await response.json();

        if (data.error) {
            addMessage(data.error, "bot");
            return;
        }

        addMessage(data.response, "bot");

    } catch (error) {
        addMessage(
            "Something went wrong. Please try again.",
            "bot"
        );

        console.error(error);
    }
}

sendBtn.addEventListener("click", chatGemini);

messageInput.addEventListener("keydown", (event) => {
    if (event.key === "Enter") {
        chatGemini();
    }
});
Running the Chatbot
Make sure the virtual environment is activated:
.\venv\Scripts\Activate.ps1
Run the Flask application:
python app.py
Flask will start the development server. Open the URL shown in the terminal, usually: http://127.0.0.1:5000. The Gemini Q&A chatbot will now be available in the browser.
Working
The chatbot has three main components:
1. Frontend: The HTML and JavaScript provide the chat interface. When the user enters a question, JavaScript sends it to the Flask /chat endpoint.
2. Flask Backend: Flask receives the question and sends it to Gemini using the Google GenAI SDK. The API key is stored on the server through the GEMINI_API_KEY environment variable, so it is not included in the frontend code.
3. Gemini API: Gemini processes the question and generates the response. The response is returned to Flask and then displayed in the browser. The Interactions API can maintain conversation state using previous_interaction_id, allowing follow-up questions to use the context of earlier interactions.
Video Demonstration
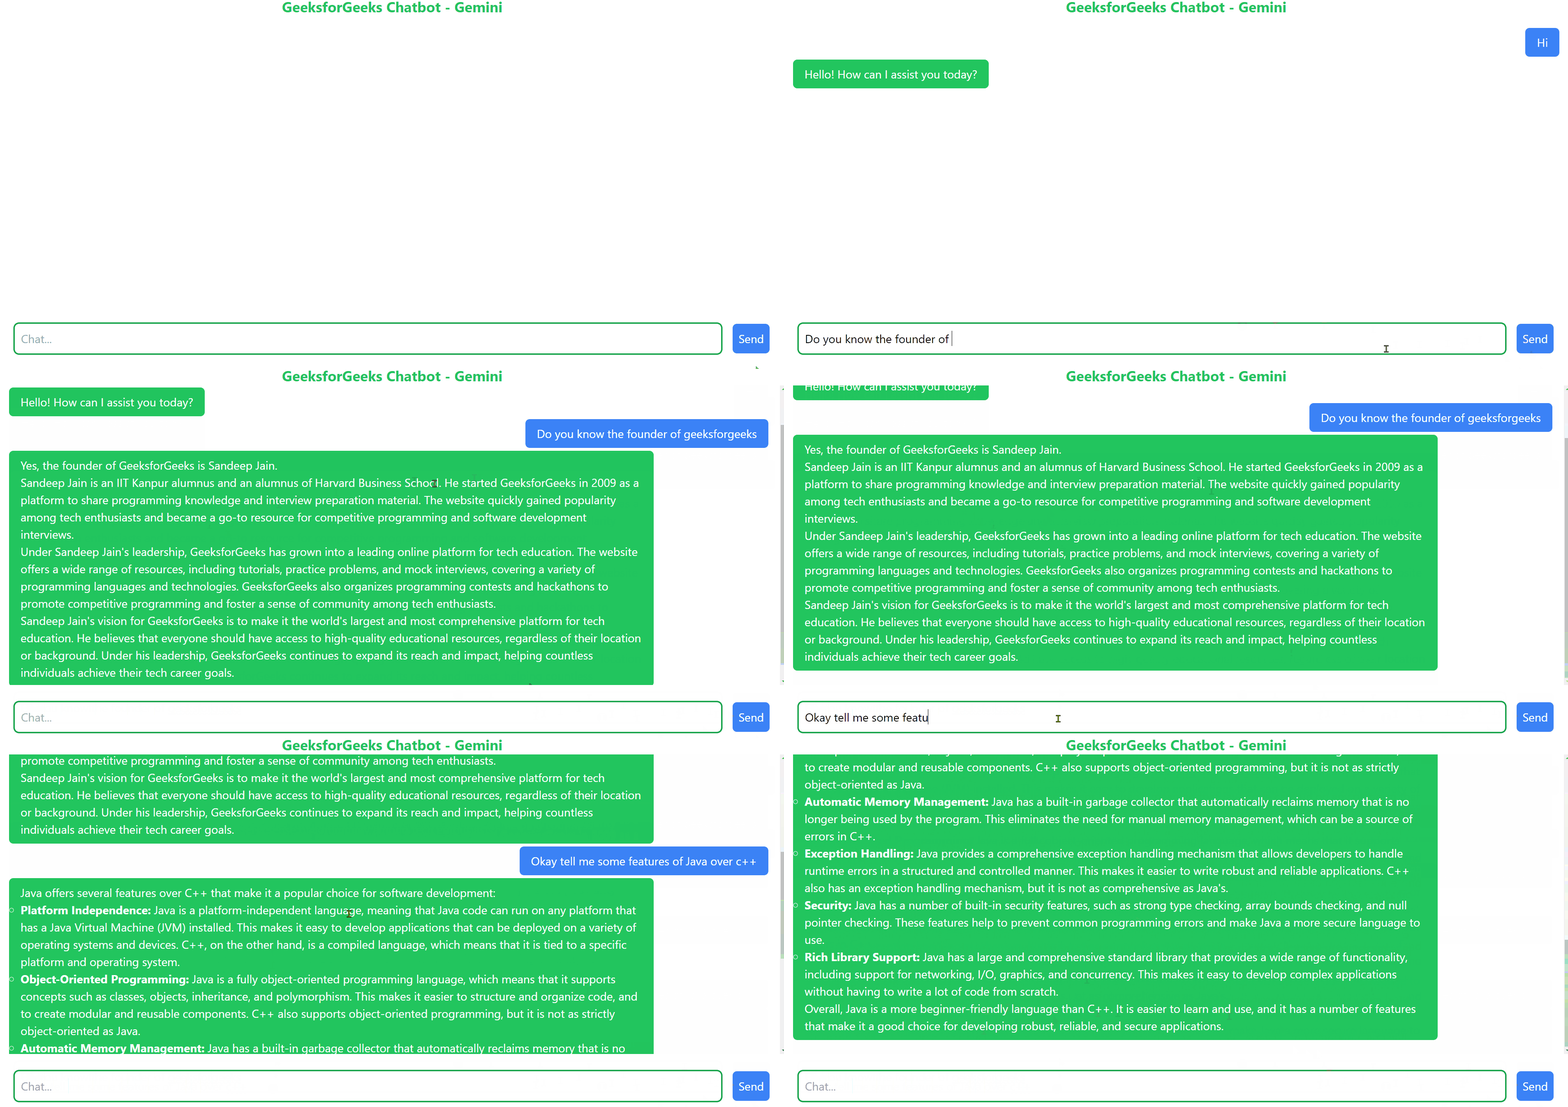
You can download the complete source code from here.
