Most production web stacks on Ubuntu run Nginx over Apache these days. Nginx handles static content and reverse proxying more efficiently, consumes less memory per connection, and scales better under high concurrency. Paired with MariaDB and PHP-FPM, you get a LEMP stack that powers everything from WordPress sites to custom PHP applications.
This guide walks through a complete LEMP installation on Ubuntu 26.04 LTS (Resolute Raccoon) with Nginx, MariaDB and PHP-FPM, shows you how to prove PHP is patched against PHP2Shell, and ends with production tuning for worker processes, PHP-FPM pools, and MariaDB buffer sizing. Every step below was run again in October 2026 on a fresh Ubuntu 26.04 LTS system with the patched PHP 8.5.4 security build, so the stack you end up with doesn’t serve requests on a PHP2Shell-vulnerable runtime. The systemctl status blocks, the socket listing and the sample SQL table are kept from the original spring run, because their timestamps and PIDs are the only things that differ.
Prerequisites
Before starting, make sure you have:
- Ubuntu 26.04 LTS server with root or sudo access (initial server setup guide)
- At least 1 GB RAM and 10 GB disk space
- SSH access to the server
- Tested on: Ubuntu 26.04 LTS, Nginx 1.28.3, MariaDB 11.8.6, PHP 8.5.4 (security build 8.5.4-0ubuntu1.5)
Update System Packages
Start with a package index refresh to make sure you pull the latest versions from the Ubuntu repositories.
sudo apt update && sudo apt upgrade -yOn a fresh 26.04 install, expect anywhere from a handful to 100+ packages to upgrade, depending on how old your install media is. This takes a minute or two depending on your connection speed.
Install Nginx
Nginx is available directly from the Ubuntu 26.04 default repositories. The version shipped with Resolute Raccoon is 1.28.3, which includes HTTP/3 support and improved QUIC handling.
sudo apt install -y nginxVerify the installed version:
nginx -vYou should see the version confirmed:
nginx version: nginx/1.28.3 (Ubuntu)Check that the service is running:
systemctl status nginxThe output should show active (running):
● nginx.service - A high performance web server and a reverse proxy server
     Loaded: loaded (/usr/lib/systemd/system/nginx.service; enabled; preset: enabled)
     Active: active (running) since Tue 2026-04-14 00:24:58 UTC; 9s ago
       Docs: man:nginx(8)
    Process: 2537 ExecStartPre=/usr/sbin/nginx -t -q -g daemon on; master_process on; (code=exited, status=0/SUCCESS)
    Process: 2538 ExecStart=/usr/sbin/nginx -g daemon on; master_process on; (code=exited, status=0/SUCCESS)
   Main PID: 2566 (nginx)
      Tasks: 3 (limit: 3522)
Nginx is enabled by default on Ubuntu 26.04, so it will start automatically on reboot.
Install MariaDB
Ubuntu 26.04 ships MariaDB 11.8.6, a significant jump from the 10.x series in older Ubuntu releases. The 11.x branch brings improved optimizer performance, better JSON handling, and native vector search support.
sudo apt install -y mariadb-server mariadb-clientConfirm the version:
mariadb --versionExpected output:
mariadb from 11.8.6-MariaDB, client 15.2 for debian-linux-gnu (x86_64) using EditLine wrapperThe service starts automatically after installation. Verify it:
systemctl status mariadbLook for active (running) and the status message “Taking your SQL requests now…”:
● mariadb.service - MariaDB 11.8.6 database server
     Loaded: loaded (/usr/lib/systemd/system/mariadb.service; enabled; preset: enabled)
     Active: active (running) since Tue 2026-04-14 00:25:25 UTC; 11s ago
       Docs: man:mariadbd(8)
             https://mariadb.com/kb/en/library/systemd/
   Main PID: 3396 (mariadbd)
     Status: "Taking your SQL requests now..."
      Tasks: 14 (limit: 23249)
MariaDB listens only on the local socket and 127.0.0.1 by default, and nothing in this guide changes that, so port 3306 stays closed to the network.
Secure the MariaDB Installation
Set a root password for MariaDB. On Ubuntu 26.04, MariaDB uses unix_socket authentication by default, which means root can connect without a password when logged in as the system root user. Keep that method when you add a password: a plain IDENTIFIED BY replaces unix_socket, and every later sudo mariadb in this guide then fails with ERROR 1045 (28000): Access denied for user 'root'@'localhost' (using password: NO). Open the MariaDB shell:
sudo mariadbInside the MariaDB shell, allow root in through the socket OR a password:
ALTER USER 'root'@'localhost' IDENTIFIED VIA unix_socket OR mysql_native_password USING PASSWORD('YourStrongPassword');
FLUSH PRIVILEGES;
EXIT;
Test the new password by logging in with it:
mariadb -u root -pEnter your password at the prompt. If you get the MariaDB shell, the password works, and sudo mariadb still logs you in without one. We checked both on the test server, and a non-root shell running mariadb -u root without -p was refused with ERROR 1698, which is what you want.
Install PHP 8.5 with PHP-FPM
Ubuntu 26.04 includes PHP 8.5, which brings the pipe operator, clone() with properties, #[\NoDiscard] and a built-in URI extension. Install PHP-FPM along with the most commonly needed extensions:
sudo apt install -y php-fpm php-mysql php-cli php-curl php-gd php-mbstring php-xml php-zipThis pulls in php8.5-fpm and all the listed extensions. Verify the PHP version:
php --versionEvery Ubuntu build of this package reports 8.5.4, patched or not, so this line confirms the install and nothing more. The security check comes after the module list:
PHP 8.5.4 (cli) (built: Oct 19 2026 14:35:18) (NTS)
Copyright (c) The PHP Group
Built by Ubuntu
Zend Engine v4.5.4, Copyright (c) Zend Technologies
    with Zend OPcache v8.5.4, Copyright (c), by Zend Technologies
Confirm PHP-FPM is running:
systemctl status php8.5-fpmThe status should show “Ready to handle connections”:
● php8.5-fpm.service - The PHP 8.5 FastCGI Process Manager
     Loaded: loaded (/usr/lib/systemd/system/php8.5-fpm.service; enabled; preset: enabled)
     Active: active (running) since Tue 2026-04-14 00:26:22 UTC; 6s ago
       Docs: man:php-fpm8.5(8)
   Main PID: 13719 (php-fpm8.5)
     Status: "Ready to handle connections"
      Tasks: 3 (limit: 3522)
Check that the PHP-FPM socket exists. Nginx communicates with PHP-FPM through this Unix socket rather than TCP, which reduces overhead:
ls -la /run/php/php8.5-fpm.sockYou should see the socket file owned by www-data:
srw-rw---- 1 www-data www-data 0 Apr 14 00:26 /run/php/php8.5-fpm.sockList the enabled PHP modules to confirm everything installed correctly:
php -m | grep -iE 'mysql|curl|gd|mbstring|xml|zip'All requested extensions should appear:
curl
gd
libxml
mbstring
mysqli
mysqlnd
pdo_mysql
SimpleXML
xml
xmlreader
xmlwriter
zip
If any extension is missing from that list, reinstall it by its php- name from the install command above before you go further.
PHP2Shell and the Patched PHP-FPM Build
PHP2Shell is a pair of critical remote code execution bugs in PHP itself, CVE-2026-109618 and CVE-2026-109619, both rated CVSS v4.0 9.2 in PHP’s pre-announcement of 20 October 2026 and fixed upstream on 21 October in PHP 8.5.12, 8.4.27, 8.3.36 and 8.2.35 (see the PHP security advisory). Ubuntu 26.04 already ships the fix for the PHP 8.5 branch this stack uses, as package 8.5.4-0ubuntu1.5 in resolute-security, and the install step above pulls it. Don’t take that on trust, because PHP-FPM is about to answer requests from the internet through Nginx. Ubuntu backported the patch and kept the 8.5.4 number, so php --version reads the same on a vulnerable server. The package changelog tells them apart:
zgrep -E 'CVE-2026-10961[89]' /usr/share/doc/php8.5-common/changelog.Debian.gzA patched build lists the backported patches and both CVE IDs. This is what our fresh install printed, and if yours matches, a new server is done with this section and can move on to the Nginx configuration:
    - debian/patches/CVE-2026-109618_109619-pre1.patch: ext/filter: fix use-
    - debian/patches/CVE-2026-109618_109619-pre2.patch: Fix GH-23204: use-after-
    - debian/patches/CVE-2026-109618_109619-pre3.patch: Fix GH-17399: iconv
    - debian/patches/CVE-2026-109618_109619-pre4.patch: Fix JIT vm_interrupt
    - debian/patches/CVE-2026-109618_109619-pre5.patch: Fix GH-21664:
    - debian/patches/CVE-2026-109618_109619.patch: Avoid state corruption via
    - CVE-2026-109618
    - CVE-2026-109619
No output means the build is older than 8.5.4-0ubuntu1.5. A minimized install has no /usr/share/doc changelogs, so there zgrep fails with a missing-file error instead. This version comparison works with or without the docs:
dpkg --compare-versions "$(dpkg-query -W -f='${Version}' php8.5-common)" ge 8.5.4-0ubuntu1.5 && echo patched || echo VULNERABLEIt printed patched on the fresh install. To stand in for an older LEMP server, we rolled the php8.5 packages back to the April build 8.5.4-0ubuntu1, and there the zgrep printed nothing and the comparison printed this:
VULNERABLEOn an existing server that reports VULNERABLE, upgrade the php8.5 packages in place. The glob only upgrades packages you already have, so it pulls in nothing new (Apache included). It doesn’t match libphp8.5-embed, so add that name if it’s installed:
sudo apt update
sudo apt install --only-upgrade -y "php8.5*"
The package restarted PHP-FPM by itself in our test, but restart it anyway, because that automatic restart isn’t guaranteed (a held or deferred restart, or a local policy, can skip it) and FPM workers keep running the old code until a new master process loads the patched library:
sudo systemctl restart php8.5-fpmSince the version string never moves, prove the running service is newer than the upgrade. Compare the FPM start time with the last php8.5 entry in the dpkg logs, rotated copies included:
systemctl show -p ActiveEnterTimestamp php8.5-fpm
zgrep -hE ' (install|upgrade) php8.5-(common|fpm):' /var/log/dpkg.log* | sort | tail -1
On our test server FPM came up 28 seconds after dpkg upgraded php8.5-common, which is the order you want:
ActiveEnterTimestamp=Thu 2026-10-22 20:42:47 UTC
2026-10-22 20:42:19 upgrade php8.5-common:amd64 8.5.4-0ubuntu1 8.5.4-0ubuntu1.5
If the FPM start time is earlier than that dpkg line, restart again. Queue workers and other long-running PHP CLI processes under Supervisor or their own systemd unit keep the old code loaded too, so restart those as well. If you can’t upgrade right away, the PHP advisory lists partial mitigations, among them tighter limits on decoded request size, field, part and header counts and nesting depth, which belong at the web server or proxy in front of PHP. On the PHP side it names session.upload_progress.enabled=0 and, for PHP 8.5, fatal_error_backtraces=0, both set in php.ini or the FPM pool (never through ini_set or .user.ini), followed by a restart of every PHP worker. They only reduce exposure; the package upgrade is the fix. No third-party repository is needed for it either, and the Ondrej PPA has no 26.04 build to offer anyway.
Configure Nginx to Process PHP Files
By default, Nginx serves static files but does not know how to handle PHP. You need to edit the default server block to pass .php requests to PHP-FPM via the Unix socket.
Open the default site configuration:
sudo vi /etc/nginx/sites-available/defaultReplace the entire contents with:
server {
    listen 80 default_server;
    listen [::]:80 default_server;

    root /var/www/html;
    index index.php index.html index.htm;

    server_name _;

    location / {
        try_files $uri $uri/ =404;
    }

    location ~ \.php$ {
        include snippets/fastcgi-php.conf;
        fastcgi_pass unix:/run/php/php8.5-fpm.sock;
    }

    location ~ /\.ht {
        deny all;
    }
}
The key line is fastcgi_pass unix:/run/php/php8.5-fpm.sock, which tells Nginx to forward PHP requests to the FPM process manager over a Unix socket. The snippets/fastcgi-php.conf include handles the FastCGI parameter mapping.
Test the configuration for syntax errors:
sudo nginx -tA clean test returns:
nginx: the configuration file /etc/nginx/nginx.conf syntax is ok
nginx: configuration file /etc/nginx/nginx.conf test is successful
Reload Nginx to apply the changes:
sudo systemctl reload nginxA reload keeps existing connections open. If nginx -t had failed, the reload would not have applied anything, and the old configuration would keep serving.
Configure the Firewall
If UFW is installed (it is by default on Ubuntu 26.04), allow HTTP and HTTPS traffic. Nginx registers application profiles with UFW during installation.
sudo ufw allow 'Nginx Full'
sudo ufw allow OpenSSH
sudo ufw enable
Verify the firewall rules:
sudo ufw statusThe output confirms both Nginx and SSH are allowed:
Status: active

To                         Action      From
--                         ------      ----
Nginx Full                 ALLOW       Anywhere
OpenSSH                    ALLOW       Anywhere
Nginx Full (v6)            ALLOW       Anywhere (v6)
OpenSSH (v6)               ALLOW       Anywhere (v6)
Allow OpenSSH before you run ufw enable, never after, because once UFW is active without that rule, every new SSH connection is refused and your next login fails. MariaDB’s port 3306 is not in the list, and it shouldn’t be.
Test PHP Processing
Create a PHP info page to confirm Nginx passes requests to PHP-FPM correctly:
echo '<?php phpinfo(); ?>' | sudo tee /var/www/html/info.phpOpen http://10.0.1.50/info.php in your browser. You should see the full PHP information page showing PHP 8.5.4 with all the extensions you installed. The Server API line should read FPM/FastCGI, confirming that Nginx is routing through PHP-FPM rather than CGI.
Remove the info page after testing, since it exposes sensitive server details:
sudo rm /var/www/html/info.phpDo not leave phpinfo() pages on a public server. They hand an attacker the exact PHP build, loaded modules and file paths.
Create a Test Database
With all three components running, test the full stack by creating a database, populating it with sample data, and querying it from PHP. Log into MariaDB:
sudo mariadbCreate a database, a dedicated user, and a table with sample records:
CREATE DATABASE lemp_test;
CREATE USER 'lemp_user'@'localhost' IDENTIFIED BY 'YourStrongPassword';
GRANT ALL PRIVILEGES ON lemp_test.* TO 'lemp_user'@'localhost';
FLUSH PRIVILEGES;

USE lemp_test;
CREATE TABLE servers (
    id INT AUTO_INCREMENT PRIMARY KEY,
    hostname VARCHAR(100) NOT NULL,
    ip_address VARCHAR(45) NOT NULL,
    os VARCHAR(100),
    created_at TIMESTAMP DEFAULT CURRENT_TIMESTAMP
);

INSERT INTO servers (hostname, ip_address, os) VALUES
    ('web01', '10.0.1.50', 'Ubuntu 26.04 LTS'),
    ('db01', '10.0.1.51', 'Ubuntu 26.04 LTS'),
    ('app01', '10.0.1.52', 'Rocky Linux 10');

SELECT * FROM servers;
EXIT;
The query returns the three sample records:
+----+----------+------------+-------------------+---------------------+
| id | hostname | ip_address | os                | created_at          |
+----+----------+------------+-------------------+---------------------+
|  1 | web01    | 10.0.1.50  | Ubuntu 26.04 LTS  | 2026-04-14 00:26:54 |
|  2 | db01     | 10.0.1.51  | Ubuntu 26.04 LTS  | 2026-04-14 00:26:54 |
|  3 | app01    | 10.0.1.52  | Rocky Linux 10    | 2026-04-14 00:26:54 |
+----+----------+------------+-------------------+---------------------+
The lemp_user account can only reach lemp_test, which is the least-privilege pattern to copy for each real application database.
Test PHP and MariaDB Together
Create a PHP script that connects to MariaDB and queries the test table. This validates the full LEMP chain: Nginx receives the request, passes it to PHP-FPM, and PHP queries MariaDB.
sudo vi /var/www/html/db_test.phpAdd the following PHP code:
<?php
$host = "localhost";
$user = "lemp_user";
$pass = "YourStrongPassword";
$db   = "lemp_test";

$conn = new mysqli($host, $user, $pass, $db);
if ($conn->connect_error) {
    die("Connection failed: " . $conn->connect_error);
}
echo "<h2>LEMP Stack Database Test</h2>";
echo "<p>Connected to MariaDB successfully.</p>";

$result = $conn->query("SELECT * FROM servers");
echo "<table border='1'><tr><th>ID</th><th>Hostname</th><th>IP</th><th>OS</th><th>Created</th></tr>";
while ($row = $result->fetch_assoc()) {
    echo "<tr><td>{$row['id']}</td><td>{$row['hostname']}</td><td>{$row['ip_address']}</td><td>{$row['os']}</td><td>{$row['created_at']}</td></tr>";
}
echo "</table>";
$conn->close();
?>
Open http://10.0.1.50/db_test.php in a browser. The page should display “Connected to MariaDB successfully” along with the servers table data. Once verified, remove the test file:
sudo rm /var/www/html/db_test.phpThat file holds the database password in plain text, so delete it as soon as the page loads.
All Services at a Glance
Confirm all three LEMP components are active and enabled to start on boot:
systemctl is-active nginx mariadb php8.5-fpmAll three should return active:
active
active
active
Check that they are enabled for boot:
systemctl is-enabled nginx mariadb php8.5-fpmEach should return enabled.
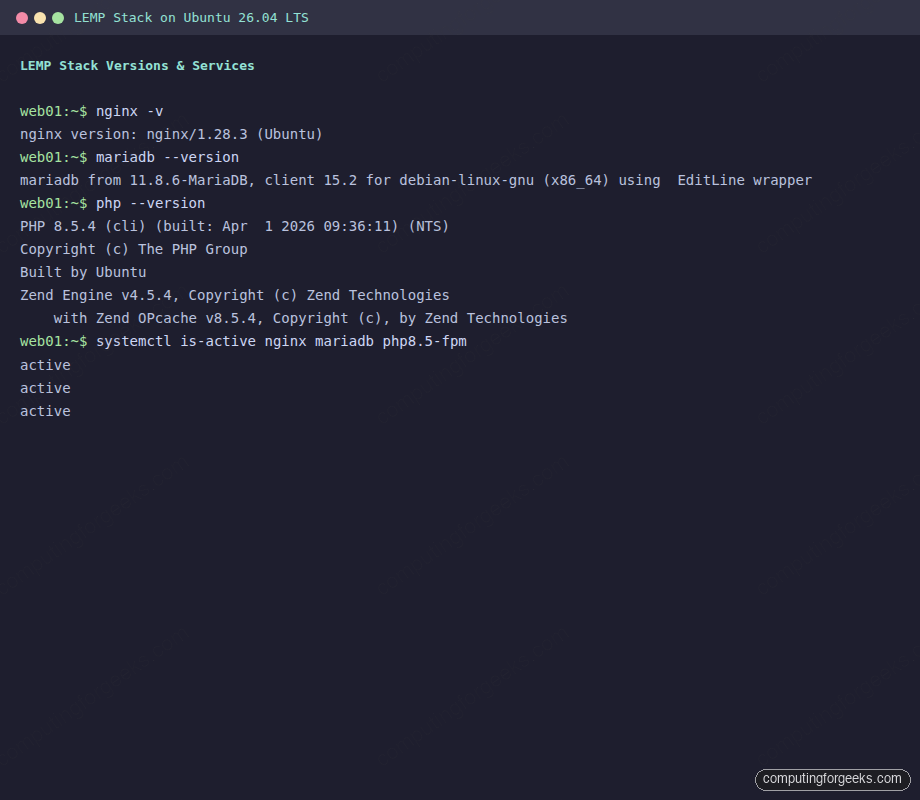
The screenshot predates the PHP2Shell update, so use the changelog check from the PHP section, not this version line, to judge your own server.
Performance Tuning for Production
The default settings work for testing, but production workloads need tuning. Here are the key parameters for each component.
Nginx Worker Tuning
The default worker_processes auto in /etc/nginx/nginx.conf matches the number of CPU cores, which is correct for most cases. On a 2-core server, Nginx spawns 2 workers. The worker_connections directive defaults to 768, which limits each worker to 768 simultaneous connections.
For a server handling more traffic, increase worker_connections in the events block:
sudo vi /etc/nginx/nginx.confFind the events block and adjust:
events {
    worker_connections 2048;
    multi_accept on;
}
With multi_accept on, each worker accepts all new connections at once instead of one at a time. On a 2-core server with 2048 connections per worker, Nginx can handle roughly 4096 concurrent connections.
PHP-FPM Pool Sizing
The default PHP-FPM pool at /etc/php/8.5/fpm/pool.d/www.conf uses pm = dynamic with pm.max_children = 5. For a server with 4 GB RAM, a rough formula for max_children is:
max_children = (Total RAM - System overhead) / Average PHP process size
Each PHP-FPM worker typically uses 30 to 50 MB. On a 4 GB server with ~1 GB reserved for the OS, MariaDB, and Nginx, that leaves about 3 GB for PHP. At 40 MB per process, you can set pm.max_children = 75. Adjust the pool config:
sudo vi /etc/php/8.5/fpm/pool.d/www.confUpdate the process manager settings:
pm = dynamic
pm.max_children = 75
pm.start_servers = 10
pm.min_spare_servers = 5
pm.max_spare_servers = 20
pm.max_requests = 500
The pm.max_requests = 500 setting recycles workers after 500 requests, which prevents memory leaks from accumulating. Restart PHP-FPM after changes:
sudo systemctl restart php8.5-fpmIf the restart fails, sudo php-fpm8.5 -t names the line it rejects. Raise pm.max_children only as far as RAM allows, because the pool can grow to that many workers at 30 to 50 MB each, and the OOM killer picks its own victims when it runs out.
MariaDB Buffer Pool
The InnoDB buffer pool is the single most impactful MariaDB setting. It caches table data and indexes in memory, reducing disk I/O. The default is 128 MB, which is too small for anything beyond trivial databases.
Set it to about 50 to 70 percent of available RAM dedicated to MariaDB. On a 4 GB server where MariaDB is the primary consumer, 1 to 2 GB is reasonable:
sudo vi /etc/mysql/mariadb.conf.d/50-server.cnfUnder the [mariadbd] section, add or modify:
innodb_buffer_pool_size = 1G
innodb_log_file_size = 256M
innodb_flush_log_at_trx_commit = 2
Setting innodb_flush_log_at_trx_commit = 2 gives a significant write performance boost at the cost of losing up to one second of transactions in a crash. For most web applications, this tradeoff is acceptable. Restart MariaDB to apply:
sudo systemctl restart mariadbYou can verify the buffer pool size took effect with:
mariadb -u root -p -e "SHOW VARIABLES LIKE 'innodb_buffer_pool_size';"The value is in bytes, so 1G reads as 1073741824, which is what our test server returned. If you still see 134217728 (the 128 MB default), the lines went in under the wrong section header and MariaDB ignored them.
Where to Go from Here
With LEMP running, you can deploy PHP applications like WordPress, Laravel, or custom frameworks. For container-based workflows, see our Docker CE installation guide for Ubuntu 26.04. If you need SSL with Let’s Encrypt on Nginx, that is covered separately. For PostgreSQL as an alternative to MariaDB, see our PostgreSQL 18 guide. If you prefer the Apache-based LAMP stack instead, we have a LAMP stack guide for Ubuntu 26.04 as well.