

The LAMP stack is still the default starting point for most PHP-based web applications. Ubuntu 26.04 LTS (Resolute Raccoon) ships with Apache 2.4.66, and the default repos include MariaDB 11.8 and PHP 8.5, which means you can get a working stack running in under 10 minutes without adding third-party repositories.
This guide walks through installing and configuring Apache, MariaDB 11.8.6, and PHP 8.5.4 with PHP-FPM on a fresh Ubuntu 26.04 server. It covers securing the database, enabling the firewall, testing PHP-to-MariaDB connectivity, and hardening the stack, plus checking PHP for the PHP2Shell fix. If you have not yet prepared your server, the Ubuntu 26.04 initial server setup guide covers SSH keys, a non-root user, and basic firewall configuration. Every step up to the final hardening restart was run again in October 2026 on a fresh Ubuntu 26.04.1 LTS server with the patched PHP 8.5 build.
Already running a LAMP server built from this guide? Run a2query -M, then jump to the PHP2Shell section below Configure Apache with PHP-FPM.
Prerequisites
- Ubuntu 26.04 LTS server (minimal or standard install)
- Root or sudo access
- Tested on: Apache 2.4.66, MariaDB 11.8.6, PHP 8.5.4 security build 8.5.4-0ubuntu1.5 (all from default Ubuntu repos)
- At least 1 GB RAM and 10 GB disk (2 GB RAM recommended for production workloads)
- For the SSL step only: a domain with a DNS A record pointing at the server
Update the System
Start with a package index refresh and apply any pending security patches.
sudo apt update && sudo apt upgrade -yOnce that finishes, reboot if a new kernel was installed. Otherwise, continue.
Install Apache
Apache is available in the default Ubuntu 26.04 repositories as apache2.
sudo apt install -y apache2The installer enables and starts Apache automatically. Confirm it is running:
sudo systemctl status apache2The output should show active (running):
● apache2.service - The Apache HTTP Server
     Loaded: loaded (/usr/lib/systemd/system/apache2.service; enabled; preset: enabled)
     Active: active (running) since Thu 2026-10-22 15:43:26 UTC; 4s ago
 Invocation: 379adf8a255942a89662680bb037a0aa
       Docs: https://httpd.apache.org/docs/2.4/
   Main PID: 1102 (apache2)
     Status: "Processing requests..."
      Tasks: 55 (limit: 1204)
     Memory: 5.3M (peak: 5.5M)
        CPU: 106ms
Check the installed version:
apache2 -vYou should see Apache 2.4.66:
Server version: Apache/2.4.66 (Ubuntu)
Server built:   2026-10-08T19:55:44
The Server built date moves with every Ubuntu security update of the apache2 package, so a newer date than the one above is normal. The version stays at 2.4.66 because Ubuntu backports security fixes into the release it shipped instead of moving to a new upstream version. PHP follows the same pattern further down, which is why the package changelog, not the version string, tells you whether a fix is installed.
Install MariaDB
Ubuntu 26.04 includes MariaDB 11.8 in its default repositories. Install both the server and client packages.
sudo apt install -y mariadb-server mariadb-clientVerify the service is active:
sudo systemctl status mariadbThe status line confirms MariaDB 11.8.6 is running:
● mariadb.service - MariaDB 11.8.6 database server
     Loaded: loaded (/usr/lib/systemd/system/mariadb.service; enabled; preset: enabled)
     Active: active (running) since Thu 2026-10-22 15:44:07 UTC; 4s ago
 Invocation: c8abd5d76f55493eaf6a67681b3b2c90
       Docs: man:mariadbd(8)
             https://mariadb.com/kb/en/library/systemd/
   Main PID: 2259 (mariadbd)
     Status: "Taking your SQL requests now..."
      Tasks: 18 (limit: 7951)
     Memory: 121M (peak: 121.6M)
        CPU: 1.002s
The package starts MariaDB and enables it at boot, so the service comes back after a reboot without extra steps.
Secure MariaDB
By default, MariaDB on Ubuntu uses unix_socket authentication for the root user. The interactive mariadb-secure-installation script handles the basics: setting a root password, removing anonymous users, disabling remote root login, and dropping the test database. Run it and answer the prompts:
sudo mariadb-secure-installationPress Enter at the first prompt, Enter current password for root (enter for none), because root has no password yet. Then set a strong root password and answer Y to all remaining questions (remove anonymous users, disallow remote root login, remove test database, reload privilege tables). Ubuntu’s build opens with a note saying MariaDB is already secure by default on Debian systems, because root logs in over unix_socket from sudo. The prompts still run, and answering Y to the unix_socket question keeps socket login for root while the new password covers everything else.
Alternatively, if you prefer to script it (useful for automation), the same steps can be done with SQL:
sudo mariadbThen run:
ALTER USER 'root'@'localhost' IDENTIFIED BY 'StrongPass123';
DELETE FROM mysql.global_priv WHERE User='';
DELETE FROM mysql.global_priv WHERE User='root' AND Host NOT IN ('localhost', '127.0.0.1', '::1');
DROP DATABASE IF EXISTS test;
DELETE FROM mysql.db WHERE Db='test' OR Db='test\_%';
FLUSH PRIVILEGES;
EXIT;
The ALTER USER line replaces unix_socket with password authentication, so on the scripted path a plain sudo mariadb now fails with ERROR 1045 (28000): Access denied for user 'root'@'localhost' (using password: NO). That is expected, so you add -p from here on. Test the new root password by logging in:
mariadb -u root -pEnter the password you set. If you land at the MariaDB [(none)]> prompt, authentication is working correctly. Type EXIT; to return to the shell.
Install PHP 8.5
Ubuntu 26.04 ships PHP 8.5 in the default repos. Install the core packages along with the most commonly needed extensions for web applications.
sudo apt install -y php php-fpm php-mysql php-cli php-curl php-gd php-mbstring php-xml php-zipThe php metapackage accepts PHP-FPM in place of the Apache module, so with php-fpm on the same line apt doesn’t pull in libapache2-mod-php and Apache keeps the event MPM. Confirm the PHP version:
php -vPHP 8.5.4 with OPcache enabled. The build date changes with each Ubuntu security update, but it doesn’t prove a build is patched, and the PHP2Shell section below shows the check that does:
PHP 8.5.4 (cli) (built: Oct 19 2026 14:35:18) (NTS)
Copyright (c) The PHP Group
Built by Ubuntu
Zend Engine v4.5.4, Copyright (c) Zend Technologies
    with Zend OPcache v8.5.4, Copyright (c), by Zend Technologies
Verify that all the extensions loaded correctly:
php -m | grep -iE 'mysql|curl|gd|mbstring|xml|zip'All requested modules should appear in the output:
curl
gd
libxml
mbstring
mysqli
mysqlnd
pdo_mysql
SimpleXML
xml
xmlreader
xmlwriter
zip
A missing name here means its package didn’t install, so rerun the apt line before you continue.
Configure Apache with PHP-FPM
PHP-FPM runs PHP as its own service, so Apache keeps the event MPM and hands .php requests to FPM over FastCGI instead of loading PHP into every worker. Enable the proxy modules and the PHP-FPM configuration:
sudo a2enmod proxy_fcgi setenvif
sudo a2enconf php8.5-fpm
sudo systemctl restart apache2
Start and enable the PHP-FPM service:
sudo systemctl enable --now php8.5-fpmConfirm PHP-FPM is active:
sudo systemctl status php8.5-fpmThe output shows the FPM master process and its workers:
● php8.5-fpm.service - The PHP 8.5 FastCGI Process Manager
     Loaded: loaded (/usr/lib/systemd/system/php8.5-fpm.service; enabled; preset: enabled)
     Active: active (running) since Thu 2026-10-22 15:45:32 UTC; 19s ago
 Invocation: e33ed88f5b534717a4689fa3de10aa93
       Docs: man:php-fpm8.5(8)
   Main PID: 12471 (php-fpm8.5)
     Status: "Processes active: 0, idle: 2, Requests: 0, slow: 0, Traffic: 0.00req/sec"
      Tasks: 3 (limit: 1204)
     Memory: 18.8M (peak: 20.8M)
        CPU: 80ms
Check which MPM Apache runs. It should print event, and that is what our October run returned:
a2query -MIf it prints prefork, the server was set up from an earlier version of this guide that also installed libapache2-mod-php. In that state Apache still loads PHP itself and only reaches FPM because conf-enabled loads last, since the <IfModule !mod_php8.c> guard in php8.5-fpm.conf never matches on PHP 8. Finish the switch in one go. The command sets up the FPM side first and disables mod_php last, so Apache never loses its PHP handler halfway through, and it also covers boxes that never had php8.5-fpm installed:
sudo apt install -y php8.5-fpm && sudo a2enmod proxy_fcgi setenvif && sudo a2enconf php8.5-fpm && sudo a2dismod php8.5 mpm_prefork && sudo a2enmod mpm_event && sudo systemctl restart apache2We ran that on a test server that had only mod_php and no FPM package, and afterwards a2query -M returned event and a test page reported the fpm-fcgi SAPI. Never run a2dismod php8.5 on its own, because Apache then serves PHP files as plain text with your source and credentials in them. With that settled, all three services (Apache, MariaDB, PHP-FPM) are active and running on Ubuntu 26.04.
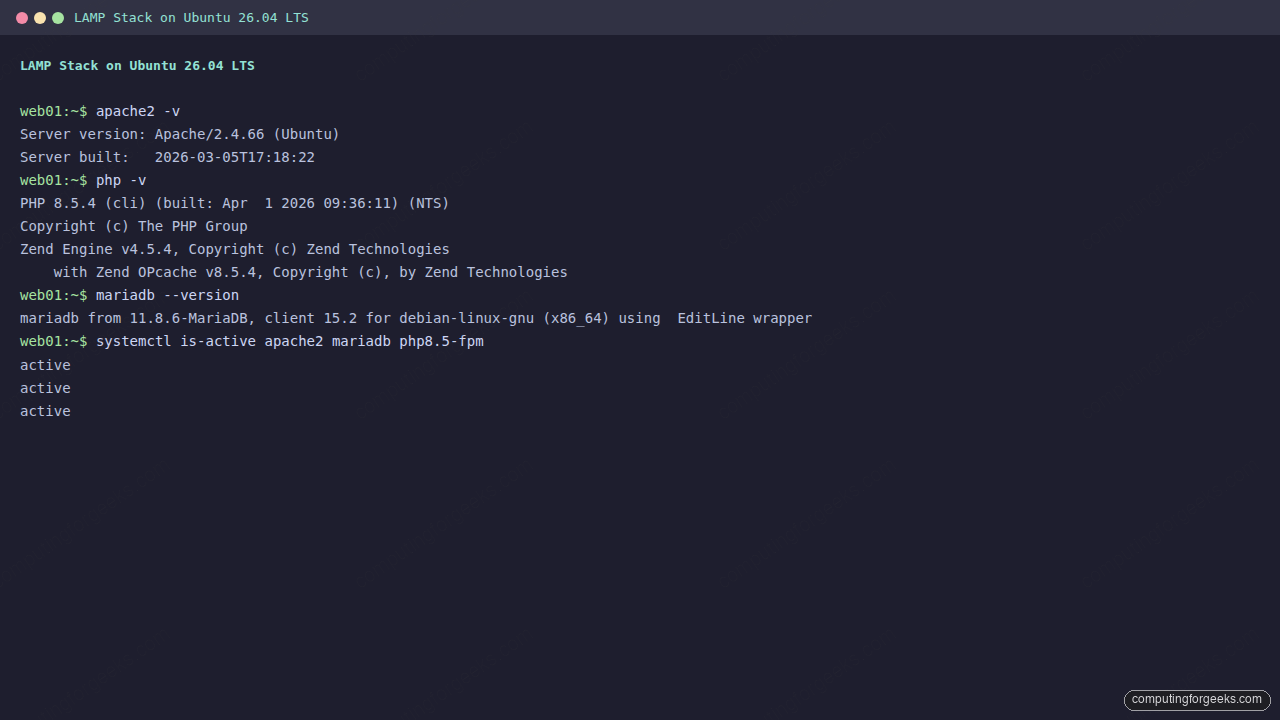
Before this box takes traffic, confirm the PHP packages carry the October 2026 security fix. A server built from an older image or a stale mirror can still run the vulnerable build.
Patch PHP2Shell (CVE-2026-109618, CVE-2026-109619)
PHP2Shell is the name for two critical remote code execution bugs in PHP itself, CVE-2026-109618 and CVE-2026-109619, both rated CVSS v4.0 9.2 in PHP’s pre-announcement of 20 October 2026. The fixes landed upstream on 21 October 2026 in PHP 8.5.12, 8.4.27, 8.3.36 and 8.2.35, as the PHP security advisory lists. Ubuntu 26.04 already ships the fix for the PHP 8.5 this guide installs, but as a backport: the security build 8.5.4-0ubuntu1.5 keeps the 8.5.4 version number, so php -v can’t tell you whether your server is patched.
The package changelog can, so search it for both CVE IDs on your server.
zgrep -E 'CVE-2026-10961[89]' /usr/share/doc/php8.5-common/changelog.Debian.gzA patched server prints the patch entries and both CVE IDs. A fresh install from this guide pulls the fixed build and can stop here once it sees this output. If the command prints nothing at all, your installed build is older than 8.5.4-0ubuntu1.5 and needs the upgrade below.
    - debian/patches/CVE-2026-109618_109619-pre1.patch: ext/filter: fix use-
    - debian/patches/CVE-2026-109618_109619-pre2.patch: Fix GH-23204: use-after-
    - debian/patches/CVE-2026-109618_109619-pre3.patch: Fix GH-17399: iconv
    - debian/patches/CVE-2026-109618_109619-pre4.patch: Fix JIT vm_interrupt
    - debian/patches/CVE-2026-109618_109619-pre5.patch: Fix GH-21664:
    - debian/patches/CVE-2026-109618_109619.patch: Avoid state corruption via
    - CVE-2026-109618
    - CVE-2026-109619
On a minimized Ubuntu install, dpkg leaves out /usr/share/doc, so the same zgrep fails with gzip: /usr/share/doc/php8.5-common/changelog.Debian.gz: No such file or directory. Compare the installed package version against the fixed one instead, which works with or without the docs:
dpkg --compare-versions "$(dpkg-query -W -f='${Version}' php8.5-common)" ge 8.5.4-0ubuntu1.5 && echo patched || echo VULNERABLEA server on the security build prints one word:
patchedWe ran it on a minimized-style install with the docs excluded, where it printed patched on 8.5.4-0ubuntu1.5 and VULNERABLE after we rolled the packages back to 8.5.4-0ubuntu1. Either check is enough, so use whichever your server supports.
The rest of this section is for an existing server. To reproduce one, we rolled our test box back to the older build 8.5.4-0ubuntu1, and the same zgrep printed nothing. The upgrade glob "php8.5*" covers the php8.5 metapackage and every installed php8.5 extension. libapache2-mod-php8.5 stays on the line for servers that still carry mod_php from an earlier version of this guide, and apt skips it where it isn’t installed:
sudo apt update
sudo apt install --only-upgrade -y "php8.5*" libapache2-mod-php8.5
apt prints a “Skipping” line for every matching package that isn’t installed, then upgrades the rest. On our FPM-only server that was 11 packages:
Upgrading:
  php8.5         php8.5-curl  php8.5-mbstring  php8.5-xml
  php8.5-cli     php8.5-fpm   php8.5-mysql     php8.5-zip
  php8.5-common  php8.5-gd    php8.5-readline

Summary:
  Upgrading: 11, Installing: 0, Removing: 0, Not Upgrading: 0
Note the upgrade time, because the restart check below compares against it. dpkg logs every package change, and the log rotates, so search the old copies too:
zgrep -h ' upgrade php8.5' /var/log/dpkg.log* | sort | tail -3The last lines show the packages moving from the old build to 8.5.4-0ubuntu1.5:
2026-10-22 15:47:42 upgrade php8.5-cli:amd64 8.5.4-0ubuntu1 8.5.4-0ubuntu1.5
2026-10-22 15:47:42 upgrade php8.5-common:amd64 8.5.4-0ubuntu1 8.5.4-0ubuntu1.5
2026-10-22 15:47:47 upgrade php8.5:all 8.5.4-0ubuntu1 8.5.4-0ubuntu1.5
Restart PHP-FPM so no worker keeps running the old code, because a process that started before the upgrade still has the vulnerable build loaded in memory. The package restarted FPM by itself in our first test run, but restart anyway and confirm it. If a2query -m php8.5 reports the module enabled, Apache loads PHP too, so restart apache2 as well or finish the FPM switch from the previous section:
sudo systemctl restart php8.5-fpmBecause the version string doesn’t change, you prove the running process is new instead. ActiveEnterTimestamp must be later than the upgrade time from dpkg.log:
systemctl show -p ActiveEnterTimestamp php8.5-fpmOur packages finished at 15:47:47 UTC, and FPM came back after that:
ActiveEnterTimestamp=Thu 2026-10-22 15:48:03 UTCRun the zgrep again and it lists both CVE IDs. Long-running PHP CLI processes, such as queue workers under supervisor or systemd, keep the old code until they restart too, so restart those as well.
Older Ubuntu releases differ, and the free archive is not patched on all of them. These are the native PHP builds each release served on 22 October 2026:
- Ubuntu 24.04: php8.3
8.3.6-0ubuntu0.24.04.13, patched - Ubuntu 22.04: php8.1
8.1.2-1ubuntu2.28, patched - Ubuntu 20.04: php7.4
7.4.3-4ubuntu2.29, not patched (fix in Ubuntu Pro only)
A LAMP box on 20.04 without Pro is better rebuilt on 26.04 with this guide, and the PHP 8.5 install guide for Ubuntu 26.04 covers the extra extensions most migrated apps need.
Configure the Firewall
UFW stays inactive until you enable it, and once enabled it drops every incoming connection that no rule allows. Add the SSH rule first and enable the firewall last, because enabling UFW without an SSH rule cuts off your session on a remote server. If your SSH daemon listens on a non-default port, allow that port instead of the OpenSSH profile (for example sudo ufw allow 2222/tcp).
sudo ufw allow OpenSSH
sudo ufw allow 'Apache Full'
sudo ufw enable
ufw enable warns that it may disrupt existing SSH connections, so answer y once the SSH rule is in. Then verify the rules:
sudo ufw status verboseOpenSSH and Apache (ports 80 and 443) should be listed for IPv4 and IPv6:
Status: active
Logging: on (low)
Default: deny (incoming), allow (outgoing), deny (routed)
New profiles: skip

To                         Action      From
--                         ------      ----
22/tcp (OpenSSH)           ALLOW IN    Anywhere
80,443/tcp (Apache Full)   ALLOW IN    Anywhere
22/tcp (OpenSSH (v6))      ALLOW IN    Anywhere (v6)
80,443/tcp (Apache Full (v6)) ALLOW IN    Anywhere (v6)
The routed default reads deny here because IP forwarding was on in our October test system. On a server with forwarding off it reads disabled, as it did in our April run, and incoming traffic is limited to SSH, 80 and 443 either way.
Test the LAMP Stack
With all three components installed and running, create a PHP info page to confirm Apache is processing PHP through FPM.
PHP Info Page
Create a quick test file in the Apache document root:
echo '<?php phpinfo(); ?>' | sudo tee /var/www/html/info.phpOpen http://10.0.1.50/info.php in a browser. You should see the full PHP information page showing PHP 8.5.4, the loaded extensions, and the Server API listed as FPM/FastCGI. Remove this file after testing because it exposes sensitive configuration details:
sudo rm /var/www/html/info.phpLeaving info.php in place hands anyone your full PHP configuration, including file paths and every loaded module.
Create a Test Database
To verify the full stack end to end (Apache serving PHP that queries MariaDB), create a test database with sample data.
mariadb -u root -pEnter the root password, then at the MariaDB prompt create the database, a dedicated user, and a table with some rows:
CREATE DATABASE testdb;
CREATE USER 'testuser'@'localhost' IDENTIFIED BY 'TestPass456';
GRANT ALL PRIVILEGES ON testdb.* TO 'testuser'@'localhost';
FLUSH PRIVILEGES;

USE testdb;
CREATE TABLE servers (
  id INT AUTO_INCREMENT PRIMARY KEY,
  hostname VARCHAR(50) NOT NULL,
  ip_address VARCHAR(15) NOT NULL,
  os VARCHAR(50) NOT NULL,
  role VARCHAR(30) NOT NULL
);

INSERT INTO servers (hostname, ip_address, os, role) VALUES
('web01', '10.0.1.10', 'Ubuntu 26.04', 'Web Server'),
('db01', '10.0.1.20', 'Ubuntu 26.04', 'Database'),
('app01', '10.0.1.30', 'Ubuntu 26.04', 'Application');

SELECT * FROM servers;
EXIT;
The SELECT query confirms the data was inserted:
+----+----------+------------+--------------+-------------+
| id | hostname | ip_address | os           | role        |
+----+----------+------------+--------------+-------------+
|  1 | web01    | 10.0.1.10  | Ubuntu 26.04 | Web Server  |
|  2 | db01     | 10.0.1.20  | Ubuntu 26.04 | Database    |
|  3 | app01    | 10.0.1.30  | Ubuntu 26.04 | Application |
+----+----------+------------+--------------+-------------+
Those three rows give the PHP test page something to read back in the next step.
PHP + MariaDB Connection Test
Create a PHP script that connects to MariaDB and queries the test table. This proves the entire LAMP pipeline works.
sudo vi /var/www/html/dbtest.phpAdd the following PHP code:
<?php
$host = "localhost";
$user = "testuser";
$pass = "TestPass456";
$db   = "testdb";

$conn = new mysqli($host, $user, $pass, $db);
if ($conn->connect_error) {
    die("Connection failed: " . $conn->connect_error);
}

echo "<h2>LAMP Stack - PHP + MariaDB Connection Test</h2>";
echo "<p>Connected to MariaDB successfully.</p>";
echo "<p>Server info: " . $conn->server_info . "</p>";
echo "<p>PHP version: " . phpversion() . "</p>";

$result = $conn->query("SELECT * FROM servers");
if ($result->num_rows > 0) {
    echo "<table border='1' cellpadding='8'>";
    echo "<tr><th>ID</th><th>Hostname</th><th>IP</th><th>OS</th><th>Role</th></tr>";
    while ($row = $result->fetch_assoc()) {
        echo "<tr><td>".$row["id"]."</td><td>".$row["hostname"]."</td>";
        echo "<td>".$row["ip_address"]."</td><td>".$row["os"]."</td>";
        echo "<td>".$row["role"]."</td></tr>";
    }
    echo "</table>";
}
$conn->close();
?>
Open http://10.0.1.50/dbtest.php in a browser. The page displays the MariaDB server version, PHP version, and the server inventory table pulled from the database. This confirms Apache, PHP-FPM, and MariaDB are all working together.
Clean up the test files once you have verified everything works:
sudo rm /var/www/html/dbtest.php
mariadb -u root -p -e "DROP DATABASE testdb; DROP USER 'testuser'@'localhost';"
Both commands print nothing when they succeed, so silence is the result you want. Don’t skip this cleanup, because dbtest.php keeps the testuser password in plain text inside the web root and that account has full rights on testdb.
Production Hardening
The default Apache and PHP configuration is fine for testing but leaks version information and serves unnecessary content. Before exposing this stack to the internet, tighten a few settings.
Hide Apache Version Information
By default, Apache broadcasts its version in HTTP headers and error pages. Disable this.
sudo vi /etc/apache2/conf-enabled/security.confFind and change these two directives:
ServerTokens Prod
ServerSignature Off
ServerTokens Prod reduces the Server header to just “Apache” with no version. ServerSignature Off removes the version footer from error pages.
Disable Directory Listing
Prevent Apache from showing directory contents when no index file exists.
sudo vi /etc/apache2/apache2.confFind the <Directory /var/www/> block and remove Indexes from the Options line, so it reads:
Options FollowSymLinksWith Indexes gone, a directory without an index file returns 403 Forbidden instead of a file listing.
Harden PHP Settings
Ubuntu 26.04’s FPM php.ini already ships expose_php = Off, display_errors = Off and log_errors = On, so check those three are still set and raise the limits real applications hit first. Keep upload_max_filesize below post_max_size, because the uploaded file travels inside the POST body.
sudo vi /etc/php/8.5/fpm/php.iniSet these values:
expose_php = Off
display_errors = Off
log_errors = On
upload_max_filesize = 64M
post_max_size = 72M
memory_limit = 256M
expose_php = Off strips the X-Powered-By: PHP/8.5.4 header. Turning off display_errors prevents stack traces from leaking to users, while log_errors keeps them in the log. After the restart below, a test page served by Apache reported 64M, 72M and 256M for the three limits, and the response carried no X-Powered-By header.
Remove the Default Apache Page
The default “It works!” page tells attackers you have a stock installation, so delete it. Disabling 000-default.conf with a2dissite is not enough: in our October run Apache kept serving the same page from /var/www/html through its main server config. Remove the file itself instead, and with Indexes already off the bare IP answers 403 Forbidden until you deploy an app:
sudo rm /var/www/html/index.htmlApply all changes by restarting both services:
sudo systemctl restart apache2 php8.5-fpmBoth units should be active afterwards. Confirm it with systemctl is-active apache2 php8.5-fpm, which prints active once per service.
Enable SSL/TLS
Never serve production traffic over plain HTTP. certbot’s Apache plugin needs a DNS A record that points your domain at this server and a VirtualHost whose ServerName matches the domain. Set the name in the default site, replacing yourdomain.com with your own:
sudo sed -i 's/#ServerName www.example.com/ServerName yourdomain.com/' /etc/apache2/sites-available/000-default.conf
sudo apache2ctl configtest
sudo systemctl reload apache2
The configtest must end with Syntax OK before the reload. Then install certbot and request the certificate:
sudo apt install -y certbot python3-certbot-apache
sudo certbot --apache -d yourdomain.com --non-interactive --agree-tos -m [email protected]
Certbot configures the Apache VirtualHost with SSL, sets up automatic certificate renewal, and redirects HTTP to HTTPS.
Our October test ran the ServerName edit and configtest but not the two certbot commands, because they need a public domain. Verify auto-renewal is working:
sudo certbot renew --dry-runIf you prefer the LEMP stack (Nginx instead of Apache), that guide covers the full Nginx, MariaDB, and PHP-FPM setup, and the Nginx on Ubuntu 26.04 with Let’s Encrypt guide covers Nginx as a reverse proxy.
For containerized deployments on this same Ubuntu 26.04 base, see the Docker CE installation guide. If you need a more powerful database backend, PostgreSQL 18 on Ubuntu 26.04 is a solid alternative to MariaDB. The previous version of this guide covering LAMP on Ubuntu 24.04 is available if you are running an older LTS release. For RHEL-based systems, the MariaDB on Rocky Linux guide covers the RPM-based workflow. For a full overview of what changed in this release, check the Ubuntu 26.04 LTS features roundup.




