XAMPP bundles Apache, MariaDB, PHP, phpMyAdmin, and Perl into a single installer that gets a full local web development stack running in under five minutes. Whether you’re prototyping a WordPress site, testing a Laravel app, or just need a quick LAMP environment without touching your system packages, the unattended installer does it in one command. The trade is that XAMPP carries its own PHP under /opt/lampp, so Ubuntu security updates never reach it.
This guide walks through installing any of the three available PHP editions on Ubuntu 24.04 and 22.04, configuring auto-start with systemd, deploying WordPress as a practical test, checking and mitigating the PHP2Shell bugs, and moving to PHP 8.3 or 8.4 when XAMPP’s bundled version isn’t enough. If you’re on a different distro, check out the Debian guide or the Rocky/AlmaLinux guide. The bundled PHP still answers as 8.2.12 (re-tested October 2026 on Ubuntu 24.04 and 22.04 with the SourceForge installer), a November 2023 build that carries none of the PHP2Shell fixes.
Prerequisites
You need a running Ubuntu 24.04 or 22.04 system (desktop or server), a user account with sudo privileges, and an active internet connection to download the installer. Make sure no existing Apache, MySQL, or MariaDB service is running on the system to avoid port conflicts.
The lampp control script checks for busy ports with netstat, which a fresh Ubuntu 24.04 install does not ship. Without it every start prints netstat: command not found and the port check is skipped, so install the net-tools package first:
sudo apt install -y net-toolsXAMPP needs nothing else from the system, because Apache, MariaDB and PHP all come from the installer.
Choose Your PHP Edition
XAMPP ships three separate installers, each built around a different PHP version. Set a variable for the one you want:
export PHP_VER="8.2.12" # pin: no release API, other editions 8.1.25 and 8.0.30 #https://www.apachefriends.org/download.htmlPick 8.2 unless an application forces an older branch. It is the only one of the three that PHP still patches (security fixes until 31 December 2026), although XAMPP’s 8.2.12 build has picked up none of those fixes since November 2023. Branches 8.1 and 8.0 are past end of life upstream, so choose them only to reproduce a legacy application locally, never to serve it.
Download and Install XAMPP
Grab the installer from SourceForge using the version variable:
wget "https://sourceforge.net/projects/xampp/files/XAMPP%20Linux/${PHP_VER}/xampp-linux-x64-${PHP_VER}-0-installer.run/download" -O xampp-installer.runMake the installer executable and run it in unattended mode:
chmod +x xampp-installer.run
sudo ./xampp-installer.run --mode unattended
The --mode unattended flag skips the graphical installer wizard and runs everything silently. The installer unpacks a 160 MB archive into /opt/lampp and prints nothing while it works. It ran for 12 to 18 minutes on our test systems, and the time varies with disk speed, so let it finish. When it is done it starts Apache on its own.
Start XAMPP
Fire up all services with a single command:
sudo /opt/lampp/lampp startBecause the installer already started Apache, a fresh install reports it as already running and brings up MariaDB and ProFTPD:
Starting XAMPP for Linux 8.2.12-0...
XAMPP: Starting Apache...already running.
XAMPP: Starting MySQL...ok.
XAMPP: Starting ProFTPD...ok.
If Apache or MySQL fails to start, the most common cause is another service already occupying port 80 or 3306. We’ll cover that in the troubleshooting section below.
Verify Installed Versions
Confirm the exact versions XAMPP installed. Check PHP first:
/opt/lampp/bin/php -vThe output confirms PHP 8.2.12:
PHP 8.2.12 (cli) (built: Nov 25 2023 08:09:53) (NTS)
Copyright (c) The PHP Group
Zend Engine v4.2.12, Copyright (c) Zend Technologies
Check the MariaDB version:
/opt/lampp/bin/mysql --versionThis shows MariaDB 10.4.32 bundled with XAMPP:
/opt/lampp/bin/mysql Ver 15.1 Distrib 10.4.32-MariaDB, for Linux (x86_64) using readline 5.1And verify Apache:
/opt/lampp/bin/httpd -vApache 2.4.58 is the bundled web server:
Server version: Apache/2.4.58 (Unix)
Server built:   Nov 25 2023 07:37:35
All three components come from the same November 2023 build. MariaDB 10.4 and Apache 2.4.58 are also old, but the PHP build is the one with a remote code execution bug published against it this month.
XAMPP and PHP2Shell (CVE-2026-109618, CVE-2026-109619)
PHP2Shell is a pair of critical remote code execution bugs in PHP itself, CVE-2026-109618 and CVE-2026-109619, both rated CVSS v4.0 9.2 and fixed upstream on 21 October 2026 in PHP 8.5.12, 8.4.27, 8.3.36 and 8.2.35 (PHP security advisory). XAMPP has no fixed build: on 22 October 2026 the Apache Friends download page still lists 8.2.12, 8.1.25 and 8.0.30 as the newest Linux installers, and apt upgrade never touches the PHP in /opt/lampp. Every XAMPP install is vulnerable, so keep it on localhost for development only (the hardening section below binds Apache to 127.0.0.1).
XAMPP ships an unmodified upstream PHP, so here the version string is the whole check: anything on the 8.2 line below 8.2.35 is affected. Read it through Apache rather than the CLI, because mod_php is what an attacker reaches. Create a probe page that prints the version, the server API and the two settings the mitigation changes:
echo '<?php echo PHP_VERSION, " ", PHP_SAPI, " upload_progress=", ini_get("session.upload_progress.enabled"), " memory_limit=", ini_get("memory_limit"), " post_max_size=", ini_get("post_max_size"), " upload_max_filesize=", ini_get("upload_max_filesize"), PHP_EOL;' | sudo tee /opt/lampp/htdocs/p2s.phpRequest it through Apache with curl.
curl -s http://localhost/p2s.phpOur test box answered with the stock build, upload progress tracking on, XAMPP’s 512M memory limit and 40M request limits:
8.2.12 apache2handler upload_progress=1 memory_limit=512M post_max_size=40M upload_max_filesize=40MFor anything reachable from a network, drop XAMPP. Two patched options existed on 22 October. The first is Ubuntu’s own PHP, which carries the fix as a backport under its old version number: php8.3 8.3.6-0ubuntu0.24.04.13 on Ubuntu 24.04 and php8.1 8.1.2-1ubuntu2.28 on 22.04, both from the security pocket, and the LAMP stack guide for Ubuntu 24.04 installs that php8.3 build. The second is the Ondrej PPA, which ships the upstream fixed releases (8.5.12, 8.4.27) and is what the PHP 8.5 setup on Ubuntu 24.04 uses. On Ubuntu 26.04 the archive’s own patched 8.5 is the route, covered in the PHP 8.5 on Ubuntu 26.04 guide.
On a development box that has to keep XAMPP, the PHP advisory lists measures that reduce exposure without fixing anything, so treat all of them as temporary. Set memory_limit to -1 where applications cannot override it, disable upload progress tracking, and lower post_max_size to 8M (32M if you need uploads, with upload_max_filesize below it). Under mod_php the place for that is Apache’s own configuration with php_admin_value, because a php_value line in any .htaccess overrides php.ini. On our test box an .htaccess put memory_limit back to 128M and post_max_size up to 100M when the settings lived in php.ini, and changed nothing once they were php_admin values.
We add one measure of our own on top: refusing multipart/form-data requests with mod_rewrite. It breaks file uploads, the WordPress media library included, so skip those three lines if you need uploads and use the 32M limits instead. Create an Apache include file for all of it:
sudo vim /opt/lampp/etc/extra/httpd-php2shell.confAdd the four PHP settings, then the three rewrite lines. XAMPP already loads mod_php and mod_rewrite, so nothing else needs enabling.
php_admin_flag session.upload_progress.enabled off
php_admin_value memory_limit -1
php_admin_value post_max_size 8M
php_admin_value upload_max_filesize 2M
RewriteEngine On
RewriteCond %{HTTP:Content-Type} multipart/form-data [NC]
RewriteRule ^ - [F]
Rewrite rules are not inherited by virtual hosts, and XAMPP serves HTTPS from its own virtual host on port 443. Include the file in the main config and inside that virtual host, test the syntax, then restart Apache. Any <VirtualHost> you add later, for example in httpd-vhosts.conf, needs the same Include line.
echo 'Include etc/extra/httpd-php2shell.conf' | sudo tee -a /opt/lampp/etc/httpd.conf
sudo sed -i 's|^</VirtualHost>|Include etc/extra/httpd-php2shell.conf\n</VirtualHost>|' /opt/lampp/etc/extra/httpd-ssl.conf
sudo /opt/lampp/bin/apachectl configtest
sudo /opt/lampp/lampp restartapache
Prove both changes through Apache with the probe page, a multipart POST and a normal form POST.
curl -s http://localhost/p2s.php
echo hello > /tmp/up.txt
curl -s -o /dev/null -w '%{http_code}\n' -F file=@/tmp/up.txt http://localhost/p2s.php
curl -s -o /dev/null -w '%{http_code}\n' -d a=1 http://localhost/p2s.php
The probe now reports upload progress off, no memory limit and the 8M and 2M request limits, the multipart upload gets 403 and the plain form POST still gets 200. The same multipart request against https://localhost returned 403 on the test box as well:
8.2.12 apache2handler upload_progress=0 memory_limit=-1 post_max_size=8M upload_max_filesize=2M
403
200
A memory_limit of -1 lets one request take all the RAM on the machine, so remove the include once Apache Friends ships an 8.2.35 or newer build once Apache Friends ships an 8.2.35 or newer build, and delete p2s.php when you are done with it. The same check against a new installer is a one-line curl.
Access the XAMPP Dashboard
Open http://localhost/dashboard/ in your browser. The default XAMPP dashboard loads with links to phpMyAdmin, FAQs, and the HOW-TO guides.
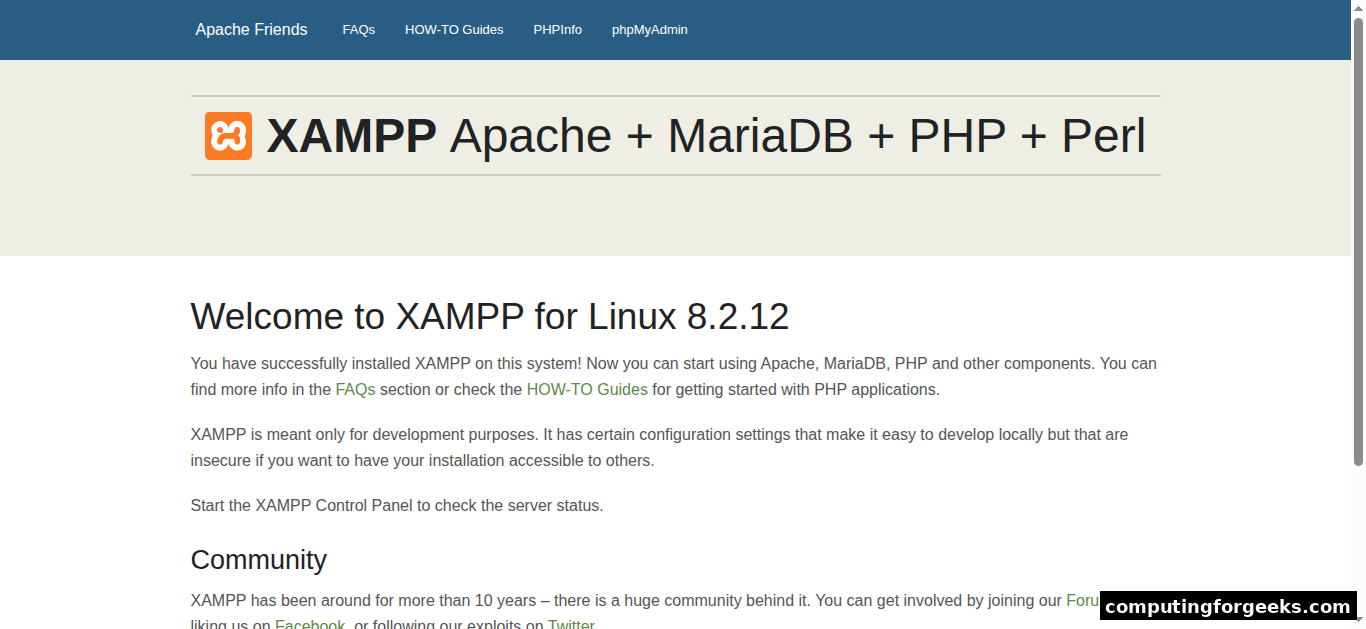
If the page does not load, check that Apache is up with sudo /opt/lampp/lampp status, which lists Apache, MySQL and ProFTPD as running or not running.
Access phpMyAdmin
Navigate to http://localhost/phpmyadmin/ to manage databases through the web interface. By default, phpMyAdmin connects as root with no password.
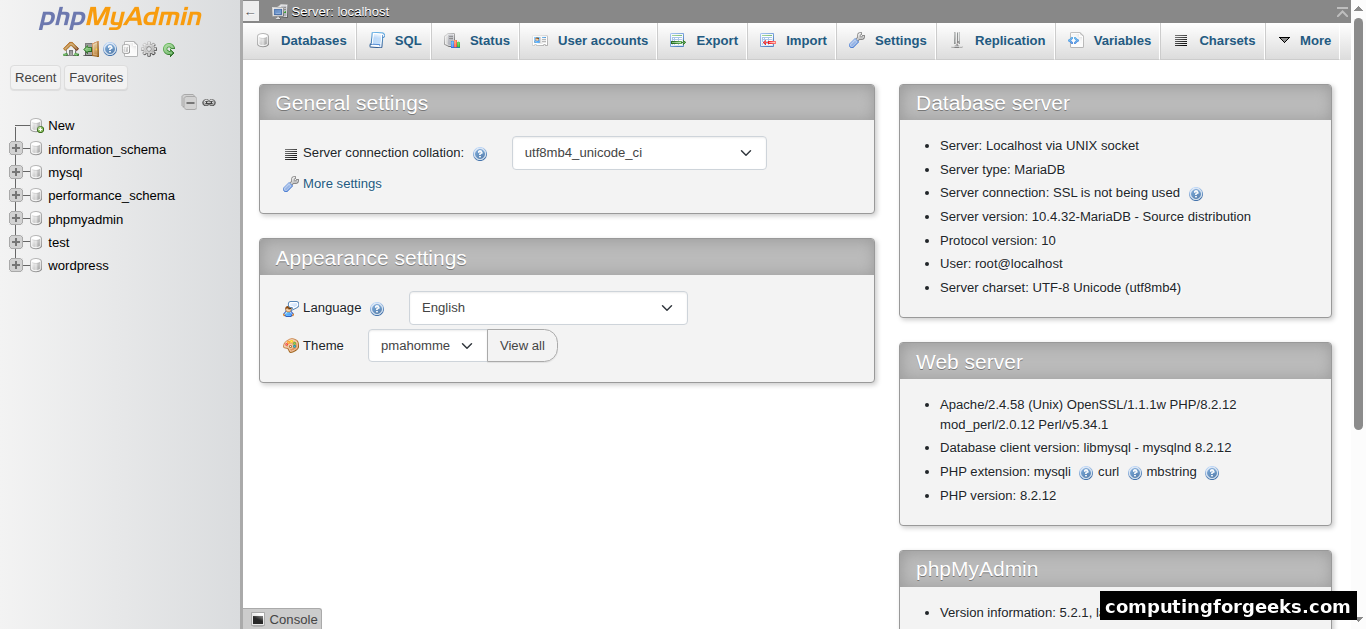
We’ll lock this down with a password in the security hardening section.
Test PHP Processing
Create a quick phpinfo page to confirm Apache is processing PHP correctly:
echo '<?php phpinfo(); ?>' | sudo tee /opt/lampp/htdocs/test.phpOpen http://localhost/test.php in your browser. The full PHP configuration page should load, showing all compiled modules, loaded extensions, and environment variables.
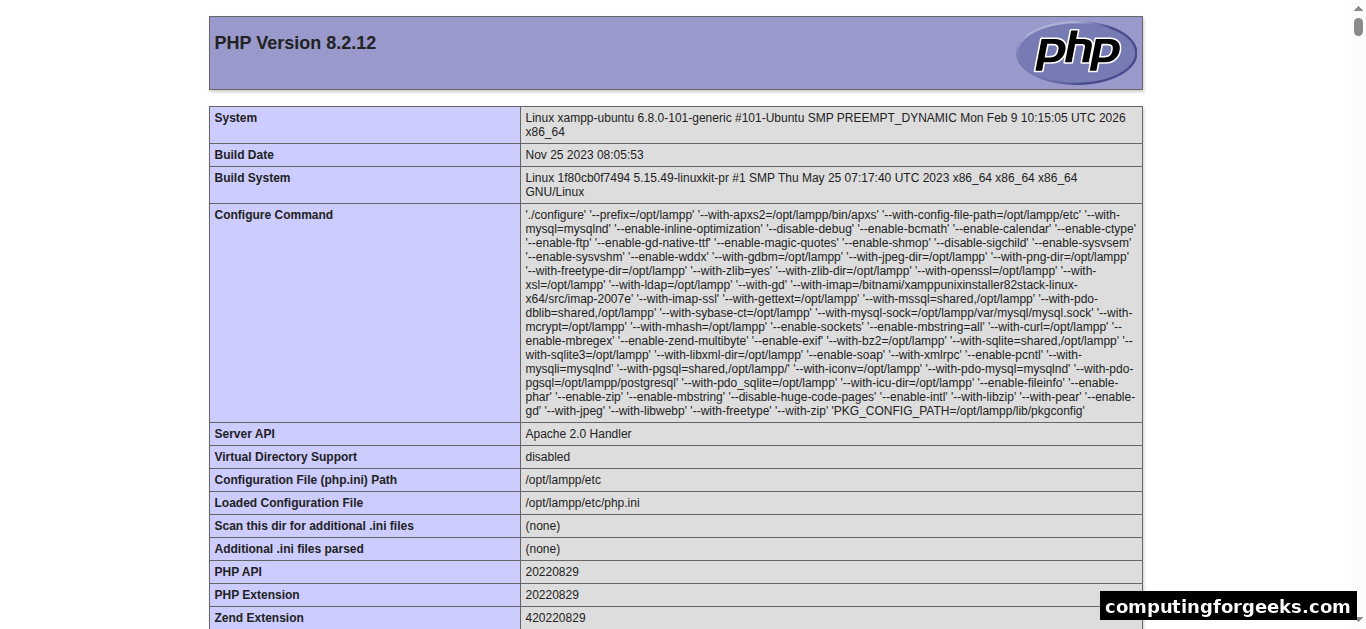
Remove this file when you’re done testing. Leaving phpinfo() exposed is a security risk since it reveals your entire server configuration.
sudo rm /opt/lampp/htdocs/test.phpThe p2s.php probe from the PHP2Shell section prints far less, but delete it the same way once you have finished checking the mitigations.
Auto-Start XAMPP on Boot
XAMPP doesn’t ship with a systemd unit file, so it won’t survive a reboot by default. Create one:
printf '[Unit]\nDescription=XAMPP\nAfter=network.target\n\n[Service]\nType=forking\nExecStart=/opt/lampp/lampp start\nExecStop=/opt/lampp/lampp stop\n\n[Install]\nWantedBy=multi-user.target\n' | sudo tee /etc/systemd/system/xampp.serviceReload systemd and enable the service:
sudo systemctl daemon-reload
sudo systemctl enable xampp
Enabling the unit makes systemd start XAMPP at boot, but systemd only tracks processes it started itself. XAMPP is already running from lampp start, and on our Ubuntu 24.04 test box a systemctl restart xampp in that state left the unit inactive with Apache and MariaDB stopped. Hand the running stack over to systemd once.
sudo /opt/lampp/lampp stop
sudo systemctl start xampp
Check that the unit is up.
systemctl is-active xamppIt prints active. From here on, manage XAMPP with sudo systemctl restart xampp, sudo systemctl stop xampp and sudo systemctl status xampp rather than lampp start and lampp stop. A restart took 3 seconds on Ubuntu 24.04 and 22.04, but give MariaDB a few seconds after a start. When a restart came within a second of a start, lampp stop reported MariaDB as not running, so systemd waited out its 90 second stop timeout and then killed mysqld.
Security Hardening
A default XAMPP install runs MariaDB with no root password and listening on the network, phpMyAdmin’s pma user with no password, and ProFTPD with the stock daemon password xampp. The bundled security script fixes those in one pass:
sudo /opt/lampp/lampp securityThe script asks four questions in a fixed order, and each one changes a different file or account, so answer yes to the first three. The fourth defaults to yes, so type no there:
- MariaDB network access: adds
skip-networkingto/opt/lampp/etc/my.cnfand restarts MariaDB, after which port 3306 stopped listening on our test box. - pma password: sets the phpMyAdmin control user’s password in MariaDB and in phpMyAdmin’s config.
- MariaDB root password: sets it and changes phpMyAdmin’s authentication method.
- FTP password: broken in the 8.2.12 build. The helper that hashes the new password is a PHP script with a short
<?open tag, and XAMPP’s ownphp.inisetsshort_open_tag=Off, so the script’s source code lands in/opt/lampp/etc/proftpd.confand ProFTPD refuses to start.
After the root password is set, the WordPress database commands later in this guide need -p, so keep the password at hand.
The FTP failure matters more than it looks. With ProFTPD unable to start, lampp start exits with an error (fatal: unknown configuration directive 'function' on line 44 of '/opt/lampp/etc/proftpd.conf'), systemd marks xampp.service as failed and stops Apache and MariaDB with it. A development box rarely needs FTP, so switch ProFTPD off for good, which also removes the stock xampp FTP password from the network. This also recovers a box where the FTP question was already answered yes.
sudo /opt/lampp/lampp stopftplampp status then reports ProFTPD is deactivated. and later starts skip it.
What the script leaves alone is Apache, which still listens on every interface on ports 80 and 443. With an unpatched PHP behind it, those two open ports matter more for PHP2Shell than any password. Bind both ports to the loopback address so only the local machine can reach XAMPP:
sudo sed -i 's/^Listen 80$/Listen 127.0.0.1:80/' /opt/lampp/etc/httpd.conf
sudo sed -i 's/^Listen 443$/Listen 127.0.0.1:443/' /opt/lampp/etc/extra/httpd-ssl.conf
sudo systemctl restart xampp
Confirm that Apache now listens on loopback only.
sudo netstat -tlnp | grep httpdBoth sockets show 127.0.0.1, and a request to the machine’s LAN address is refused:
tcp        0      0 127.0.0.1:443           0.0.0.0:*               LISTEN      19885/httpd
tcp        0      0 127.0.0.1:80            0.0.0.0:*               LISTEN      19885/httpd
This guide assumes XAMPP runs on the desktop you browse from. On a remote server, keep the loopback binding and reach the pages through an SSH tunnel from your workstation with ssh -L 8080:127.0.0.1:80 user@server, then browse http://localhost:8080/ while the session stays open. If you deliberately test from another device on your LAN, revert the two Listen lines for that session only and put them back afterwards.
Deploy WordPress on XAMPP
A practical way to validate your XAMPP stack is to deploy a real application. WordPress is the obvious choice since it exercises PHP, MariaDB, and Apache together.
Create the Database
Use the bundled MySQL client to set up a dedicated database and user:
/opt/lampp/bin/mysql -u root -e "CREATE DATABASE wordpress;"
/opt/lampp/bin/mysql -u root -e "CREATE USER 'wpuser'@'localhost' IDENTIFIED BY 'StrongP@ss';"
/opt/lampp/bin/mysql -u root -e "GRANT ALL ON wordpress.* TO 'wpuser'@'localhost';"
If you already set a root password with lampp security, append -p to each command and enter the password when prompted.
Download WordPress
Grab the latest release and extract it into the web root:
cd /opt/lampp/htdocs
sudo wget -q https://wordpress.org/latest.tar.gz
sudo tar xzf latest.tar.gz
sudo rm latest.tar.gz
Copy the sample config file so WordPress can find its settings:
sudo cp /opt/lampp/htdocs/wordpress/wp-config-sample.php /opt/lampp/htdocs/wordpress/wp-config.phpThe copy keeps the sample’s placeholder credentials, so WordPress cannot connect to MariaDB until you edit the next three lines.
Configure Database Credentials
Open the config file in your preferred editor:
sudo vim /opt/lampp/htdocs/wordpress/wp-config.phpFind and update these three lines to match the database you created:
define( 'DB_NAME', 'wordpress' );
define( 'DB_USER', 'wpuser' );
define( 'DB_PASSWORD', 'StrongP@ss' );
Set the correct ownership so Apache can write to the WordPress directory:
sudo chown -R daemon:daemon /opt/lampp/htdocs/wordpress/XAMPP runs Apache as the daemon user, which is why the ownership target isn’t www-data like a standard Ubuntu Apache install.
Complete the WordPress Setup
Open http://localhost/wordpress/ in your browser. The WordPress installer loads with language selection, site title, and admin account creation. Fill in the details and click Install.
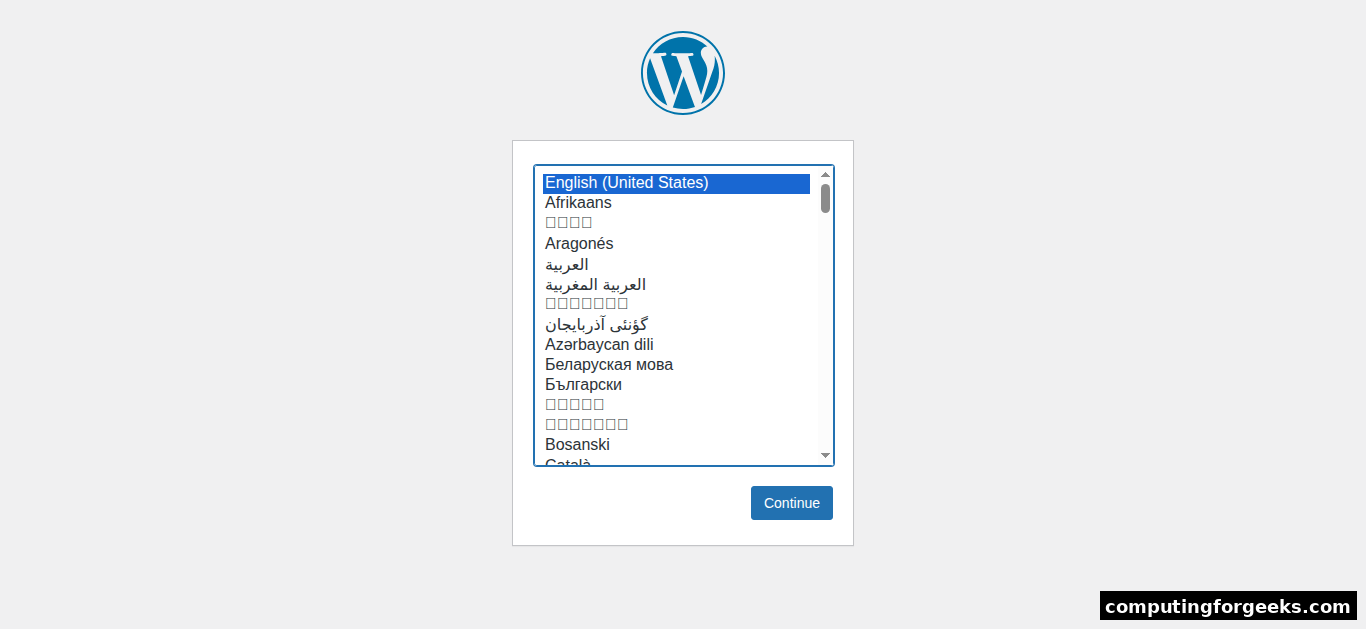
Once the installation finishes, you’ll have a fully functional WordPress site running on your local XAMPP stack. Log in at http://localhost/wordpress/wp-admin/ to access the dashboard.
Upgrading PHP to 8.3 or 8.4
The official XAMPP Linux installers still top out at PHP 8.2.12, checked on the Apache Friends download page in October 2026. There are no 8.3 or 8.4 builds for Linux. If your application requires a newer PHP version, or you need a PHP that receives security fixes, you have two realistic options.
The first is compiling PHP from source. Download the tarball from php.net, configure it with the same flags XAMPP uses (check with /opt/lampp/bin/php -i | grep configure), and replace the binaries under /opt/lampp/bin/ and /opt/lampp/lib/php/. This works but is fragile. XAMPP’s internal components expect specific PHP versions, and swapping binaries can break phpMyAdmin or the control panel.
The second and more practical approach is dropping XAMPP entirely and using native Ubuntu packages. The ondrej/php PPA provides PHP 8.3 and 8.4 packages for Ubuntu 24.04 and 22.04 that integrate cleanly with the system Apache and MariaDB (it has no Ubuntu 26.04 build, where the archive’s own PHP 8.5 is the choice). The PPA pulls in the system apache2 package, which wants port 80, so stop XAMPP and keep it from starting at boot with sudo systemctl disable --now xampp first:
sudo add-apt-repository ppa:ondrej/php
sudo apt update
sudo apt install php8.4 libapache2-mod-php8.4 php8.4-mysql
On our Ubuntu 24.04 and 22.04 test boxes this installed PHP 8.4.27, the PHP2Shell fixed release, with apache2 active and serving it through mod_php. Distro packages can carry a backported fix under an older version number, so the changelog is the reliable check:
zgrep -E 'CVE-2026-10961[89]' /usr/share/doc/php8.4-common/changelog.Debian.gzA patched build prints the changelog entry that names both CVEs. An empty result means the package predates the fix:
+ (CVE-2026-109618, CVE-2026-109619): Avoid state corruption viaFuture PHP fixes then arrive through apt. Upgrade the packages, then restart Apache yourself so mod_php loads the new library instead of trusting the package scripts to do it:
sudo apt update
sudo apt install --only-upgrade libapache2-mod-php8.4 'php8.4-*'
sudo systemctl restart apache2
The PPA ships upstream releases, so the version Apache reports is the proof here. Copy the probe page into Apache’s web root and request it after the restart:
sudo cp /opt/lampp/htdocs/p2s.php /var/www/html/
curl -s http://localhost/p2s.php
On our test box the PPA was already at the fixed build, so the upgrade was a no-op and the restarted Apache served 8.4.27 through mod_php:
8.4.27 apache2handler upload_progress=1 memory_limit=128M post_max_size=8M upload_max_filesize=2MAs a second check, systemctl show -p ActiveEnterTimestamp apache2 must print a time later than the upgrade. On the test box it printed the second of the restart, 16:11:37 UTC.
XAMPP has no equivalent update path. For any environment where XAMPP’s convenience isn’t a strict requirement, native packages are the better long-term choice, and for anything reachable from a network they are the only safe one until Apache Friends ships a patched build.
Troubleshooting
Port 80 already in use
XAMPP’s Apache needs port 80, which conflicts with any existing web server on the system. If Apache fails to start, stop the conflicting service first:
sudo systemctl stop apache2
sudo systemctl disable apache2
For Nginx, the commands are similar:
sudo systemctl stop nginx
sudo systemctl disable nginx
After stopping the conflicting service, restart XAMPP with sudo systemctl restart xampp once you have handed it to systemd (Auto-Start section), or with sudo /opt/lampp/lampp restart before that. You can verify what’s holding port 80 with sudo lsof -i :80 if the problem persists.
Error: “xampplib: line 22: netstat: command not found”
The lampp script prints this once per service when net-tools is missing. Apache, MariaDB and ProFTPD still started on our test box, but the busy-port check behind the message never ran, so a port conflict shows up later as a cryptic start failure instead. Install net-tools with sudo apt install -y net-tools and restart XAMPP, with sudo systemctl restart xampp after the systemd handover or sudo /opt/lampp/lampp restart before it.
MySQL socket error
If XAMPP’s MySQL refuses to start with a socket error, check whether the system’s own MySQL or MariaDB service is already running:
sudo systemctl stop mysql
sudo systemctl disable mysql
On systems with MariaDB installed via apt, use sudo systemctl stop mariadb instead. Both services bind to port 3306 by default, which prevents XAMPP’s bundled MariaDB from starting.
Permission denied on htdocs
If PHP applications can’t write files (uploads, cache, logs), the ownership is wrong. XAMPP’s Apache runs as the daemon user:
sudo chown -R daemon:daemon /opt/lampp/htdocs/your-app/Don’t use chmod 777 as a shortcut. Setting proper ownership is the correct fix.
Uninstall XAMPP
If you need to remove XAMPP completely, stop all services first and then delete the installation directory along with the systemd unit file:
sudo systemctl disable --now xampp
sudo /opt/lampp/lampp stop
sudo rm -rf /opt/lampp
sudo rm /etc/systemd/system/xampp.service
sudo systemctl daemon-reload
This removes everything XAMPP installed, including all databases and web files under /opt/lampp/htdocs/. Back up any projects you want to keep before running these commands.