Most robot vacuums take every command through their maker’s cloud, so they stop answering Home Assistant the moment your internet drops. So pick the robot by how it reaches Home Assistant, not by suction numbers. Three paths stay inside the house: Roborock’s local API, Matter, and Valetudo, the replacement firmware that turns a rooted robot into a plain MQTT device.
We sorted the best robot vacuums for Home Assistant into those lanes, and you’ll find the Roborock, Eureka, MOVA and SwitchBot picks below with live Amazon price bands and the catch each one carries. Specs come from the makers’ pages, integration behaviour from the Home Assistant and Valetudo docs, and we didn’t own any of these robots during testing. The Valetudo side is different: we wired Valetudo’s own mock robot through Mosquitto into Home Assistant and confirmed it working in October 2026 with Valetudo 2026.10.0 and Home Assistant 2026.10.4 on an Ubuntu 26.04 lab VM.
Pick a robot vacuum by its Home Assistant path
The column that decides this is the connection, so read it before the price. A Roborock on stock firmware talks to Home Assistant locally but still needs Roborock’s servers to stay reachable. A Matter robot works offline with a smaller set of controls, and a Valetudo robot has no vendor cloud left at all once it is rooted. Prices are Amazon US bands from October 25, 2026, so check the live price before you buy.
| Job | Robot | Path into Home Assistant | Works with the internet down | Price band |
|---|---|---|---|---|
| Best overall, no rooting | Roborock Qrevo S Pro | Core Roborock integration, local polling | No, it blocks its local API | about $500 |
| Carpets and rugs | Roborock Qrevo 2 Pro | Core Roborock integration, local polling | No, it blocks its local API | about $550 |
| Cloud-free on a budget | Eureka J15 Pro Ultra | Valetudo over MQTT, after a USB root | Yes | about $505 |
| Cloud-free flagship | MOVA V50 Ultra Complete | Valetudo over MQTT, after a breakout PCB root | Yes | about $899 |
| Cheapest Matter robot | SwitchBot K11+ | Matter, local push | Yes, with fewer controls | about $240 |
The two Valetudo rows need a rooted robot plus a broker, which is a weekend job the others do not ask for. If you’d rather skip rooting entirely, the Roborock rows are the safe buy, and the SwitchBot row is the one to pick when offline control matters more than mopping.
Check which lane survives an internet outage
Home Assistant gives every integration an IoT class, and for vacuums it hides the detail that matters. The Roborock integration is labelled local polling, yet its own docs say that when the vacuum is disconnected from the internet, it blocks its local API until it can reach the Roborock servers. Maps and routines always come through the cloud, and setup needs your Roborock account, so a Roborock is local for speed but not for independence.
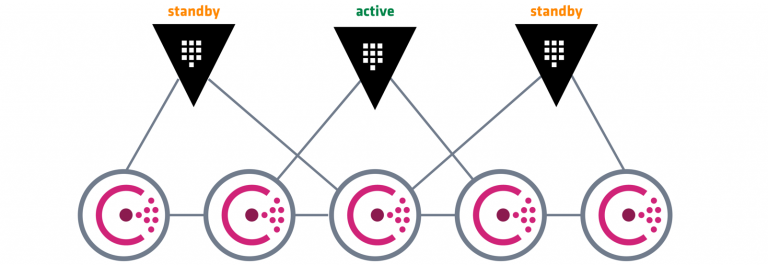
This diagram shows the three local lanes next to the cloud one. The Roborock lane sits inside the LAN because its commands never leave the house, even though the robot still checks in with Roborock before it will take them:

Matter is the opposite trade. Home Assistant added Matter vacuums in 2024.11 and the clean area action in 2026.3, which sends a Matter, Ecovacs or Roborock robot to rooms you’ve mapped to Home Assistant areas. A Matter robot keeps working without the internet, and Home Assistant’s Matter vacuum entity can cover start, pause, return to base, locate and room cleaning when the robot exposes them, which is still less than the vendor app offers. Valetudo is the only lane where the robot never talks to its maker again, and the price of that is rooting it yourself.
The local lanes each need one piece in the house besides Home Assistant:
- Roborock: nothing extra, but leave the robot online
- Matter: the Matter Server app on Home Assistant OS (Container installs can run the Matter server image themselves, which Home Assistant does not support) and IPv6 on your LAN
- Valetudo: an MQTT broker such as Mosquitto, which the setup section below walks through
All three run comfortably on the box Home Assistant already lives on, and our Home Assistant mini PC guide covers that hardware if you’re still choosing it.
Run a Roborock Qrevo S Pro through the core integration
The Roborock Qrevo S Pro is the one we’d hand to someone who wants a robot working in Home Assistant tonight. Home Assistant’s docs list the S, QV, Qrevo and Saros series as fully supported, so the Qrevo name is the safe part of this listing, though nobody has written that line with this 2026 SKU specifically in mind. Setup is a Roborock account login in the integration dialog. From then on Home Assistant polls the robot every 30 seconds over the LAN, and you get a map image, room cleaning through areas, and the usual start and dock controls.

Roborock rates it at 18,500 Pa with LiDAR navigation and structured-light obstacle avoidance, with no camera listed. The dock washes the two spinning mops with water from a heater Roborock rates at 167°F, dries them with 113°F air, empties the dust bin and refills the tank. The robot is 3.8 inches tall, runs on a 5,200 mAh battery and lifts its mops 10 mm on carpet.
Skip it if you want the vacuum to keep working when your internet drops, because it will not take local commands until Roborock’s servers answer again. Roborock also lists Matter for this model, but its own page says Matter arrives in an upcoming OTA, so don’t buy it for Matter today. It sells for about $500 in black, while the white version costs more, so check the live price before you order.
If you want Roborock without its cloud, there’s a middle road that needs no rooting. Roborock Local Server runs Roborock’s cloud backend on your own network so the robot keeps maps and local control on an isolated LAN, and Valetudo’s homepage points to it. Its README says the entry-level Q series is not supported yet, so a Qrevo is the better candidate.
Switch to the Qrevo 2 Pro for rugs
The Roborock Qrevo 2 Pro joins Home Assistant the same way as the S Pro, so the only reason to pay the difference is the floor. It drops its mop pads at the dock before it vacuums carpet, which matters in a house with large rugs where lifting the mops 10 mm still drags them. Roborock rates it at 20,000 Pa with LiDAR and structured-light avoidance, washes the mops at up to 149°F and dries them at 113°F.

Its listing has far fewer reviews than the S Pro, and Roborock does not publish the battery capacity on its page. Roborock’s page does say Matter Supported without the OTA note, but we would still connect it through the Roborock integration, which exposes more of the robot. Skip it if your floors are mostly hard, since the S Pro does the same job for less.
Get the Eureka J15 Pro Ultra and root it
If the goal is a robot that never phones home, the Eureka J15 Pro Ultra is the easiest one to get there. Eureka is a Midea brand, and Valetudo’s supported robots list says rooting it is pretty easy, needing only a Linux laptop and a micro USB cable, with all warranty seals intact. Valetudo’s buying guide names it as the budget pick when you can find it on offer, and at about $505 sold by Amazon it’s well under its list price.

Eureka rates it at 16,200 Pa with LiDAR, an RGB camera and a line laser for obstacles, and a 5,200 mAh battery. The base washes the mops with hot water, dries them with hot air and empties the dust bin. Buy the black listing we link, since the white one was sold by a third party when we checked.
The root has rules you need to know before the box arrives, because Valetudo warns that this method can permanently brick the robot if you are not careful:
- Root it factory new. Valetudo’s guides assume a robot that has never joined the vendor cloud, so skip the Eureka app, or do a full factory reset first if you already used it
- Never update it through the vendor app. Valetudo warns that any firmware update can add new locks
- Boot a native Debian 13 live session on the laptop, because the guide calls VMs troublesome
- Expect a pry tool to reach the micro USB port, and follow the install script until it removes itself
Once it is rooted, the robot joins Home Assistant through MQTT exactly like the mock robot in our setup section. If you’d rather pay more to skip the budget hunt, Valetudo recommends the Eureka J15 Max Ultra for anyone avoiding the Dreame breakout board, though that listing sat at about $1,200 with only a dozen reviews.
Choose the MOVA V50 Ultra for Valetudo
Valetudo’s buying guide answers what to buy with “Probably a Mova V50”, and the MOVA V50 Ultra Complete is the flagship in this list. MOVA rates it at 24,000 Pa with a retractable LiDAR, an RGB camera and a chassis that climbs a 6 cm two-layer threshold. The dock empties the bin into a bag that lasts up to 100 days, refills the tank with hot water and dries the mop at 60°C, and the robot runs on a 6,400 mAh battery.

The catch is how you root it. MOVA is a Dreame brand, so Valetudo strongly recommends the Dreame breakout PCB, plus a laptop running Debian 13 for the fastboot method. Valetudo flags the V50 root as just released and warns that a failed attempt needs a battery pull, which breaks the warranty seals. Check that the serial starts with R2582 or R2525 before you start, because those are the units Valetudo lists.
We’d buy it if you are comfortable with the breakout board and a fastboot session from a Debian 13 laptop, and want the strongest robot Valetudo supports. Skip it if rooting a robot that costs about $900 with a freshly released method makes you nervous, because the Eureka gets you the same cloud-free result with a USB cable. Amazon sells the white version directly, which is the one shown here.
Connect a SwitchBot K11+ over Matter
The SwitchBot K11+ is the cheapest way to get a robot vacuum into Home Assistant without a vendor cloud in the loop. SwitchBot’s page says it supports Matter with no extra hubs needed, so you add it from the Home Assistant Companion app as a Matter device, and Home Assistant’s Matter integration handles it as local push. At about $240 it’s also the robot we’d pick for a small flat where a mop dock wouldn’t fit.

It’s a vacuum first, with 6,000 Pa, LiDAR navigation, a 3,200 mAh battery and a body SwitchBot lists at 98.5 mm, just under 3.9 inches tall. The base holds a 4 L bag that SwitchBot rates for up to 90 days, and the robot joins 2.4 GHz Wi-Fi only. It takes mopping cloths but has no mop-washing dock, so skip it if you want hands-off mopping or dock controls in Home Assistant, because Matter exposes the cleaning controls and little else.
SwitchBot also has a cloud integration in Home Assistant that lists the K11+, but it is cloud polling and needs Home Assistant reachable from the internet for its webhook, so Matter is the better path here. If you’re building out Matter, our Thread border router guide covers the radio side for the battery devices you’ll add next.
Set up Valetudo with Home Assistant over MQTT
A rooted robot running Valetudo publishes everything to an MQTT broker, and Home Assistant picks the robot up through MQTT discovery with no custom integration. We ran this on Ubuntu 26.04 with Home Assistant in Docker, which is the same layout as our Home Assistant Docker setup. On Home Assistant OS, install the Mosquitto broker app instead and skip to the Home Assistant step.
Install the broker and its command line clients on the Home Assistant host:
sudo apt install -y mosquitto mosquitto-clientsCreate one MQTT user for the robot and one for Home Assistant, so you can revoke either without touching the other. The first command creates the file and both prompt for a password:
sudo mosquitto_passwd -c /etc/mosquitto/passwd valetudo
sudo mosquitto_passwd /etc/mosquitto/passwd homeassistant
The broker reads that file after it drops to the mosquitto user, so the group has to be mosquitto and readable. Set it like this, because the ownership mosquitto_passwd suggests stops the broker from starting (the last section shows the error):
sudo chown root:mosquitto /etc/mosquitto/passwd
sudo chmod 0640 /etc/mosquitto/passwd
Next, give the broker a listener with anonymous access turned off:
sudo vim /etc/mosquitto/conf.d/valetudo.confAdd these three lines. The listener binds every interface because the robot connects over Wi-Fi, and allow_anonymous false makes the password file mandatory for every client:
listener 1883 0.0.0.0
allow_anonymous false
password_file /etc/mosquitto/passwd
Restart Mosquitto and confirm it listens on TCP 1883:
sudo systemctl restart mosquitto
sudo ss -tlnp | grep 1883
You should see the broker bound on all addresses:
LISTEN 0 100 0.0.0.0:1883 0.0.0.0:* users:(("mosquitto",pid=40182,fd=5))The robot sits on Wi-Fi, so if ufw is active on the host, open 1883 to your LAN only and not to the whole internet. We ran the same rule on the lab VM and clients on the LAN still reached the broker afterwards. Swap in your own subnet:
sudo ufw allow from 10.0.1.0/24 to any port 1883 proto tcpNow point Home Assistant at the broker. Go to Settings, Devices & services, Add integration, pick MQTT, and enter localhost, port 1883 and the homeassistant user. Then open Valetudo’s web UI on the robot, go to Connectivity, then MQTT, tick MQTT enabled and Credentials, and fill in the broker host, port 1883 and the valetudo user. Set an Identifier such as vacuum01, because it becomes part of every topic and entity ID.
After you save, the page should flip to Connected and start counting messages:

Most of that volume is map data, which showed up as binary image payloads when we dumped the topics. To see what Home Assistant received, list the discovery topics with the Home Assistant user:
timeout 5 mosquitto_sub -h localhost -u homeassistant -P 'your-mqtt-password' -t 'homeassistant/#' -v | awk '{print $1}' | sortOur run printed 13 discovery configs, one per entity, all under the identifier we set:
homeassistant/button/vacuum01/vacuum01_button_AutoEmptyDockManualTriggerCapability/config
homeassistant/button/vacuum01/vacuum01_button_LocateCapability/config
homeassistant/camera/vacuum01/vacuum01_camera_MapData/config
homeassistant/select/vacuum01/vacuum01_select_FanSpeedControlCapability/config
homeassistant/select/vacuum01/vacuum01_select_OperationModeControlCapability/config
homeassistant/select/vacuum01/vacuum01_select_WaterUsageControlCapability/config
homeassistant/sensor/vacuum01/vacuum01_sensor_MapSegments/config
homeassistant/sensor/vacuum01/vacuum01_sensor_ValetudoEvents/config
homeassistant/sensor/vacuum01/vacuum01_sensor_WifiConfigurationCapability/config
homeassistant/sensor/vacuum01/vacuum01_sensor_battery_level/config
homeassistant/sensor/vacuum01/vacuum01_sensor_error/config
homeassistant/sensor/vacuum01/vacuum01_sensor_status_flag/config
homeassistant/vacuum/vacuum01/vacuum01_vacuum/config
Valetudo doesn’t trigger a new devices notification, so the robot just appears under the MQTT integration. The device page groups the vacuum control, the dock trigger, the map camera and the fan, mode and water selects:

Home Assistant created 12 entities from those 13 configs. The missing one is the locate button, which Valetudo publishes with enabled_by_default set to false, so enable it from the entity settings if you want it. We listed them through Home Assistant’s REST API with a long-lived token:
curl -s -H "Authorization: Bearer $HA_TOKEN" http://localhost:8123/api/states | jq -r '.[] | select(.entity_id|test("valetudo")) | "\(.entity_id) \(.state)"' | sortEvery entity carries the valetudo_vacuum01 prefix, which is why the identifier is worth setting before the first connect:
button.valetudo_vacuum01_trigger_auto_empty_dock  unknown
camera.valetudo_vacuum01_map_data  idle
select.valetudo_vacuum01_fan  medium
select.valetudo_vacuum01_mode  vacuum
select.valetudo_vacuum01_water  medium
sensor.valetudo_vacuum01_battery_level  100
sensor.valetudo_vacuum01_error  No error
sensor.valetudo_vacuum01_events  4
sensor.valetudo_vacuum01_map_segments  0
sensor.valetudo_vacuum01_status_flag  none
sensor.valetudo_vacuum01_wi_fi_configuration  -40
vacuum.valetudo_vacuum01  docked
The vacuum entity reads docked, the battery sensor reads 100 and the error sensor reads No error, which is the healthy resting state to compare against after you root a real robot.
Verify the round trip from Home Assistant to the robot
An entity showing up proves discovery, not control. The real test is a command from Home Assistant reaching the robot and the new state coming back, so we watched the vacuum’s topics while calling start and then return to base:
mosquitto_sub -h localhost -u homeassistant -P 'your-mqtt-password' -t 'valetudo/vacuum01/hass/vacuum01_vacuum/#' -vThe command goes out on command, and Valetudo answers on state within the next update:
valetudo/vacuum01/hass/vacuum01_vacuum/state {"state":"docked","fan_speed":"medium","segments":{}}
valetudo/vacuum01/hass/vacuum01_vacuum/command START
valetudo/vacuum01/hass/vacuum01_vacuum/state {"state":"cleaning","fan_speed":"medium","segments":{}}
valetudo/vacuum01/hass/vacuum01_vacuum/command HOME
valetudo/vacuum01/hass/vacuum01_vacuum/state {"state":"returning","fan_speed":"medium","segments":{}}
valetudo/vacuum01/hass/vacuum01_vacuum/state {"state":"docked","fan_speed":"medium","segments":{}}
Home Assistant’s vacuum entity followed the same path, from docked to cleaning to returning and back to docked. One honest note on the lab: Valetudo’s mock robot changes its status without announcing it, which a real robot’s state polling does on its own, so we added a two-second state update to the mock. Nothing on the Mosquitto or Home Assistant side was changed.
Room cleaning works over the same broker. Valetudo’s docs send it with the mqtt.publish action to valetudo/vacuum01/MapSegmentationCapability/clean/set, with the segment IDs in the payload. We couldn’t run that one, because the mock robot has no rooms on its map.
Keep these off the shortlist
Some popular robots look like Home Assistant picks on paper and aren’t, for reasons the box won’t tell you:
| Robot | Why it is off the list |
|---|---|
| New Roombas (x05 models) | Home Assistant’s Roomba integration is local push, but its docs say it does not work with the newer x05 Wi-Fi models such as the Roomba 105, 405 and 505. iRobot went through a pre-packaged Chapter 11 and is now owned by its manufacturer Picea, and the older supported models only showed up used on Amazon. |
| Ecovacs Deebot | The Home Assistant integration is cloud push. A self-hosted server option exists, but by default every command leaves your network. |
| Dreame on stock firmware | Home Assistant has no core Dreame integration, and the popular HACS integration’s local mode only covers devices made before 2022. Newer Dreames go through a cloud account. |
| Dreame L40 Ultra Gen 2 | A different robot from the L40 Ultra on Valetudo’s list, so do not buy it for rooting. The same goes for any model Valetudo does not name. |
| Roborock Q-series | Home Assistant says compatibility varies and newer variants may use a different protocol, so a Qrevo is the safer Roborock. |
| eufy robot vacuums | There is no official Home Assistant integration for them, and the best-known HACS one is archived. |
That list changes with firmware, so check the integration page for your exact model before you buy. A robot that only works through a vendor cloud can still sit in Home Assistant, but you’ll lose it every time that service has a bad day.
Restore the MQTT link when the vacuum goes quiet
Every failure we hit on the Valetudo lane was in the link between the robot, the broker and Home Assistant, not in the robot itself. These are the ones we reproduced in the lab, with the exact messages.
Error: Unable to open pwfile “/etc/mosquitto/passwd”
Mosquitto failed to start with this in /var/log/mosquitto/mosquitto.log after we made the password file root:root with mode 0600. That’s the ownership mosquitto_passwd hints at, but the broker opens the file after it drops to the mosquitto user, so it can’t read it. Put it back to root:mosquitto with mode 0640 and restart the broker.
Warning: File /etc/mosquitto/passwd group is not root
Mosquitto 2.0.22’s mosquitto_passwd printed this when we added a user to the file owned root:mosquitto, and it says future versions will refuse to load the file. On this version the broker loads it fine and authentication works, so treat it as a notice and recheck the permissions after a major Mosquitto upgrade.
Connection Refused: not authorised
A client with a wrong user or password gets this from the broker, which is what allow_anonymous false is for. If Valetudo shows Disconnected with a growing error count, retype the password in its MQTT page, because the field is masked and a stray space is easy to miss.
Valetudo shows reconnects after a broker restart
Across our broker restarts, including the failed start above, Valetudo logged 10 errors and 12 reconnects, then came back to Connected on its own and republished its state. You do not need to touch the robot after a broker restart, but if the count keeps climbing, check that the broker’s IP hasn’t changed and that ufw still allows 1883 from the robot’s subnet.
The locate button is missing in Home Assistant
It is not missing, it’s disabled. Valetudo marks the Play locate sound button as a diagnostic entity with enabled_by_default set to false, so open the device, show disabled entities and enable it.
A Z-Wave 800 stick and an mmWave presence sensor round out a local setup. Presence is the trigger most people end up using to start a clean once the house is empty, and it works the same whichever lane your robot uses.