

JWT (JSON Web Token) authentication allows an Express application to verify the identity of a user using a signed token. A token is generated after successful login and sent with subsequent requests to access protected routes.
Implementation of JWT Authentication
We can implement JWT authentication in the Express app by following the below steps:
Step 1: Initialize the server & Install JWT Package
npm init -y
npm install express jsonwebtoken bcryptjs
- express: Creates the web server and routes.
- jsonwebtoken: Generates and verifies JWTs.
- bcryptjs: Hashes and verifies passwords.
Step 2: Create Signup and Login Routes
For simplicity, this example uses an in-memory array to store users. In a production application, user data should be stored in a database.
const express = require('express');
const jwt = require('jsonwebtoken');
const bcrypt = require('bcryptjs');
const app = express();
const PORT = 3000;
const JWT_SECRET = 'your-secret-key';
app.use(express.json());
const users = [];
// Signup
app.post('/signup', async (req, res) => {
    const { name, email, password } = req.body;
    if (!name || !email || !password) {
        return res.status(400).json({
            message: 'Name, email and password are required'
        });
    }
    const existingUser = users.find(user => user.email === email);
    if (existingUser) {
        return res.status(409).json({
            message: 'User already exists'
        });
    }
    const hashedPassword = await bcrypt.hash(password, 10);
    const user = {
        id: users.length + 1,
        name,
        email,
        password: hashedPassword
    };
    users.push(user);
    res.status(201).json({
        message: 'User registered successfully'
    });
});
// Login
app.post('/login', async (req, res) => {
    const { email, password } = req.body;
    const user = users.find(user => user.email === email);
    if (!user || !(await bcrypt.compare(password, user.password))) {
        return res.status(401).json({
            message: 'Invalid email or password'
        });
    }
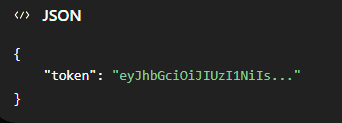
    const token = jwt.sign(
        { userId: user.id, email: user.email },
        JWT_SECRET,
        { expiresIn: '1h' }
    );
    res.json({ token });
});
Step 3: Create JWT Authentication Middleware
The token can be verified using middleware before allowing access to protected routes.
function authenticateToken(req, res, next) {
    const authHeader = req.headers.authorization;
    if (!authHeader || !authHeader.startsWith('Bearer ')) {
        return res.status(401).json({
            message: 'Authentication token required'
        });
    }
    const token = authHeader.split(' ')[1];
    try {
        const decoded = jwt.verify(token, JWT_SECRET);
        req.user = decoded;
        next();
    } catch {
        return res.status(401).json({
            message: 'Invalid or expired token'
        });
    }
}
The middleware reads the token from the Authorization header in the Bearer <token> format. jwt.verify() checks whether the token is valid and has not expired.
Step 4: Protect a Route
Use the authentication middleware before a route that requires authentication.
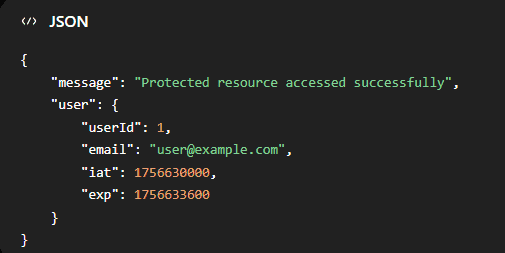
app.get('/profile', authenticateToken, (req, res) => {
    res.json({
        message: 'Protected resource accessed successfully',
        user: req.user
    });
});
app.listen(PORT, () => {
    console.log(`Server running on http://localhost:${PORT}`);
});
Now, /profile can only be accessed when a valid JWT is provided.
Send the token in the request header:
Authorization: Bearer YOUR_JWT_TOKENOutput:
Working of JWT Authentication
- The user signs up and the password is securely hashed.
- The user logs in with valid credentials.
- The server generates a signed JWT.
- The client sends the JWT with requests to protected routes.
- Express middleware verifies the JWT.
- If the token is valid, the request continues to the protected route.
Reason to use JWT Authentication
- Stateless Authentication: The server can verify a token without maintaining a session for every request.
- API Security: JWTs can protect API endpoints from unauthenticated requests.
- Easy Request Authentication: The token can be sent with each request using the Authorization header.
- Scalable: Token-based authentication can work well across distributed applications.
