Most self-hosted file managers want to own your data: a tidy web UI, on the condition that everything lives in their directory, their database, their volume. Filestash takes the opposite bet: it assumes your data is already where you want it, sitting in an S3 bucket, on an SFTP box, behind an SMB share, on an NFS export, and it hands you one interface to all of it. Nothing gets copied or migrated. Filestash is the front door, not the warehouse.
That design choice puts it in a different category from tools like Nextcloud, Seafile and FileBrowser. This guide deploys Filestash with Docker, connects S3, MinIO, Google Cloud Storage, SFTP, WebDAV, SMB and NFS, wires in Collabora for in-browser Office editing, and puts it all behind Nginx with TLS. We rebuilt it twice in October 2026 on Ubuntu 24.04 with Docker 29.9 and the rolling Filestash build v0.6.20261014, the second time with the ports locked to loopback before the first start. Everything below ran, except certificate issuance (a lab CA stood in for Let’s Encrypt) and live SFTP, WebDAV, SMB, NFS and Google Cloud Storage connections.
What you need before starting
Filestash itself is light: the project’s 2019 benchmark ran it in containers capped at 32 MB and 128 MB of RAM. Collabora is the heavy part. For this build you want:
- A Linux host with Docker and the Compose plugin installed (we used Docker 29.9 from Docker’s own apt repository)
- A domain name with A records for two hostnames pointing at the server, one for Filestash and one for Collabora (plus AAAA records if the server has IPv6, since the Nginx config below listens on both), and port 80 reachable so Let’s Encrypt can validate over HTTP (any DNS provider works, not just Cloudflare)
- The storage you intend to browse: an S3 bucket, an SFTP account, an SMB share, whatever you already run
- For in-browser Office editing, roughly 2 GB of free RAM for the Collabora container
If Docker is not on the box yet, follow the Docker install steps for Ubuntu first, then come back here.
Set reusable shell variables
The commands below reference a few values repeatedly: your Filestash hostname, the Collabora hostname, and a contact email for the certificate. Export them once so you change one block and paste the rest unchanged. These live only for the current shell session, so if you reconnect, re-run them and cd ~/filestash before carrying on.
export FILESTASH_DOMAIN="files.example.com"
export OFFICE_DOMAIN="office.example.com"
export ADMIN_EMAIL="[email protected]"
Confirm they are set before going further:
echo "Filestash: ${FILESTASH_DOMAIN}"
echo "Office:    ${OFFICE_DOMAIN}"
Prepare the Compose file before the first start
The project ships a ready Compose file, and it is tempting to bring it straight up. Don’t, because as shipped it publishes both services on every interface and leaves the admin account unclaimed: whoever loads /admin/setup first becomes the administrator. A host firewall won’t save you here either. Ports that Docker publishes skip UFW’s rules entirely, a behaviour Docker documents, so “close 8334 in the firewall” does nothing on Ubuntu. Fix both before the first start. Create a working directory and fetch the file:
mkdir ~/filestash && cd ~/filestash
curl -O https://downloads.filestash.app/latest/docker-compose.yml
Bind both ports to loopback, since Nginx will reach them over 127.0.0.1 anyway, and drop the obsolete version key while you are in there; current Compose ignores it but prints a warning on every command until it is gone:
sed -i -e 's/"8334:8334"/"127.0.0.1:8334:8334"/' -e 's/"9980:9980"/"127.0.0.1:9980:9980"/' docker-compose.yml
sed -i '/^version:/d' docker-compose.yml
Next, seed the admin password through the ADMIN_PASSWORD environment variable, so there is no setup page left to race for. It takes a bcrypt hash, not the password itself. This reads the password without echoing it, hashes it without putting it on a command line where ps could show it, and doubles every $ in the hash, because Compose treats $ as the start of a variable and would otherwise cut the hash down to $2y$10 with only a warning:
sudo apt install -y apache2-utils
read -rsp 'Filestash admin password: ' ADMIN_PW; echo
ADMIN_HASH=$(printf '%s' "$ADMIN_PW" | htpasswd -niBC 10 "" | tr -d ':\n' | sed 's/\$/$$/g')
unset ADMIN_PW
Insert it into the environment list of the app service. The upstream file indents list items with four spaces, and the new line has to match exactly: indent it any deeper and YAML quietly folds it into the previous line, so the password never applies and the setup page stays open, with no error anywhere. Let sed do the indenting:
sed -i "/OFFICE_REWRITE_URL/a\ - ADMIN_PASSWORD=${ADMIN_HASH}" docker-compose.ymlThen check what Compose actually sees before starting anything. ADMIN_PASSWORD must appear as its own key, and both ports must carry the loopback address:
docker compose config | grep -E 'ADMIN_PASSWORD|OFFICE_REWRITE_URL|host_ip'On our host it printed the hash still escaped (Compose shows the file’s $$ form here; the container receives single $ signs) and 127.0.0.1 for both ports:
      ADMIN_PASSWORD: $$2y$$10$$gm...
      OFFICE_REWRITE_URL: http://127.0.0.1:9980
        host_ip: 127.0.0.1
        host_ip: 127.0.0.1
Now bring the stack up and check what started:
docker compose up -d
docker compose ps
Two containers, Filestash on 8334 and the Collabora office server on 9980, both reachable only from the host itself:
NAME             IMAGE                         COMMAND                  SERVICE       CREATED          STATUS          PORTS
filestash        machines/filestash:latest     "/app/filestash"         app           21 seconds ago   Up 20 seconds   127.0.0.1:8334->8334/tcp
filestash_wopi   collabora/code:24.04.10.2.1   "/bin/bash -c 'curl …"   wopi_server   21 seconds ago   Up 20 seconds   127.0.0.1:9980->9980/tcp
From another machine on the network, curl http://10.0.1.50:8334/ now fails at once with Failed to connect to 10.0.1.50 port 8334 after 0 ms: Couldn't connect to server, which is the result you want. On the host, Filestash answers:
curl -s -o /dev/null -w '%{http_code}\n' http://127.0.0.1:8334/It prints 200. Without a seeded password the same request returns 307, a redirect to /admin/setup, so a 307 here means the password line did not land. Filestash keeps its whole state in one volume mounted at /app/data/state/: the settings in config/config.json, the SQLite databases for metadata, shares and workflows under db/, and folders for plugins, the search index, certificates and logs. Back up that one volume and you have backed up the install. The file also pins Collabora to collabora/code:24.04.10.2.1; the Collabora section explains what that pin costs.
Open the admin console through an SSH tunnel
With both ports on loopback, the admin console isn’t reachable from your browser until Nginx is in front, and that’s the point. Until then, tunnel it over SSH from your own machine:
ssh -L 8334:127.0.0.1:8334 [email protected]Use your own SSH user and server address in place of [email protected]. Leave that session open and browse to http://127.0.0.1:8334/admin, then sign in with the password you hashed earlier. Through the tunnel the admin page and the login both answered 200 in our test, and a wrong password gets a 403. Filestash stores the password as a bcrypt hash in the auth.admin field of config/config.json, and an unauthenticated call to the admin API gets a 403 with Permission Denied.
The first screen after signing in is new in recent builds. A page headed “You’re at the Helm now” runs a few health checks, flagging that the connection isn’t encrypted until Nginx is in front and confirming the container runs as the non-root filestash user, and then offers presets that configure a common setup in one click: local files just for you, local users, SFTP with existing credentials, S3 with your AWS credentials or with multiple users, and FTP storage with WordPress users. We skipped the presets and wired the backends by hand, which is what the rest of this guide does:

One behaviour to know before you change the password in the UI: Filestash applies ADMIN_PASSWORD on every start, so while the variable is set, a password changed in the console reverts at the next restart. Rotate it in the Compose file instead. We did exactly that on a running install, and after the recreate the old password got a 403 and the new one a 200:
read -rsp 'New Filestash admin password: ' ADMIN_PW; echo
ADMIN_HASH=$(printf '%s' "$ADMIN_PW" | htpasswd -niBC 10 "" | tr -d ':\n' | sed 's/\$/$$/g')
unset ADMIN_PW
sed -i "s|- ADMIN_PASSWORD=.*|- ADMIN_PASSWORD=${ADMIN_HASH}|" docker-compose.yml
docker compose up -d
If you’d rather manage the password from the console, remove the ADMIN_PASSWORD line after the first start and run docker compose up -d again, because the running container keeps the variable until it is recreated, and a plain restart or a reboot would re-apply the old hash. And if you skip the variable altogether, the setup page is still there: with the ports on loopback only someone with SSH access to the host can reach it, so open it through the tunnel as soon as the container starts and set the password there:
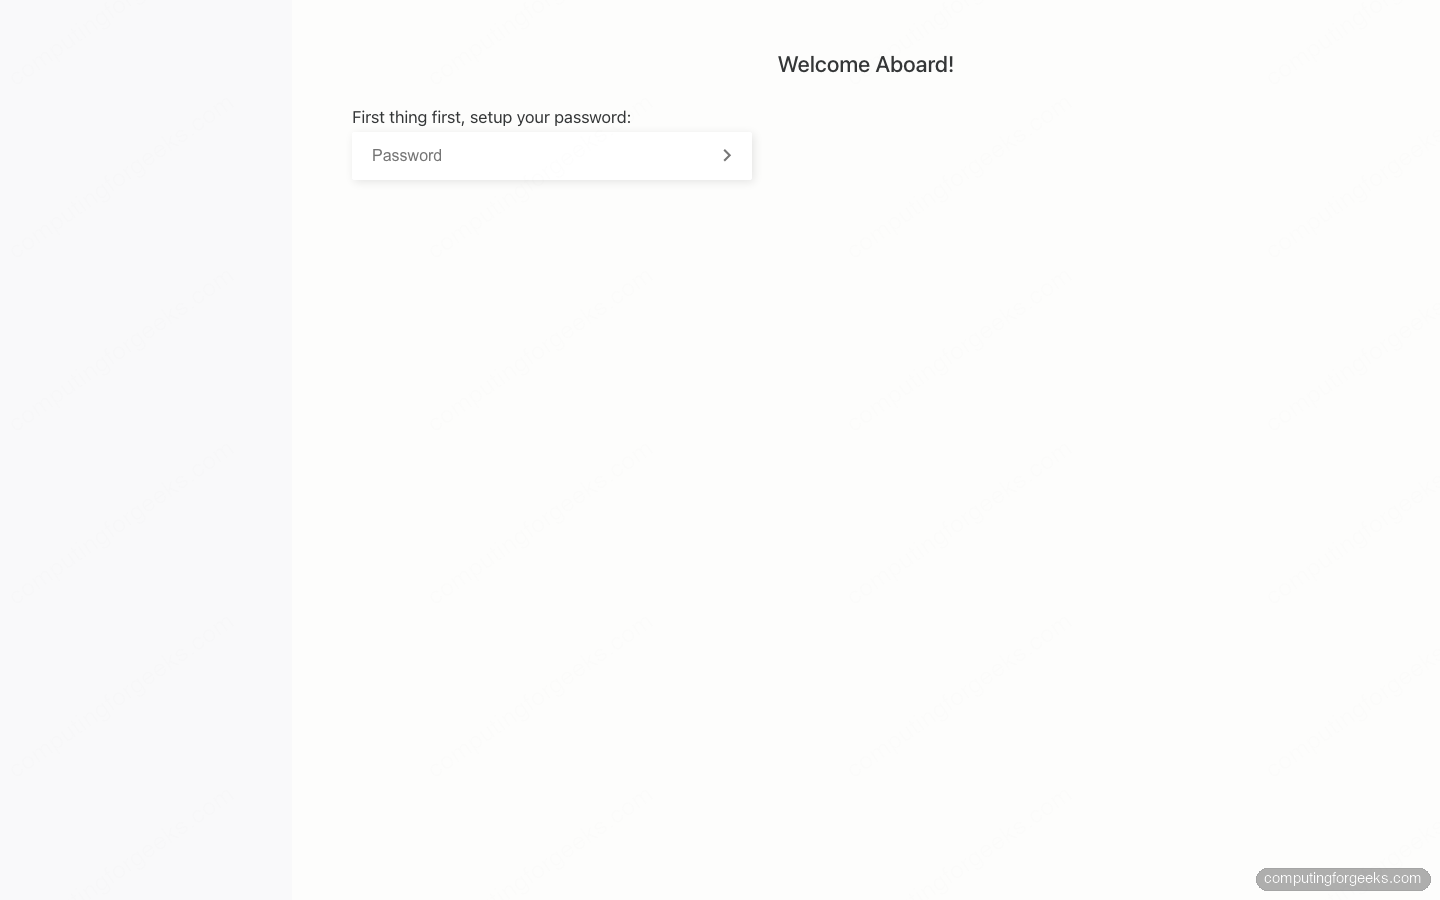
Set it before you do anything else, because until a password exists the console belongs to whoever reaches that page first.
Tour the admin console
Open Storage in the left rail; the other entries are Workflow, Activity and Settings, and the build version sits in the footer. The Storage Backend grid is the clearest picture of what Filestash actually is: 22 storage protocols it can speak, from S3, SFTP, SMB and NFS to WebDAV, Git, Dropbox, Google Drive, Backblaze and Storj. On a fresh install none of them is enabled, and the page says so with “You need to select at least 1 storage backend”. Click a tile and it turns blue and saves immediately.

Each enabled backend gets a label field below the grid, and that label is the tab name people see on the login page. It defaults to the lowercase type (s3, samba), so rename it to something like “S3 / MinIO” if several teams share the instance. Further down, an Authentication Middleware section lists the identity options (htpasswd, LDAP, local users, passthrough and WordPress) for when you’d rather sign people in once than hand them storage credentials.
Settings carries the host, Force SSL, the log level and the session options. Turning the log level up to DEBUG helps while you wire the local users plugin, which then logs the attributes it passes on; the other identity plugins only log errors at that level.
Connect your storage backends
Enable the backends you care about, then visit the Filestash home page (http://127.0.0.1:8334/ through the tunnel until Nginx is in front). Until at least one backend is enabled, that page fails with “Oops! Internal Error”, whose details read there is nothing here; it looks alarming but only means there is nothing to log in to yet. With backends enabled you get a tab per backend, and the form below changes to match whichever one you select. This is the everyday entry point: pick a backend, type the connection details, and you’re browsing.
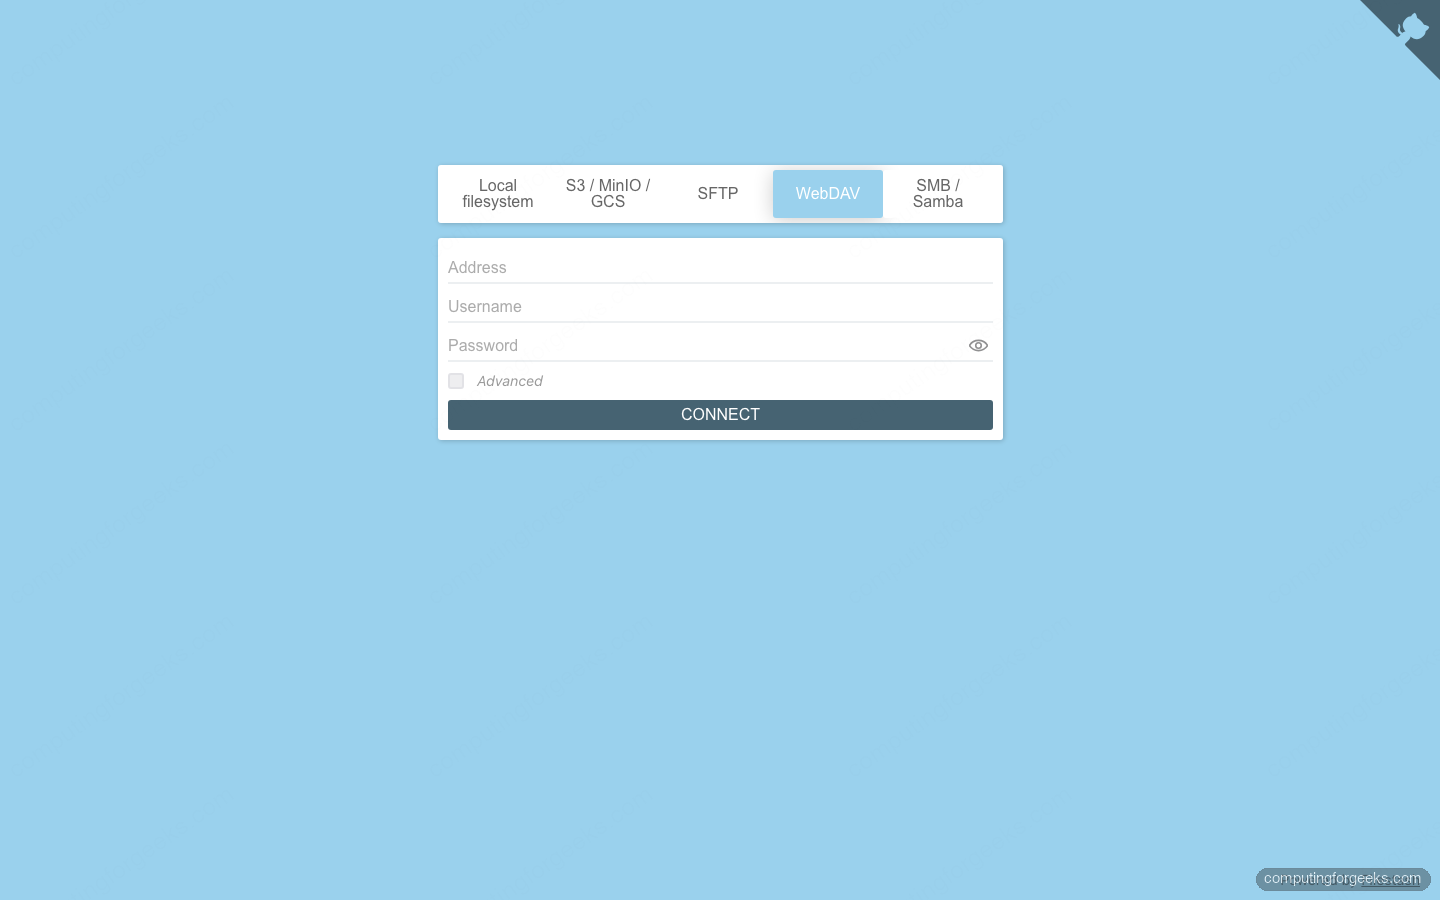
Those tab names are the labels from the admin grid, which we renamed in our earlier build. By default they match the backend type, such as s3 or sftp.
S3, MinIO and Google Cloud Storage
One backend covers all three. Filestash treats anything that speaks the S3 API the same way; only the endpoint and region change. The form asks for an Access Key ID and Secret Access Key up front. Under the Advanced toggle sit Region, Endpoint, Role ARN, Session Token, a starting Path, an Encryption Key, and two tuning fields, Num. Thread and List Object Timeout.
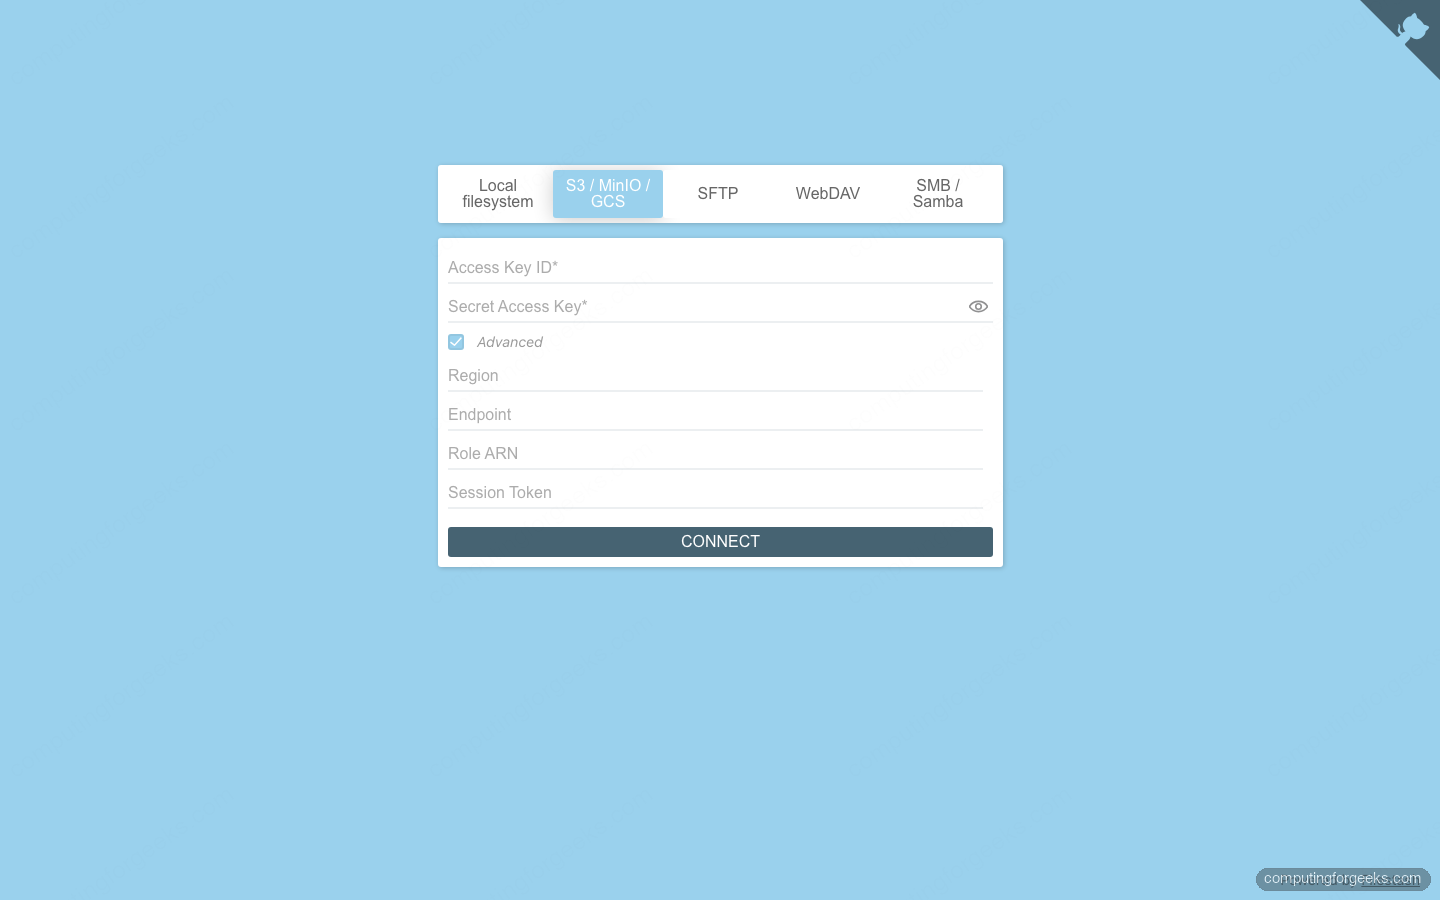
The differences between providers come down to two fields:
| Field | AWS S3 | MinIO | Google Cloud Storage |
|---|---|---|---|
| Endpoint | blank (default AWS) | http://minio-host:9000 | https://storage.googleapis.com |
| Region | e.g. eu-west-1 | us-east-1 | auto |
| Credentials | IAM access key | MinIO root user/pass | HMAC key for a service account |
Google Cloud Storage has no dedicated Filestash backend, but it exposes an S3-compatible interoperability endpoint. Generate an HMAC key for a service account and point the S3 backend at storage.googleapis.com. The same trick works for Backblaze B2, Wasabi and DigitalOcean Spaces.
Testing against MinIO in October turned up a change that affects anyone planning a fresh MinIO install. The minio/minio image is gone from Docker Hub (the pull fails with pull access denied for minio/minio, repository does not exist), quay.io/minio/minio refuses anonymous pulls, and the binary download at dl.min.io answers 410; the upstream minio/minio repository on GitHub is archived. We ran Chainguard’s build instead, on the same Docker network as Filestash, so the S3 endpoint was simply http://minio:9000 with region us-east-1:
read -rsp 'MinIO root password (8+ characters): ' MINIO_ROOT_PASSWORD; echo
docker run -d --name minio --network filestash_default \
  -v minio-data:/data -e MINIO_ROOT_USER=minioadmin \
  -e MINIO_ROOT_PASSWORD="${MINIO_ROOT_PASSWORD}" \
  cgr.dev/chainguard/minio:latest server /data
It reported RELEASE.2026-09-22T19-25-18Z. There is no -p flag on purpose: Filestash reaches MinIO by name on the Compose network, so the S3 API never needs a port on the host. Keep the password to eight characters or more, because a shorter one stops MinIO at startup with MINIO_ROOT_USER length should be at least 3, and MINIO_ROOT_PASSWORD length at least 8 characters. A fresh MinIO has no buckets, so create one with the MinIO client, run the same way:
docker run --rm --network filestash_default \
  -e MC_HOST_lab="http://minioadmin:${MINIO_ROOT_PASSWORD}@minio:9000" \
  cgr.dev/chainguard/minio-client:latest mb lab/team-docs
It answers Bucket created successfully `lab/team-docs`. Because the password goes into a URL there, stick to letters and digits for it (or URL-encode it), and add --restart unless-stopped to the MinIO container if it should come back after a reboot. If you already run MinIO from an older image or binary, as in our MinIO install guide for Rocky and AlmaLinux, it keeps working; the change only bites on a fresh pull. Once connected, a bucket browses like any other store:

SFTP, WebDAV, SMB and NFS
The network-storage backends follow the shape you would expect. We checked these forms in the October build; the live connections in the screenshot below date from our earlier June run. The fields are:
- SFTP: Hostname, Username and Password, with the Port, a starting Path, a key Passphrase and a Host key field under Advanced. The Port moved under Advanced in recent builds, so look there if your server is not on 22.
- WebDAV: the full Address such as
https://dav.example.com/, plus Username and Password, and a starting Path under Advanced. - SMB / Samba: Hostname, Username and Password, with Path, Port (445), Domain and the Share Name under Advanced.
- NFS: Hostname and the Mount Path (the export, for example
/srv/share), with UID, GID, Auxiliary GIDs, Machine Name and Chroot under Advanced.
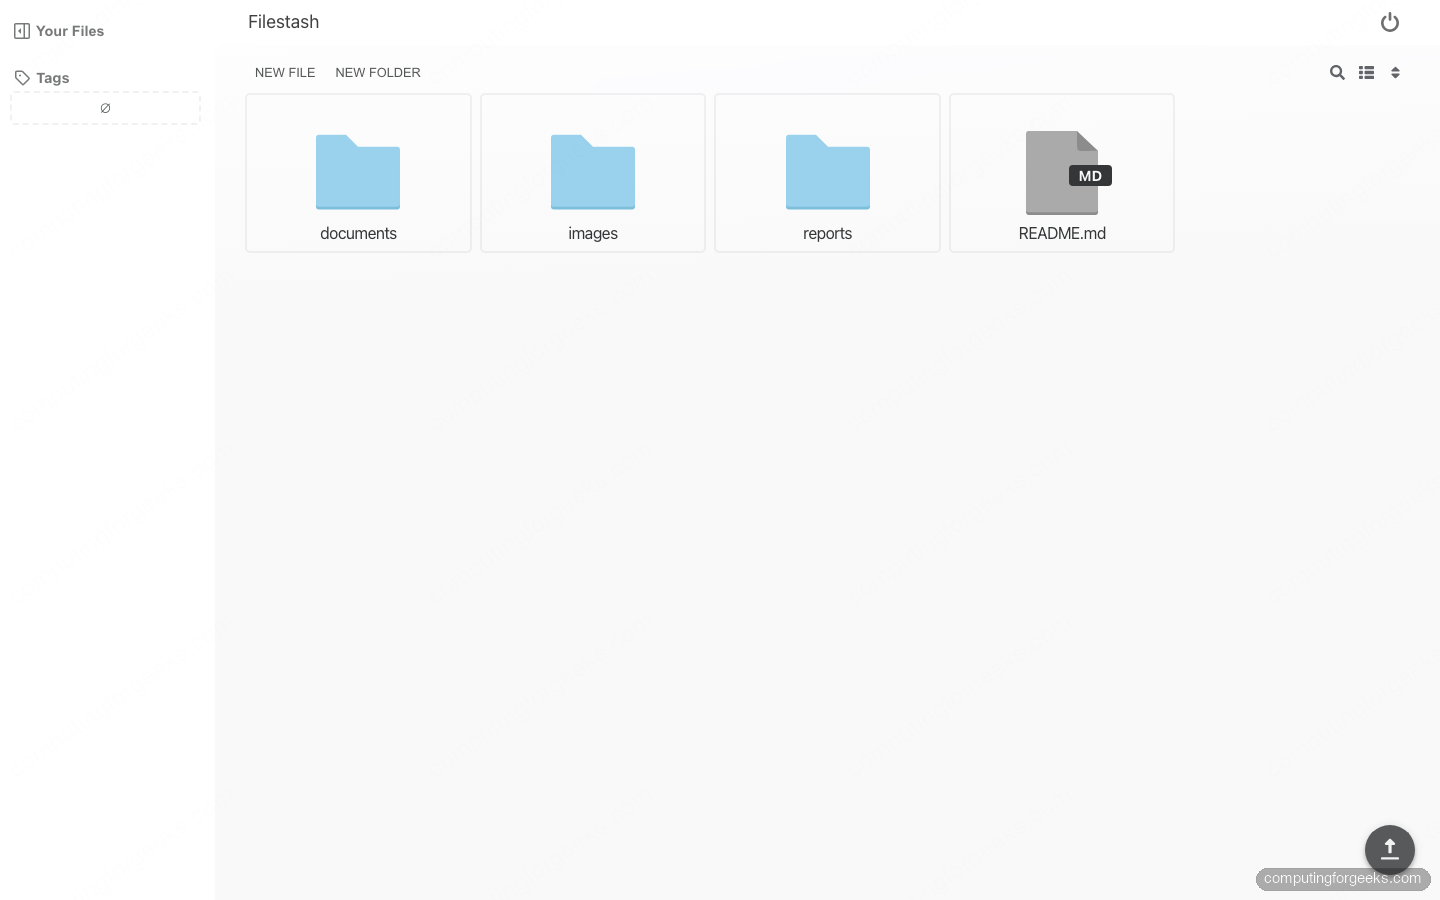
Each one lands you in the same clean file grid. Here is a WebDAV share opened straight from the login form, folders and files rendered the same regardless of where they physically live. If you need an SFTP or WebDAV server to point Filestash at, SFTPGo serves both from one daemon.
Local filesystem and Git
The Local backend serves a path inside the Filestash container, so mount the host directory into the container first. This adds /srv/files below the state volume of the app service and recreates it:
sed -i "s|    - filestash:/app/data/state/|    - filestash:/app/data/state/\n    - /srv/files:/srv/files|" docker-compose.yml
docker compose up -d
The container runs as the non-root filestash user, UID 1000, so files the host owns as root are readable but not writable; our first write attempt got touch: cannot touch '/srv/files/new.txt': Permission denied. If Filestash should write there, hand the directory to UID 1000:
sudo chown -R 1000:1000 /srv/filesThen point the Local backend at /srv/files. The Local form asks for the admin password, because browsing arbitrary server paths is deliberately gated to the administrator; a wrong one gets Invalid account.
The Git backend clones a repository and lets you browse and commit through the web UI, and two things bit us in the October build. The Branch field under Advanced defaults to master, so a repository whose default branch is main fails with Couldn't find remote ref: refs/heads/master until you type main there. And the Password field, where a token for a private repository would go, does not render at all. It shows a read-only box reading unknown element type long_password, so this build gives you no way to enter a token from the login form, while public repositories connect fine once the branch is right.

Edit Office documents in the browser with Collabora
The Compose file you deployed already includes a Collabora Online container, so the server side is running. The work is making the browser able to reach it, and this is where most people hit a wall. Collabora has to be served on its own hostname over HTTPS, and Filestash has to be told that public URL.
Upstream, the Compose file already sets three office variables on the app service. Two are right as shipped because they are container-to-container addresses on the Compose network: OFFICE_URL is how Filestash reaches Collabora, and OFFICE_FILESTASH_URL is how Collabora reaches Filestash back. The third, OFFICE_REWRITE_URL, is the public URL the browser loads the editor from, and it ships as http://127.0.0.1:9980, which only works for a browser running on the server itself. Change it to your office hostname:
sed -i "s|OFFICE_REWRITE_URL=.*|OFFICE_REWRITE_URL=https://${OFFICE_DOMAIN}|" docker-compose.ymlOn the wopi_server service, the shipped extra_params already holds --o:ssl.enable=false, which stays, because TLS ends at Nginx and Collabora itself serves plain HTTP. Append the two flags this setup needs to that same line rather than adding a second extra_params, then replace the quoted aliasgroup1 line below it:
sed -i "s|extra_params=--o:ssl.enable=false\"|extra_params=--o:ssl.enable=false --o:ssl.termination=true --o:net.frame_ancestors=${FILESTASH_DOMAIN}\"|" docker-compose.yml
sed -i "s|- aliasgroup1=.*|- aliasgroup1=http://app:8334|" docker-compose.yml
Check the result before recreating anything:
grep -E 'OFFICE_|extra_params|aliasgroup1' docker-compose.ymlAll five office lines should now carry your hostnames:
    - OFFICE_URL=http://wopi_server:9980
    - OFFICE_FILESTASH_URL=http://app:8334
    - OFFICE_REWRITE_URL=https://office.example.com
    - "extra_params=--o:ssl.enable=false --o:ssl.termination=true --o:net.frame_ancestors=files.example.com"
    - aliasgroup1=http://app:8334
We removed each flag in turn to see what breaks, because the two failures look nothing alike. ssl.termination=true tells Collabora that the outside connection is HTTPS, so it hands the browser wss:// URLs; without it, opening a document produces an explicit error dialog, SecurityError: Failed to construct 'WebSocket', since a browser won’t open a plain ws:// socket from an HTTPS page. net.frame_ancestors adds your Filestash hostname to Collabora’s Content-Security-Policy; without it the failure is quieter and harder to spot, because the editor spins forever and only the browser console shows the frame-ancestors violation.
The aliasgroup1 change fixes a quoting bug in the upstream file. Written as - aliasgroup1="https://.*:443" in YAML list syntax, the quotes become part of the value, Collabora logs WRN parseAliases: Bad URI syntax: bad or invalid port number: 443" on every start, which means the WOPI host allow-list it was meant to set does not parse. Setting it to the address Filestash actually calls from, http://app:8334, starts without the warning and the editor still loads. We did not go on to test that it rejects other hosts. Recreate the stack after editing:
docker compose up -dCollabora’s log then confirms both flags, with ssl.termination: true, net.frame_ancestors: files.example.com and SSL support: termination is enabled., and no parseAliases warning. Give it a minute after a recreate. Its start command first downloads a branding stylesheet from a GitHub gist, and on one of our recreates that stalled for 70 seconds, during which Nginx returned 502 for the editor. Then decide on the image tag. The pinned 24.04.10.2.1 image dates from December 2024 and gets no further fixes, which matters for an editor reachable from the internet. The current 26.04 image restart-loops under the upstream file with Unknown option specified: c and exit code 78, because it moved its server into the image entrypoint and the file’s command: block now arrives as arguments. In our test, changing the tag to collabora/code:26.04.5.1.1 and deleting the whole command: block (the key and the five lines under it) together with the user: root line made it start and edit normally, at the cost of Filestash’s branding stylesheet. On an internet-facing host that is the trade we would make.
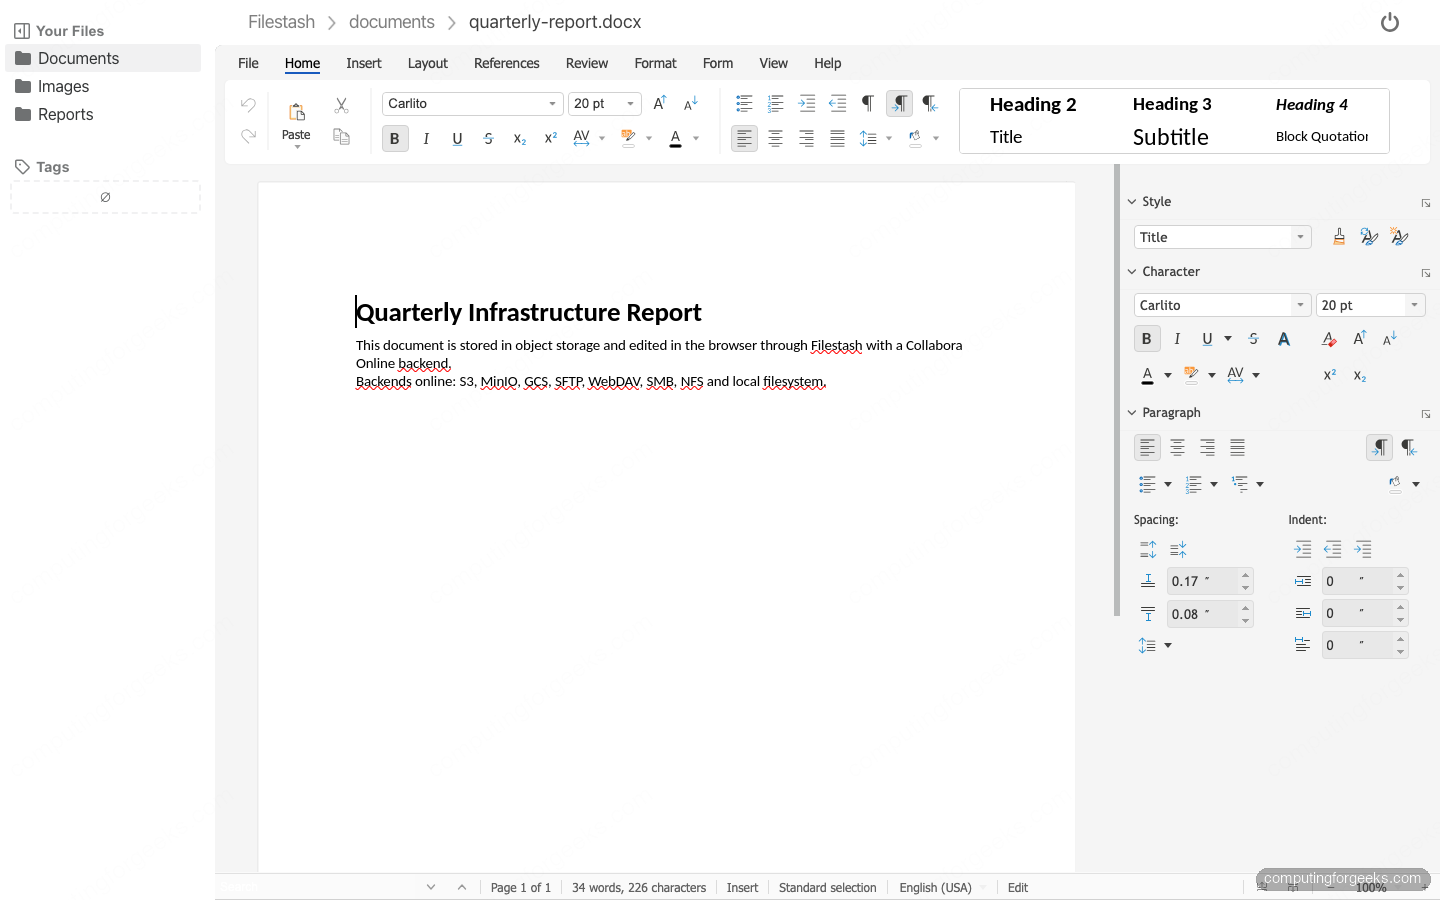
With the Nginx vhosts from the next section in place, opening a .docx or spreadsheet in any connected backend loads the full Collabora editor inside Filestash, ribbon and all. In our test the edit saved straight back to the MinIO bucket: the object grew from 3.5 KiB to 5.3 KiB and its ETag changed.
Put Filestash and Collabora behind Nginx with SSL
Filestash and Collabora both speak plain HTTP on loopback, so Nginx terminates TLS for two hostnames. The Collabora editor runs over a websocket, so its block must pass the upgrade headers; in Filestash only the console plugin uses one, and uploads are ordinary HTTP requests, so the same headers there are harmless insurance. Install Nginx and Certbot, then request one certificate that covers both names. We use certonly with the nginx authenticator, so Certbot does not try to edit server blocks that do not exist yet, and a deploy hook so every renewal reloads Nginx. If UFW is active, open the web ports first with sudo ufw allow 'Nginx Full': Nginx runs on the host, so unlike the Docker-published ports it does go through UFW. No public port 80? Use the DNS-01 command further down instead of this one:
sudo apt install -y nginx certbot python3-certbot-nginx
sudo certbot certonly --nginx -d "${FILESTASH_DOMAIN}" -d "${OFFICE_DOMAIN}" \
  --non-interactive --agree-tos -m "${ADMIN_EMAIL}" \
  --deploy-hook "systemctl reload nginx"
Certbot names the certificate after the first -d, so both hostnames share the files under /etc/letsencrypt/live/files.example.com/. Next, write the virtual hosts:
sudo vim /etc/nginx/sites-available/filestash.confThe file carries three server blocks: a port-80 redirect for both names, the Filestash proxy, and the Collabora proxy. The office block is the one the June version of this guide lacked; without it, requests for the office hostname fall into the Filestash block and get Filestash’s own 404. The [::] lines make each block answer on IPv6 too; keep them if your hostnames have AAAA records, because Let’s Encrypt prefers IPv6 when it validates:
server {
    listen 80;
    listen [::]:80;
    server_name FILESTASH_DOMAIN_HERE OFFICE_DOMAIN_HERE;
    return 301 https://$host$request_uri;
}

server {
    listen 443 ssl http2;
    listen [::]:443 ssl http2;
    server_name FILESTASH_DOMAIN_HERE;

    ssl_certificate     /etc/letsencrypt/live/FILESTASH_DOMAIN_HERE/fullchain.pem;
    ssl_certificate_key /etc/letsencrypt/live/FILESTASH_DOMAIN_HERE/privkey.pem;
    client_max_body_size 0;

    location / {
        proxy_pass http://127.0.0.1:8334;
        proxy_set_header Host              $host;
        proxy_set_header X-Forwarded-Proto $scheme;
        proxy_http_version 1.1;
        proxy_set_header Upgrade    $http_upgrade;
        proxy_set_header Connection "upgrade";
        proxy_read_timeout 3600s;
    }
}

server {
    listen 443 ssl http2;
    listen [::]:443 ssl http2;
    server_name OFFICE_DOMAIN_HERE;

    ssl_certificate     /etc/letsencrypt/live/FILESTASH_DOMAIN_HERE/fullchain.pem;
    ssl_certificate_key /etc/letsencrypt/live/FILESTASH_DOMAIN_HERE/privkey.pem;

    location / {
        proxy_pass http://127.0.0.1:9980;
        proxy_set_header Host $host;
        proxy_http_version 1.1;
        proxy_set_header Upgrade    $http_upgrade;
        proxy_set_header Connection "upgrade";
        proxy_read_timeout 36000s;
    }
}
Swap both placeholders for your real hostnames in one pass, link the file into sites-enabled, and reload:
sudo sed -i -e "s/FILESTASH_DOMAIN_HERE/${FILESTASH_DOMAIN}/g" \
  -e "s/OFFICE_DOMAIN_HERE/${OFFICE_DOMAIN}/g" /etc/nginx/sites-available/filestash.conf
sudo ln -s /etc/nginx/sites-available/filestash.conf /etc/nginx/sites-enabled/
sudo nginx -t && sudo systemctl reload nginx
Do not skip the ln line. Ubuntu’s Nginx only loads what is linked into sites-enabled, and without the link the failure is confusing: nginx -t passes, the reload succeeds, and the site still refuses connections. On Ubuntu 24.04’s Nginx 1.24 the test prints:
nginx: the configuration file /etc/nginx/nginx.conf syntax is ok
nginx: configuration file /etc/nginx/nginx.conf test is successful
On Nginx 1.25.1 and newer, which includes the 1.28 in Ubuntu 26.04, the same file passes with a warning that the listen ... http2 form is deprecated. There, write listen 443 ssl and add http2 on inside each server block; don’t copy that newer form back to 1.24, which rejects it. Then check both hostnames answer through Nginx:
curl -s -o /dev/null -w '%{http_code}\n' "https://${FILESTASH_DOMAIN}/"
curl -s -o /dev/null -w '%{http_code}\n' "https://${OFFICE_DOMAIN}/hosting/discovery"
Two 200 lines mean Filestash’s login page and Collabora’s discovery document are both reachable over HTTPS, which is everything the editor needs.
Our lab had no public DNS, so a local CA stood in for Let’s Encrypt and we could not run issuance or renewal there. On your host, rehearse a renewal once to prove the challenge still reaches the server behind the redirect:
sudo certbot renew --dry-runA dry run skips deploy hooks unless you add --run-deploy-hooks, so it tests the challenge but not the Nginx reload.
One Filestash setting finishes the job. In Settings, set the host to the bare hostname (files.example.com, no scheme) and turn on Force SSL, which makes Filestash send a Strict-Transport-Security header so browsers stick to HTTPS. Store the host with https:// in front and the frontend breaks: the browser console shows Error: Redirecting to https://https://files.example.com with Force SSL on, or Error: Redirecting to http://https://files.example.com with it off. Once the host is set correctly, opening Filestash by its IP address redirects to the configured name.
Use DNS-01 when port 80 is not reachable
If the server is on a private network with no public port 80, prove ownership through DNS instead. Most major DNS providers have a Certbot plugin (Cloudflare, Route 53, DigitalOcean, Google Cloud DNS and RFC2136 are packaged for Ubuntu). With Cloudflare and an API token that can edit the zone, it looks like this; we did not run it in the lab:
sudo apt install -y python3-certbot-dns-cloudflare
read -rsp "Cloudflare API token: " CF_TOKEN; echo
echo "dns_cloudflare_api_token = ${CF_TOKEN}" | sudo tee /etc/letsencrypt/cloudflare.ini > /dev/null
unset CF_TOKEN
sudo chmod 600 /etc/letsencrypt/cloudflare.ini
sudo certbot certonly --dns-cloudflare \
  --dns-cloudflare-credentials /etc/letsencrypt/cloudflare.ini \
  -d "${FILESTASH_DOMAIN}" -d "${OFFICE_DOMAIN}" \
  --non-interactive --agree-tos -m "${ADMIN_EMAIL}" \
  --deploy-hook "systemctl reload nginx"
The certificate lands in the same /etc/letsencrypt/live/files.example.com/ path, so the vhosts above work unchanged.
Everyday use: previews, uploads and sharing
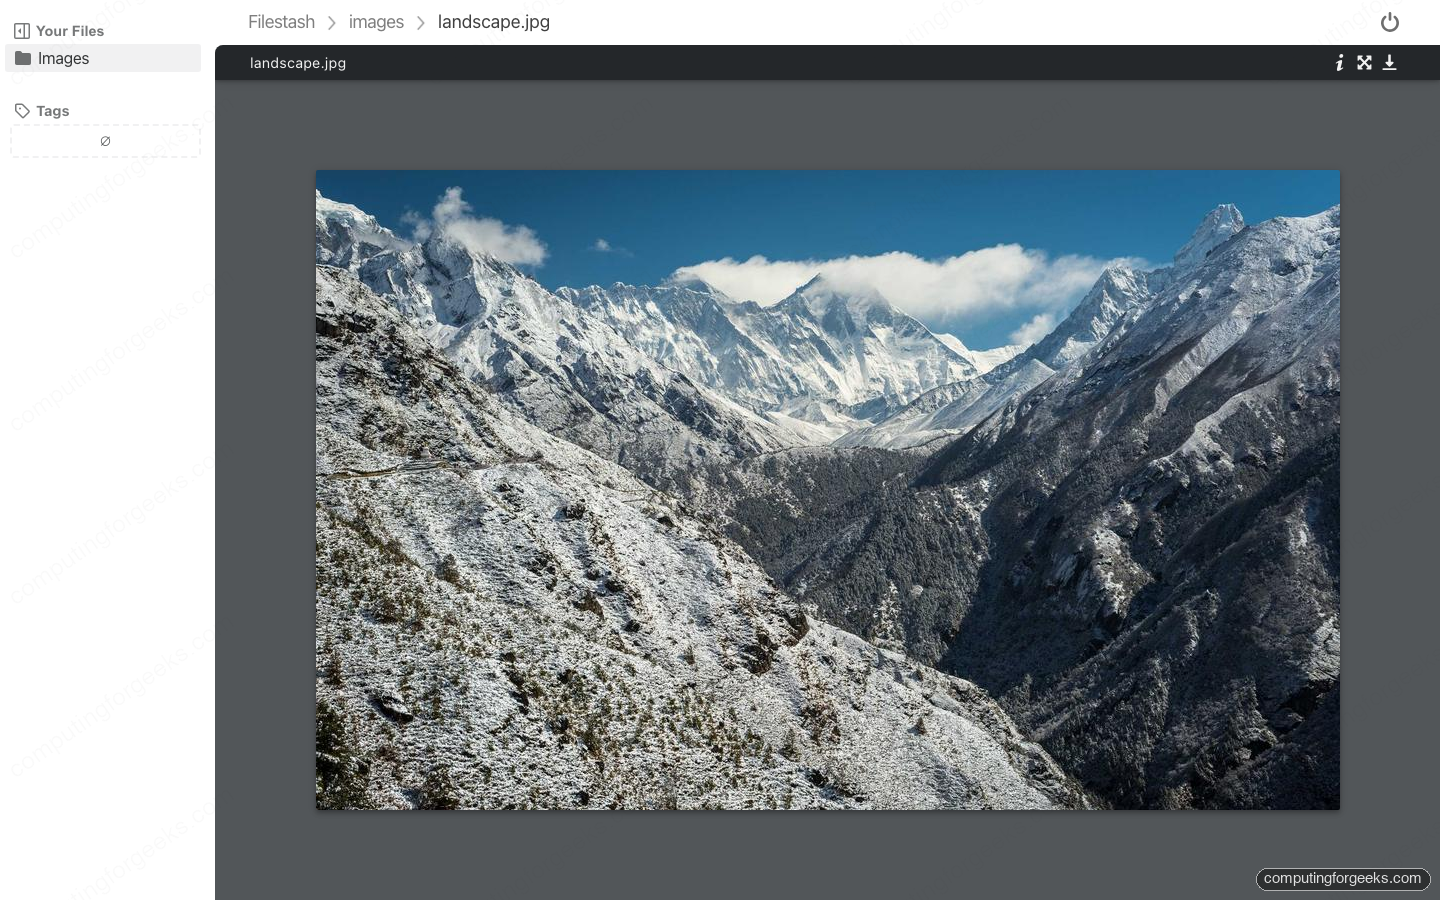
Day to day, Filestash behaves like the file explorer you already know. Images, PDFs, Markdown, video and audio preview inline without downloading, and the thumbnails render fast even against a remote S3 bucket. Click an image and it opens in a viewer over the file grid.
Uploads are drag-and-drop and travel as ordinary HTTP requests. To share, select a file and use Share in the toolbar to create a link with its own access level, so you can hand someone a single document out of an SFTP account they will never have credentials for. The dialog makes you pick a role (Viewer, Editor, or Uploader for folders) before it creates the link, so pick Viewer for anything that leaves the team. Sharing was not part of the October retest. The share, the preview and the edit all happen against the original backend; Filestash never makes a second copy.
When things break
These are the errors we hit while building and re-testing this guide, with the fix for each.
“Oops! Internal Error” with the detail “there is nothing here”
This is the home page before any storage backend is enabled. The More Details button shows message: there is nothing here, raised from the login form’s code. Enable at least one backend under Storage in the admin console and reload.

curl: (7) Failed to connect to files.example.com port 443
If nginx -t passed and the reload succeeded but nothing listens on 443, the vhost was written to sites-available and never linked. Create the sites-enabled symlink from the Nginx section and reload again.
The office hostname returns {“status”:”error”,”message”:”Not Found”}
That JSON comes from Filestash, not Collabora, which means requests for the office hostname are landing in the Filestash server block. Add the office server block from the Nginx section, reload, and the discovery URL returns 200.
SecurityError: Failed to construct ‘WebSocket’: An insecure WebSocket connection may not be initiated from a page loaded over HTTPS
Collabora shows this in a dialog over the document when --o:ssl.termination=true is missing from extra_params. It still thinks it is serving plain HTTP, so it hands the browser a ws:// address that an HTTPS page won’t open. Append the flag and recreate the stack.

The office editor spins forever
An endless spinner with no dialog points at the other flag. Open the browser console and you’ll find Framing 'https://office.example.com/' violates the following Content Security Policy directive: "frame-ancestors office.example.com:* app:*", which means Collabora’s policy doesn’t list your Filestash hostname. Add --o:net.frame_ancestors=files.example.com to extra_params and recreate the stack.
Error: Redirecting to http://https://files.example.com
The host in Settings has a scheme baked in, and Filestash prepends its own. Set the host to the bare domain with no https://, keep Force SSL on, and reload.
Couldn’t find remote ref: refs/heads/master
The Git backend tried the default master branch on a repository that uses main. Tick Advanced on the login form, set Branch to main, and connect again.
WRN parseAliases: Bad URI syntax: bad or invalid port number: 443″
Collabora logs this on every start with the upstream Compose file, because the quoted aliasgroup1 value keeps its quotes. Replace the line with - aliasgroup1=http://app:8334 as in the Collabora section.
Locked out of the admin console
If the admin password is lost, rotate it from the server with ADMIN_PASSWORD. If the line is still in docker-compose.yml, run the rotation commands from the tunnel section. If you removed it, hash a new password the same way and add the line back with the insert from the Compose section, sed -i "/OFFICE_REWRITE_URL/a\ - ADMIN_PASSWORD=${ADMIN_HASH}" docker-compose.yml, then run docker compose up -d so the container is recreated with it. We tested rotation on a running install: afterwards the old password got a 403 and the new one a 200. Because Filestash applies the variable on every start, it wins over anything set in the console, so take the line out again (and recreate) once you are back in if you prefer managing the password there. Don’t clear auth.admin in the state volume’s config/config.json instead. Once that field is empty and the container restarts, every request that comes through Nginx is redirected to /admin/setup, and whoever reaches the site first can claim it.
Where Filestash earns its place
Reach for Filestash when the data already exists somewhere and you want a clean, shared way in. It does not sync to a desktop client, it does not host a contacts and calendar suite, and it will not replace Nextcloud if collaboration features are the point. What it does, better than anything in its class, is unify a pile of unrelated storage behind one fast UI with real Office editing on top. Connect it to an S3 bucket your application already writes to, an SFTP box a vendor drops files on, and an SMB share the office uses, and suddenly all three are one searchable, shareable, previewable place. For the full command reference, every backend’s connection fields, the SSO middleware options and a hardened Compose file, keep the Filestash cheat sheet open in the next tab.